


1998-2005 Chevrolet S-10 Blazer, GMC Jimmy, and Oldsmobile Bravada
How to upgrade the stereo system in your S-10 Blazer, Jimmy, or Bravada


In brief: This Crutchfield Research Garage article gives you an overview of your SUV's stock stereo system and your aftermarket upgrade options. We'll tell you all about:
- The factory stereo system
- Removing the factory radio
- Removing the factory speakers
- Adding more bass
- Other options for your S-10 Blazer, Jimmy, or Bravada
Then, use our vehicle selector to find the gear that will fit your SUV.
Overview of the S-10 Blazer, Jimmy, and Bravada
The second generation of GM's venerable S-Series compact trucks evolved quite a bit over its long run. The 1998 model year saw some noticeable changes to the exterior and interior styling, plus some other less-visible mechanical changes.
These trucks are a long way from new, but judging by the number of them that are still on the road, they're pretty darned tough. And in a world filled with increasingly massive, luxurious, and complicated SUVs, there's a lot to be said for a medium-sized and comparatively nimble machine that does most anything you'd want an SUV to do with minimal fuss.
There are some quirks to replacing the audio gear in these SUVs, but there's nothing on the work sheet that's beyond the capability of the average DIY-er.

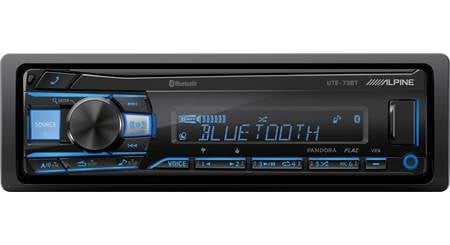
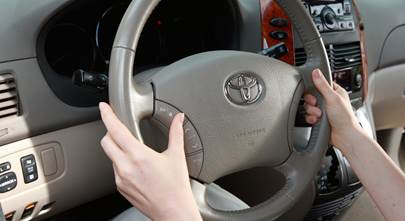
A variety of receivers appeared in this space over the years, so enter your vehicle info to see what fits (Crutchfield Research Photo)
The factory stereo system
These trucks can be found with everything from an AM/FM cassette receiver all the way up to a double-DIN AM/FM/CD receiver. For the minimalist, there was even a radio delete option, but that's mostly seen on trucks that were intended for fleet duty.
At this point, your old receiver is about as useful as the plastic plate found in the "radio-delete" trucks. As for the speakers, well, they weren't built well and they certainly weren't built to last. Even the later-model trucks can really benefit from an audio upgrade.
Speaking of radio delete, if your truck was thus non-equipped, there's no receiver wiring, so you'll need to run wires to constant and switched power sources, plus all the speaker locations.
Detailed stereo and speaker removal instructions

The 1998-2001 trucks have a somewhat oddly sized GM factory radio, which can be replaced by a single-DIN (2" tall) receiver or a "DIN-and-a-half" model from RetroSound that's made to fit in this sort of cavity.
Larger receivers appeared in 2001 and stuck around until the end, so you can install a single-DIN or a double-DIN (4" tall) aftermarket receiver in those trucks. Receivers with fold-down faceplates won’t work in any of them, though.
Your truck's audible safety warning chimes are built into the factory radio, and you don’t really want to lose those. You'll need an adapter that retains those chimes, and Crutchfield will give you a very nice break on the retail price when you purchase it along with your new receiver. We strongly suggest that you use the recommended adapter when you replace your radio. In fact, if you don't, we won't be able to provide tech support. Sorry about that....
The Blazer and Jimmy use one type of harness, while the Bravada gets something different. While a lot of these instructions are the same for all of these vehicles, there are some differences, so pay attention when you're shopping.

You may need to remove the rear support bracket in the radio cavity (Crutchfield Research Photo)
Removing the factory radio
The replacement process isn’t difficult, but there are some interesting parts. For one thing, you may have to unbolt or cut out the factory radio's rear support bracket to make room for your new car stereo. That’s not hard to do, but it is something you'll want to do with care.
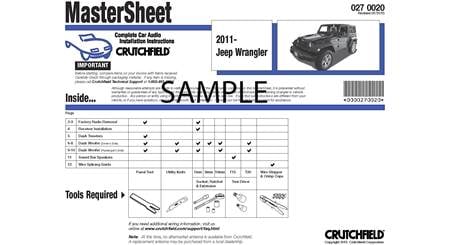
All the details can be found in the Crutchfield MasterSheet or ResearchNotes included free with your Crutchfield stereo or speaker purchase. We'll hit some of the high points here, so you'll know what you're getting into.
Once you've set the parking brake and disconnected the negative battery cable, you'll start the job by removing one 9/32" screw located under the top edge of the instrument cluster.
Remove two 9/32" screws from the top edge of the driver’s side knee panel, on either side of steering column. Remove two more 9/32" screws from the bottom edge of the knee panel and remove the panel. That will expose two more 9/32" screws on the bottom of the dash trim panel, and you'll need to remove those, too.
Carefully pull out the dash trim panel to release the retaining clips, then disconnect the air bag switch harness and carefully remove the dash panel. The "carefully" part is important, because if you brute-force the thing, you could easily break the hazard switch.
From here, all you need to do is remove the two 9/32" screws securing the stock radio to the dash, remove it, and get to work installing the new one. The Crutchfield-supplied wiring harness comes with its own instructions, so follow those when you're connecting everything. If you have to remove the rear support bracket, remember to work carefully.
Be sure to test the new receiver and make sure it is working properly before you start putting the dash back together.
Oh, and if you want or need to replace the existing antenna, your MasterSheet contains instructions for that process, too.
Tools needed: 9/32" socket, ratchet and extension
Read our Car Stereo Buying Guide for shopping tips and advice.
Shop for car stereos that fit your Chevrolet Blazer

The dash speakers are easy to get to, but somewhat challenging to replace (Crutchfield Research Photo)
Removing the factory speakers
These trucks have speakers in the dash, front doors, and either the rear side panel or the rear doors.
Removing the dash speakers
Replacing the dash speakers is harder than it looks. The stock pieces are easy to remove, but it's really difficult to find aftermarket speakers that will fit under the factory grilles that cover these rather shallow cavities. Speakers with magnets larger than 3 1/8" diameter will interfere with sub-dash structure on passenger's side, which narrows the field tremendously.
Smaller, thinner speakers can work, but mounting brackets will be required. The good news is that they're included with your Crutchfield speaker purchase. You can also go bigger, but pretty much anything in that direction will involve dash modification.
In some cases, these locations are pre-wired from the factory. But not always. Depending on the stock set-up, you'll either have to wire these speakers in a series with the front door speakers or install an amp to power them. If you don't do that, you'll have an impedance problem.
Clear as mud? Yeah, we know. Give us a call and talk to one of our advisors if you have questions about this – which you probably do at this point. Don't worry, it's easier to explain once we know more about your stock speaker situation.
Tools needed: Phillips screwdriver, 9/32" socket, ratchet and extension

Plenty of aftermarket speakers will work in the front doors (Crutchfield Research Photo)
Removing the front door speakers
Replacing the front door speakers isn't hard, but it's not a "one-size-fits-all" proposition. You'll need to remove the door panels to do anything, but once you're in there, the things you need to do vary according to the speakers you're installing. We'll take a look at those issues below.
You'll start by removing one Phillips screw from the door release trim and removing the trim. Remove two 9/32" screws located under the door pull handle, then use a panel tool to pry out one retaining clip on the front edge of the door panel.
If your truck is equipped with manual windows, use a (clean) shop rag in a “shoeshine” motion to release the C-clip on the rear of the window crank until you can remove the crank. If you have power windows, you're good to go.
From here, pry around the edges of the door panel to release nine retaining clips, then pull the panel out and, if you're dealing with power windows, disconnect the wiring harnesses. Remove the panel and store it in a clean, safe place until you need it again.
From here, the process depends on the truck and your new speakers.
- If you're installing 6-3/4" speakers, life is easy. Remove the four Torx T9 screws securing the speaker to the door, then pull it out, disconnect it, and remove it. Connect the new speaker's harness (included at a discount with your Crutchfield speaker purchase) and secure it with the speakers you just removed.
- If you're installing 6-1/2" or 5-1/4" speakers, life is still pretty easy, but you'll need to drill out the four rivets securing the factory speaker bracket. You can totally do this, but any time you're using a drill, you need to be safe. Find out what's around the area where you're drilling, work carefully, and always wear eye protection.
Secure the new speaker to the mounting bracket (also included at a discount with your Crutchfield order), then hook it up, and test it out. If it works, start putting the door back together. Make sure all the windows and locks are working properly before you finish.
Tools needed: panel tool, Phillips screwdriver, Torx T9 bit, cordless drill and 7/32" bit, shop rag

In 2-door trucks, the rear speakers are behind the side panels (Crutchfield Research Photo)
Removing the rear side speakers (2-door)
The stock side panel speakers found in the 2-door models can be replaced by 6-3/4", 6-1/2", or 5-1/4" aftermarket models. You'll need to remove the side panel, which isn’t all that hard to do, and you'll need mounting brackets in some cases. If you do, the brackets will be included with your Crutchfield speaker purchase.
The biggest oddity comes if you want to install 6-1/2" speakers here. On some 6-1/2" speakers, the basket is large enough to interfere with the mounting holes. In that case, you'll need to use flat-head screws (available at any hardware store) to secure the bracket. Once that's done, you can secure the speaker to the bracket.
If you choose 6-3/4" speakers, you can use the factory brackets, too, but you'll need to drill new mounting holes. With 5-1/4" speakers, things are pretty straightforward all around.
In any case, all the removal instructions can be found in your Crutchfield MasterSheet.
Tools needed: panel tool, Phillips screwdriver, Torx T47 driver, flat blade screwdriver, 1/4" socket, ratchet and extension

You'll have to remove the rear door panels to get to the speakers (Crutchfield Research Photo)
Removing the rear door speakers (4-door)
Replacing the rear door speakers in the 4-door trucks combines some aspects of the front door speaker process with some of the issues encountered with the 2-door's rear side speakers.
You'll need to remove the doors panels, which is generally similar to what was done up front, including the shop rag shimmy used to remove the manual window cranks (if present). You'll also need to remove the window trim, which isn't hard, but does demand some care and patience on your part.
The same speaker-size issues noted above are also in play here. Installing 6-1/2" speakers may require flat-head screws, 6-3/4" models may require new mounting holes, and 5-1/4" speakers are comparitively easy to deal with.
All is explained in your Crutchfield installation instructions, included with your purchase.
Tools needed: panel tool, Phillips screwdriver, flat blade screwdriver, 9/32" socket, ratchet and extension, Torx T9 driver, shop rag
Read our Car Speakers Buying Guide for more information.
Shop for speakers that fit your Chevrolet Blazer

The cargo area has tons of space for sub enclosures, but a powered sub can also be a nice choice (Crutchfield Research Photo)
Bass in your S-10 Blazer, Jimmy, or Bravada
There's obviously plenty of room for a sub enclosure in the cargo area, but because we're us, we measured things. From the top of the cargo shade slots, there's a 38" W x 12" H x 37"/34" D space to work with, which gives you some intriguing options if you want to go big.
If you don't, a more compact powered subwoofer will fill out your sound nicely without taking up tons of cargo space.
Learn more about building a bass system in our Car Subwoofer Buying Guide.

Feeling lost? Add a portable GPS to your travel kit.
Other options for your S-10 Blazer, Jimmy, or Bravada
Here are some other ideas on how to improve your truck.
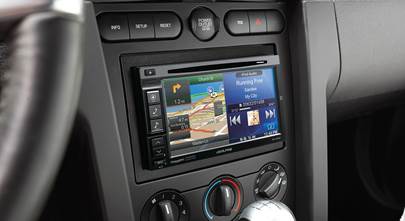
Navigation
You can add an aftermarket double-DIN nav receiver to some of these trucks, but if that's not an option for yours, you can add a portable GPS navigator. This isn't a bad thing at all, since you can move it between vehicles as needed and tuck it into a storage compartment when you're not using it.
Sound damping
There's no way to totally eliminate wind and road noise from a truck with this many right angles, but installing some Dynamat in the doors — and, potentially, throughout the cabin -- can help quiet the roar.
Security systems and remote start
Installing a security system in your truck won't be easy (security systems rarely are), but it's definitely a good idea if you tow long distances and stop overnight. Our Crutchfield Advisors can help figure out what you need to get the job done, but we usually recommend taking your vehicle to a professional installer.
Adding remote start capability lets you warm it up in the winter or cool it down in the summer. Installation is usually easier with these systems, but we still ask that you call to order so that we can make sure you get the right harness for your ride.
Let's get started!
Ready to shop? Use our vehicle selector to find the gear that will fit your car or truck. If you have questions of your own, give us a shout via phone, chat, or email


Comments (0)