


2006-2009 Volkswagen GTI and R32
How to upgrade the stereo system in your GTI or R32


In brief: This Crutchfield Research Garage article gives you an overview of your Volkswagen's stock stereo system and your aftermarket upgrade options. We'll tell you all about:
- The factory stereo system
- Removing the factory radio
- Removing the factory speakers
- Adding more bass
- Other options for your VW
Then, use our vehicle selector to find the gear that will fit your GTI.
Overview of the Volkswagen GTI
The Volkswagen GTI wasn't the first "hot hatch," but it was the one that took the concept from European cult phenomenon to worldwide sensation. The basic idea was (and is) simple: take a pedestrian hatchback, stuff it full of go-fast goodies, and wait for the enthusiasts to come running with checkbooks in hand. It worked for Volkswagen and it also worked for a lot of other manufacturers who joined in the fun. In the case of the GTI, it's worked for four decades now.
After a few arguably "soft" years, the fifth-gen GTI (and the even hotter 2008 R32 variant) was seen as a welcome return to the car's hardcore roots. Even now, it's quick, it sticks, and anyone who settles into the trademark plaid seats is in for a very fun ride. There's plenty of performance to keep you entertained in this car, but an updated stereo system will definitely add to the enjoyment. We'll tell you what you need to know about replacing your GTI's old stereo below.

Removing the GTI's radio is a pretty easy job and the results will be impressive. (Crutchfield Research Photo)
The factory stereo system
The GTI's basic system wasn't bad, with an AM/FM/6-CD MP3 receiver, 10 speakers, and factory Sirius satellite radio. A navigation receiver was also available. The only thing that's probably wrong with the stock gear at this point is that it's old and the functionality isn't quite up to today's standards. But those are pretty big things.
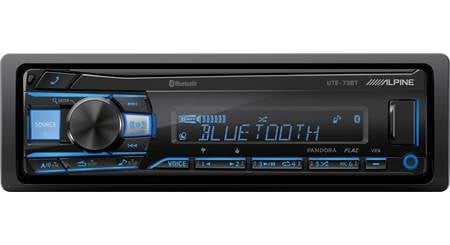
You can replace the stock stereo with your choice of numerous single-DIN (2" tall) or double-DIN (4" tall) aftermarket receivers. In some cases (we'll let you know), you'll need to use the factory radio's brackets to install your new receiver. If you don't have the brackets, you can obtain them from your dealership or an online source. You'll also need a receiver mounting kit and a wiring harness adapter, both of which are available at a discount with your Crutchfield stereo purchase.
When you replace the factory radio, you'll lose factory features like satellite radio, navigation, and the AUX input. All of those things can be found on aftermarket receivers, so that’s really no big deal. Your car also does not provide an accessory power source at the radio. That's switched through the data lines. Just a thing to know.

This kit lets you mount a single-DIN receiver. A double-DIN will also work in your GTI's dash.
Removing your GTI's factory radio
Removing the stock radio is actually pretty simple. The first thing you'll do is set the parking brake and disconnect the negative battery cable to prevent any electrical short. Once that's done, use a panel tool to pry up the screw cover on the vent trim panel and remove the exposed Torx T-20 screw.
Next, starting at the sides near the windshield, pry up the vent trim panel, then lift the panel just enough to release the retaining clips. Remove two exposed Torx T-20 screws, then pry out the receiver/climate control trim panel to release those clips, then remove the panel. From there, just remove the four Torx T-20 screws securing the factory radio and get it out of there.
Detailed stereo and speaker removal instructions

To connect the new one, follow the instructions included with your dash kit and wiring harness adapter, then slide the receiver into place and secure it. You'll want to test it out to make sure it's working properly, but don't be in a hurry. Make sure the wiring harnesses associated with the airbag are connected before you turn on the ignition switch. If those harnesses are not connected, the airbag light will come on, which will require a reset at your local VW dealership. That will cost money, which you will not like. If the radio's working as it should, you can start putting the dash back together.
Tools needed: Panel tool, Torx T-20 driver
Read our Car Stereo Buying Guide for shopping tips and advice.
Shop for car stereos that fit your Volkswagen GTI
Steering wheel audio controls
In most cases, it's reasonably easy to retain your VW's steering wheel audio controls when you install a new stereo. When you enter your vehicle information, our database will choose the adapter you need to make your factory steering wheel controls work with a compatible aftermarket receiver.

The GTI's door speakers take a bit of work, but you can handle it (Crutchfield Research Photo)
Replacing your GTI's factory speakers
The GTI and R32 have component speakers in the doors. The 2-door models also have speakers in the rear side panels. In the front doors the woofers, midranges and tweeters are wired together in parallel. The rear woofers and tweeters are wired in parallel, too. Some of these speakers are easier to deal with than others, but in general, a DIY-er will be just fine working on these cars.
Removing the front door speakers
You'll need to remove the door panels to remove the speakers from your GTI. That process will start with removing one Torx T-20 screw from the front edge of the door panel. Next, starting at the front edge, use your panel tool to pry up the power options switch panel. Disconnect the wiring harness and remove that panel.
Doing so will expose two Torx T-30 screws. Remove those, then remove the three Torx T-20 screws found along the bottom edge of the door panel. With that done, you can pry around the sides and bottom of the door panel to release six clips. Lift the door panel, disconnect the wiring harnesses and door release cable, then remove the panel and set it aside in a clean, dry location.

Removing and replacing these tweeters is a bit challenging, but it's do-able (Crutchfield Research Photo)
Tweeters: The factory tweeters measure 1.326" in diameter and they're glued to the door sail panels. Replacing them takes a bit of detail work, but it's a do-able DIY project.
Remove one Torx T-20 screw from bottom of "sail" panel, then pry the panel out to release the retaining clips. Disconnect the wiring harness and remove the tweeter/panel assembly. To separate the two, use a rotary tool to cut off the three heat fuse points. Be careful when you're doing this, by the way. It's not hard to do, but it's also not something you want to screw up because you're in a hurry.
You'll need to fabricate a mounting bracket (or use our universal backstraps, hot glue, or silicone) to secure the new tweeters. And, since there's no wiring harness adapter available, you'll need to use Posi-Products speaker connectors to connect the tweeters to the factory wiring.

Upgrading the door panel midrange speakers will add a lot to your car's soundstaging (Crutchfield Research Photo)
Midranges: The 4" midrange speakers are located in the upper half of the door. They're not hard to remove once the door panels are gone, but you will need to hold onto the factory Torx T-20 screws and use them to install the replacements. You'll need more Posi-Products speaker connectors to connect the aftermarket speakers.

Replacing these woofers isn't hard, but you should work carefully (Crutchfield Research Photo)
Woofers: The 6-3/4" factory woofers are attached to the door steel. They aren't hard to remove, but there is some drilling involved, so you'll want to work carefully, know what's around where you're drilling, and wear eye protection. You'll use an 11/64" bit to drill out the six rivets securing the speaker. Mounting brackets and adapters are included with your Crutchfield speaker purchase.
Summary
Once you've replaced all the speakers, test them to make sure they're all working properly. If they are, and if the locks and windows are working as they should, you can start putting the doors back together.
Tools needed: Panel tool, Torx T-20 and T-30 drivers, drill and 11/64" and 1/8" bits

The rear door tweeters are mounted on the door panels (Crutchfield Research Photo)
Removing the rear door speakers
The rear door speaker removal process is similar to what goes on up front, so it's not a hard job for the DIY-er.
These door panels will need to be removed, too, a process that begins with prying off the front portion of the door pull handle and removing two exposed Torx T-30 screws. Remove one Torx T-20 screw from the bottom edge of the door panel, then lift the door panel and hold it out a bit to disconnect the door release cable and wiring harnesses. Remove the door panel and set it aside while you keep working.
Tweeters: The factory tweeters are 1.560" in diameter, and they're glued to the door panel grilles. All you need to do is disconnect the wiring and pry it away from the grille. You'll want to be careful while you're doing this, of course, but it's not a hard thing to do.
You'll need universal backstraps (or hot glue or silicone) to attach the new tweeters, and you'll also need Posi-Products speaker connectors to make the necessary wiring connections.
It is possible that the replacement speakers do not have screws supplied. It may be necessary to acquire mounting hardware.
Woofers: The rear door woofers can be replaced by a wide variety of 5-1/4", 6-1/2". 6-3/4", or even 7" aftermarket speakers. You'll need to do some drilling back here, too, and the process is the same as it is up front. Just remember to work carefully and wear eye protection. Complete step-by-step instructions can be found in your Crutchfield MasterSheet, of course.
Once the new speakers are installed, test them out, check the locks and windows to make sure they're working properly, and if everything's functional, finish putting the doors back together.

You'll need to drill out the old rivets when you replace some of your GTI's speakers (Crutchfield Research Photo)
Removing the rear side panel speakers
The 2-door GTI's rear side panel speakers are a bit more of a hassle to deal with than the ones in the doors. The job's not hard, but there is a LOT of disassembly involved, which can, depending on your perspective, be challenging, tedious, frustrating, or some combination of the three. It's do-able for the DIY-er, but it'll take some time and patience.
In addition to the joys of panel removal, you'll need to drill out the old speaker rivets and drill new speaker mounting holes here, too. You'll use the same drill bits, the same techniques, the same caution, and the same eye protection when you do this.
The entire task list can be seen in your Crutchfield MasterSheet, so we're not going to list the whole thing here. You can do this, but you'll need to stay organized, work carefully, and stay patient. If you can get through the disassembly process, installing your new 5-1/4" or 6-1/2" aftermarket woofers will be pretty easy. And putting it all back together just involves doing all the disassembly stuff in reverse.
The tweeters in this location are heat-fused to the back of the side panel, so we were unable to remove them during our research (Hey, it wasn't our car….). They can be removed and replaced with aftermarket tweeters, though. If you've done this or plan on doing it, please share your experiences in the Comments section below. We'll thank you and so will your fellow GTI enthusiasts.
Read our Car Speakers Buying Guide for more information.
Shop for speakers that fit your Volkswagen GTI

This JL Audio Stealthbox is designed specifically for your Volkswagen
Bass in your GTI
Adding a subwoofer box is a popular upgrade in these cars, and there's a reasonable amount of space to work with. The 2-door offers a 39" W x 17" H x 29"/17" D space, while the 4-door gives you a 40" W x 15" x 28"/18" D space.
If you want to add bass in a more subtle way, you can install a JL Audio Stealthbox enclosure that's custom-designed for your GTI. This sealed enclosure contains a JL Audio 10TW3-D4 sub that's wired for a 2 ohm load and can handle up to 400 watts. It fits neatly into the driver's side rear corner of the trunk and doesn't take up much cargo space at all.
The third option is a powered subwoofer. These subs are available in various sizes, so you can find one that suits your individual space-to-bass ratio.
Learn more about building a bass system in our Car Subwoofer Buying Guide.
Shop for vehicle-specific subwoofers for your Volkswagen GTI
Other options for your GTI
Here are some other upgrade ideas for your GTI or R32.
Cameras everywhere
Want to know what's behind you before you back up? We offer a wide variety of rear view cameras that will make that a lot easier. You can go for a camera that mounts to your license plate and works with your new aftermarket nav receiver, or choose one that mounts onto your rear view mirror.
If you enjoy taking your GTI to the racetrack, a dash cam is a great way to record your hottest laps and analyze your performance. And on the way home, they're very handy for recording the behavior of other, decidedly less-talented motorists.
Add an amplifier
Replacing the factory radio will make a big difference in the performance of your new aftermarket speakers. To further improve the sound quality, consider installing a 4-channel amplifier. Talk to one of our advisors to get some ideas for how to build your GTI's system. Learn more about adding amps to your system in our Car Amplifier Buying Guide.
Security systems and remote start
Installing a security system in your GTI won't be easy (security systems rarely are), but it's definitely a good idea. Our Crutchfield Advisors can help figure out what you need to get the job done, but we usually recommend taking your car to a professional installer.
Adding remote start capability to your GTI lets you warm it up in the winter or cool it down in the summer. Installation is usually easier with these systems, but we still ask that you call to order so that we can make sure you get the right harness for your ride.
Let's get started!
Ready to shop? Use our vehicle selector to find the gear that will fit your car or truck. If you have questions of your own, give us a shout via phone, chat, or email


Comments (0)