


1997-2002 Chevrolet Camaro
How to upgrade the stereo system in your Camaro


In brief: This Crutchfield Research Garage article gives you an overview of your Camaro's stock stereo system and your aftermarket upgrade options. We'll tell you all about:
- The factory stereo system
- Removing the factory radio
- Removing the factory speakers
- Adding more bass
- Other options for your Camaro
Then, use our vehicle selector to find the gear that will fit your car.
Overview of the Chevy Camaro
For a car so often associated with late-night, tire-squealing hooliganism, the 1997-2002 Camaro looks almost sophisticated these days — especially compared to the thick, brawny car that wears the nameplate now. Much like a hair-metal rock star turned acoustic guitar-strumming troubadour, this Camaro can cut loose when it wants to, but it doesn't have to party hardy 24/7 anymore. And that's okay.
Though the platform dates back to the days when "hair metal" bands starred in things called "music videos," the Gen4 Camaro is still slick, quick, and fun to drive. The slippery styling stands out among today's boxy SUVs and pinched-looking compacts, and if you have a V-8, there's plenty of power on tap when you need it.
You don't have to get in touch with your inner hooligan to have fun in a Camaro, but if you're going to pump up the volume, you'll need to revamp the audio system. You'll have a lot more fun if you update that lame, old factory stereo with something that's ready to rock.

The factory stereo system
The Camaros of this era, from base models to optioned-out Anniversary Edition cars, were equipped with either an AM/FM/cassette or an AM/FM/CD stereo system. The base model offered four speakers, and the top-shelf Monsoon audio system was a pretty impressive set-up for the time. That said, even the best, newest factory system is approaching driving age at this point, and car audio technology has come a long way since then.
The good news is that there are lots of ways to update your car's audio system. Camaros are reasonably easy to work on and, thanks to the vast number of people who have installed aftermarket stereos in these cars over the years, there's plenty of collected wisdom out there to help you make the right decisions. We have a fair amount of it right here, of course.

The Camaro's factory radio (Crutchfield Research Photo)
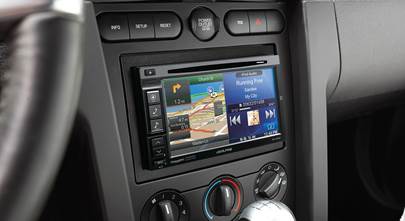
Removing the factory radio
Removing and replacing the factory receiver in a Camaro isn't all that difficult, but there are a couple of challenges. If you're reasonably good with tools and basic automotive tasks, you'll probably be fine. But if you don't have the tools or the know-how, there are plenty of car audio shops that do.
A variety of receivers will fit in the Camaro, but if you go with a new single-DIN (2" tall) or shaft-style receiver, you'll need to deal with the Camaro's shallow dash opening. The receiver mounting kit (deeply discounted with most Crutchfield stereo purchases) includes an extension, so the radio will protrude from the dash by 1/2". It's a difference you can see, but it won't affect your shifting and you'll get used to it in no time.
If your Camaro is equipped with the Monsoon stereo system, installing a new receiver is a bit more involved. In addition to using the extension piece, you'll usually have to unbolt or cut out the factory stereo's rear support bracket to make room for a new receiver.

You may need to remove the rear bracket to install a new stereo (Crutchfield Research Photo)
To remove the factory stereo, you'll start by prying out the edges of the receiver trim panel to release the retaining clips. Remove that trim panel, then remove the two 9/32” hex screws securing the factory radio, and pull it out. You'll need those screws again later, so keep them handy.
Next, disconnect the harnesses, and set the radio aside. If it's the original head unit and there's a chance you might want to return the car to stock one day, wrap it up and store it safely.
You'll want to be gentle when you're prying away panels here — and throughout the rest of the car, for that matter. The plastic is obviously old and brittle, but if your Camaro is "new to you," you're probably not the first person to go at it with a panel tool. If that last person was an impatient hack, you could accidentally break the panel somebody else started breaking a decade ago. Be careful, work slowly, and pay attention to what the panels are doing as you remove them.
Detailed stereo and speaker removal instructions

The dash kit isn’t the only discounted item that comes with your Crutchfield stereo purchase. You'll also get a wiring harness that makes the connections between your new stereo and the factory harness, plus an antenna adapter. You'll want to have those items (and the included instructions) handy before you get to work installing the new receiver.
Tools needed: Panel tool, 7mm socket, ratchet, and extension, 9/32" hex driver and socket
Read our Car Stereo Buying Guide for shopping tips and advice.
Shop for car stereos that fit your Chevrolet Camaro
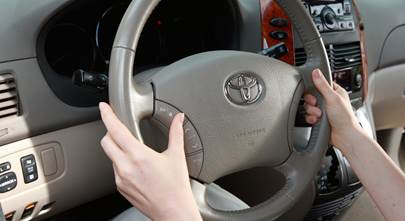
Steering wheel audio controls
In most cases, it's reasonably easy to retain your Camaro's steering wheel audio controls when you install a new stereo. When you enter your vehicle information, our database will choose the adapter you need to make your factory steering wheel controls work with a compatible aftermarket receiver.
Removing the factory speakers
The Chevy Camaro's factory speakers can be found in the doors, rear side panels, and the cargo area. Disassembly instructions are the same for the coupe and the convertible, except where otherwise noted.

The Camaro's big, long doors are deep enough to house a wide variety of speaker sizes (Crutchfield Research Photo)
Door speakers
Base Camaros are equipped with a standard 6-3/4" full-range speaker, while the Monsoon-equipped cars sport a neatly packaged component set with 6-3/4" woofers and separate tweeters mounted in the same part of the door. Both speaker packages are easy to reach and replace.
The base speakers can be replaced by same-size models, or 6-1/2" or 5-1/4" speakers. The same is true for the 2-ohm Monsoon woofers, but a set of low-impedance component speakers (we suggest Infinity or JBL) is the best choice here. Installing a normal 4-ohm speaker will result in a drop in volume that you'll probably be able to hear.
A speaker adapter bracket is required for the woofers, and it's included free when you purchase your new speakers from Crutchfield. To get full sound out of your new speakers, you'll need to bypass the factory Monsoon amp by splicing its input and output wires together. That's not too challenging, and our Tech Support team can give you a hand if you need it.

You may need to cut out the plastic trim that's visible in the upper half of the speaker cavity (Crutchfield Research Photo)
No matter what speakers you're replacing, you'll need to remove the door panels to do the job. As noted above, it's important to work carefully when you're dealing with old plastic doors held in place by old plastic clips.
This isn't difficult, but the process varies depending on whether your car has manual or power windows and door locks. Power-equipped cars are very straightforward, but if your car is equipped with manual windows, you'll need to slide a shop rag behind the window crank and use a “shoeshine” motion to release the C-clip on the rear and remove the crank.
Whether you're installing a full-range speaker or component woofer in the larger opening, you may need to cut out the back of the plastic cup or mounting bracket to accommodate the new piece. It's an easy task, and it will give you the depth you need for a speaker with a larger magnet.
Tools needed: Panel tool, Phillips screwdriver, socket wrench, extension, 1/4" socket, 7mm socket, shop rag
Rear side panel speakers
Whether you have a coupe or a ragtop, replacing the rear speakers on your 1997-2002 Chevy Camaro is reasonably uncomplicated. A wide variety of speakers are available for both models.

The Camaro coupe's rear side panel speaker (Crutchfield Research Photo)
Coupe
Replacing the side panel speakers in your Camaro is a pretty basic procedure. The base stereo features a 6-1/2" full-range speaker in this space, while the Monsoon-equipped coupe has a 6-3/4" dual voice coil subwoofer in this location. To remove the speaker, start at the top and pry out the grille, remove four 7mm screws, pull out the speaker, and disconnect the wiring harness.
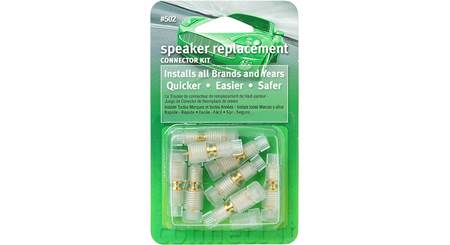
Regardless of which factory speaker is installed, 6-3/4", 6-1/2", or 5-1/4" models will fit neatly into the space. There's no wiring harness available for the Monsoon system, though, so you'll need to use a set of Posi-Products connectors to install the new speakers. Replacing the base speakers, on the other hand, simply involves hooking them up, testing them out, and re-installing the grilles.

Getting to the rear panels in a convertible is a bit harder, but still do-able (Crutchfield Research Photo)
Convertible
With the base and Monsoon-equipped Camaro convertibles, you'll need to remove the rear seat side panels to access the speakers. What you find underneath depends on the stereo system you have.
The base speakers are 6-3/4" models, which can be replaced by 6-1/2", 5-1/4", or same-size models. You'll need to use Posi-Products connectors here, too. Smaller speakers require mounting brackets, which are free with your Crutchfield speaker purchase.
On Monsoon cars, the 6-3/4" factory speaker looks like a full-range, but it's actually a component system with the signal crossed over. To get full-range sound from 6-3/4", 6-1/2", or 5-1/4" aftermarket speakers, you'll need to install a new stereo and bypass the factory amp.
Tools: Panel tool, socket wrench, extension, 7mm socket
Cargo area speakers
The speakers found under the grille in the cargo area of some Camaro coupes are actually component speakers. There's a bit of drilling involved, but these speakers aren't that hard to replace. We carry a healthy number of 4" full-range speakers, in addition to some component sets that will fit in this space. If there isn’t a tweeter back there already, there's still an opening in the factory grille, so you can install an aftermarket version without losing the factory look.

Camaro coupes have a speaker in the rear trunk panel (Crutchfield Research Photo)
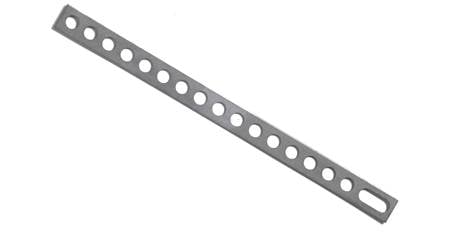
With no mounting bracket available for new tweeters, you'll need our universal backstraps or some other method to secure them. You'll also need Posi-Products connectors for this job, because there also isn’t a wiring harness adapter for this location.
To access the speakers, use a panel tool to pry off the grilles. Then, use a 1/8" bit to drill out the rivets that secure the speaker. Once the speaker is loose, you'll need to spin it a bit, lower it into the opening, and lift it out. This isn't terribly complicated if you know how to use a drill, but work carefully and be aware of wiring, windows, fuel lines, and other things. Make sure you check the drilling depth and location to avoid damaging your car. And, of course, wear eye protection.
To install the new speakers, place the "speed clips" included with your aftermarket speakers flat side up over the holes in the mounting surface. Connect the replacement speaker's wiring adapter to the car's speaker connector, then secure the speaker to the speed clips with the screws supplied. Be sure to test the speakers before reinstalling the grille.
Tools needed: Small flat blade screwdriver, drill, 1/8" bit
Read our Car Speakers Buying Guide for more information.
Shop for speakers that fit your Chevrolet Camaro

A custom sub enclosure or a powered sub are probably the best bass bets for the Camaro coupe (Crutchfield Research Photo)
Bass in your Camaro
If you like hearing a healthy rumble from your car's sound system to go along with the one coming from the sweet-running small block up front, there are plenty of ways to make that happen in your Camaro.
The coupe's rear hatch area offers enough room to install something big and booming, if you want to. The exact amount of space varies depending on whether or not your coupe has T-tops, but you're looking at roughly 36"-40" W x 8-13" H x 7-17" D for a sub box.

The ragtop doesn't offer much room for a full-sized subwoofer (Crutchfield Research Photo)
The Camaro ragtop is a different matter. The top has to go somewhere on sunny days, and that someplace happens to be about where you'd install a big enclosed subwoofer. The best bass option for the ragtop is a compact powered sub.
These surprisingly powerful subs will give you the enhanced bass you want, and fit comfortably in the limited (okay, tiny) amount of trunk space available. Of course, they're also a smart choice for coupe owners who want better bass, but need some storage capacity.
Learn more about building a bass system in our Car Subwoofer Buying Guide.

Installing Dynamat in your Camaro's doors is a great way to improve audio performance
Other options for your Camaro
There are plenty of other ways to improve your Camaro's sound quality and overall comfort. Here are some of the ways Crutchfield can help:
Dynamat
Those big, long doors can undo a lot of the good work done by your aftermarket speakers. Installing Dynamat in the door frames while you're installing the speakers is a great way to seal in sound and get the most out of your new system. More extensive use of this sound-deadening material throughout the rest of the car can help dull the rattles and creaks that occur in cars of this age—especially convertibles.
Q-Forms Kick Panel Pods
These unloaded speaker enclosures are a nice way to boost the sound quality and imaging in any Camaro, but they're especially good for convertibles. Available in a variety of colors to match your interior, Q-Forms Kick Panel Pods hold a 6-1/2" component system. This installation requires cutting the factory kick-plate to join with the Q-form, plus you'll need to cut holes for the speakers. Instructions are included, but tools, skill, and experience are required. This could be a job for a car audio pro, but if you really like music, it's definitely a job worth doing.
Antenna replacement
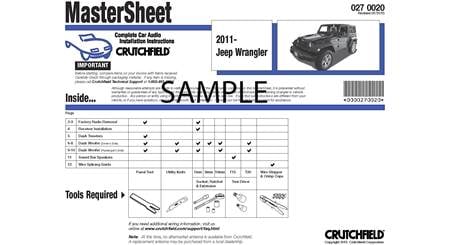
Replacing the old antenna on your Camaro is a smart thing to do while you're doing everything else. It's reasonably easy, and complete instructions are included in your Crutchfield MasterSheet. When you do this, be sure to give the spare tire a good once-over before you put it back, just to make sure it's in good shape.
Security
Camaros were popular when new, so they're probably still popular with joyriders and car thieves. Installing a security system in your Camaro isn't easy (security systems rarely are), but it's less complicated than it could be. Our Crutchfield Advisors can help figure out what you need to get the job done, but we usually recommend taking your car and new gear to a professional installer.
Let's get started!
Ready to shop? Use our vehicle selector to find the gear that will fit your car or truck. If you have questions of your own, give us a shout via phone, chat, or email


Joe Buchanan from Charleston
Posted on 3/12/2020
love seeing the 'Brand New' 2002 Camaros getting the stereo's installed! My 2000 is a project someone has put junk in it and subs, big speakers and an amp with an old 40 watt radio that all has to come out I'm hoping there is still a wiring harness in there, all the factory speakers are disconnected.
Jon Paul from Crutchfield
on 3/13/2020
Jon Paulette from Crutchfield
Posted on 6/19/2018
Bruce, We only deal in aftermarket stereos, but you might have some luck on Camaro owners' forums or some internet auction sites. If that doesn't work, come on back here and talk to one of our advisors about a new stereo that'll work in your car. Good luck!
Bruce Pochinski from Sun Valley
Posted on 6/19/2018
I am looking for an updated factory style Delco monsoon head unit with an aux jack in it.I seen it in a video on YouTube.The actual model # of mine is a FM 20 EV 150721234 in my 2001 camaro.Where can I find one? Do you have them?