


2007-2013 Chevy Silverado and GMC Sierra Extended Cab
How to upgrade the stereo system in your Silverado or Sierra


In brief: This Crutchfield Research Garage article gives you an overview of your truck's stock stereo system and your aftermarket upgrade options. We'll tell you all about:
- The factory stereo system
- Removing the factory radio
- Removing the factory speakers
- Adding more bass
- Other options for your Silverado or Sierra
Then, use our vehicle selector to find the gear that will fit your pickup.
Overview of the Chevy Silverado and GMC Sierra
These days, a pickup can be pretty much anything you want it to be. If you need a stripped-down workhorse in basic white, your local dealer will be happy to help you. If you want an ultra-luxurious, leather-lined cruiser that's perfectly at home in the country club parking lot, you can have that, too. And your dealer will probably be even happier to help you.
GM's Chevy Silverado and GMC Sierra extended cab pickups are pretty decent at most anything you'd ask a truck to do, but why stop at stock? There are plenty of aftermarket performance and appearance parts available, so if you can dream it, you can probably build it. The same goes for stereo systems, of course. Whether you're on the road or off in the woods, your truck can rock a little harder with up-to-date technology and upgraded sound.
Note: The chassis discussed here, known inside GM as the GMT900 and to the rest of the world as the Chevy Silverado and GMC Sierra, was introduced in 2007. The previous generation, the GMT800, hung around for another year as the "Classic" model. If you're not sure which '07 version you have, take a look at the nose. The more aggressive-looking "Classic" features distinct "eyebrows" above the headlamps, plus a slight dip in the front bumper to accommodate the grille.

The "Type A" radio has vents on either side (Crutchfield Research Photo)
The factory stereo system
Extended-cab Silverados and Sierras were available with two different dash configurations. The base-model "Type A" dash has vents on either side of the stereo, while the mid- to upper-level trucks have a "Type B" dash with vents above the radio. Interestingly enough, the same mounting kit works on both types, and it's included at a deep discount with your Crutchfield stereo purchase.
A variety of single-DIN (2" tall) and double-DIN (4" tall) receivers will fit in these pickups, but there are some irregularities in the dash substructure that prevent certain double-DIN radios from fitting properly. It’s best to pick a double-DIN radio with wire harnesses or RCA connectors located on the bottom half of the back of the radio. You can also look for CD receivers or digital media receivers with a depth of less than 6-1/2".
Don't worry about these details. Our vehicle selector will figure it out for you. Just enter your truck's information on our Outfit My Car page.

The "Type B" radio is underneath the air vents (Crutchfield Research Photo)
Removing the factory radio
If your truck has the "Type A" dash, you'll start the removal process by prying around the bottom of the trim panel to release the metal clips. These clips are very tight, so work carefully and be patient. Once they're all clear, you can remove the trim panel. Next, you'll remove the six 7mm screws securing the switch panel, heater controls and factory radio. You can allow the heater controls to hang while you disconnect the harnesses, remove the old radio, and install the new one.
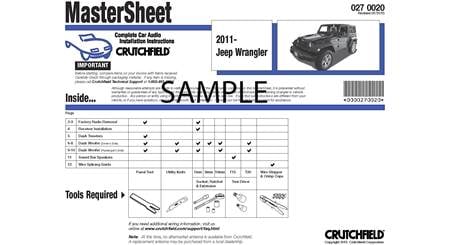
On the "Type B" dash, the process is basically the same, except that you'll be removing eight 7mm screws on this one. Illustrated, step-by-step instructions can be found in the Crutchfield MasterSheet that's included free with your stereo purchase.
You’ll also need to purchase an adapter that allows you to retain your warning chimes (along with OnStar functionality if you have it), plus a relay to keep your audible turn signals working with your new stereo. These adapters are not free, but we'll give you a very nice discount on the ones you'll need.
Crutchfield strongly recommends that you use one of the recommended adapters. Failure to do so may result in serious injury or death. It will most certainly result in our (very) polite refusal to provide technical assistance when you call us for installation advice.
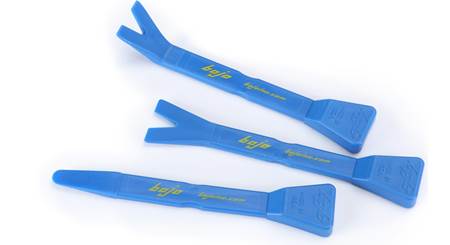
Tools needed: Panel tool, 7mm socket and ratchet
Detailed stereo and speaker removal instructions

Read our Car Stereo Buying Guide for shopping tips and advice.
Shop for car stereos that fit your GMC Sierra
Steering wheel audio controls
In most cases, it's reasonably easy to retain your truck's steering wheel audio controls when you install a new stereo. When you enter your vehicle information, our database will choose the adapter you need to make your factory steering wheel controls work with a compatible aftermarket receiver.

The Bose system includes front pillar tweeters (Crutchfield Research Photo)
Removing the factory speakers
Depending on the stock stereo, these trucks came with speakers in the front pillars, front doors, and rear doors. There's a little bit of room for an amp or a powered sub behind the seats.
Removing the front pillar speakers
The A-pillar tweeters found in some trucks are easy to remove, but you’ll need to do a bit of work to install the replacements.
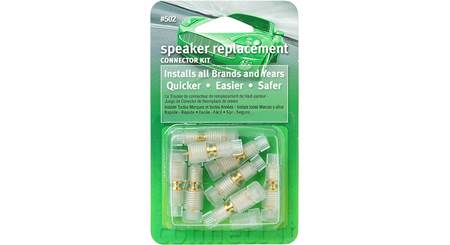
There's no wiring harness adapter made for this location, so you'll need a set of Posi-Products speaker connectors to hook everything up. You'll also need a mounting bracket, and using our universal backstraps will be a much easier solution than making one of your own. You can also use hot glue or silicone to secure your new tweeters.
Tools needed: small flat blade screwdriver

You can install 6-3/4" or 6-1/2" speakers in the doors (Crutchfield Research Photo)
Removing the front door speakers
You'll need to remove the door panel to access these speakers, of course. Depending on whether your truck has manual or power windows, there will be some differences in exactly how you go about doing that, but all will be explained in your MasterSheet.
The standard factory door speakers are kinda sorta like 6-3/4" models, but not exactly, so you’ll need an adapter plate. You can install 6-3/4" or 6-1/2" speakers, and the adapter plates make installation relatively easy. The factory speakers are 4-ohm models, so you have a wide selection to choose from.
You'll need speaker harnesses to attach the new speakers to the plugs that connect to the GM factory speakers. Crutchfield includes these harnesses, plus the mounting brackets above, at a deep discount with every speaker order.
The Bose system uses a 1.9-ohm speaker in the front doors, so if you're going to keep the Bose amp, you'll need an aftermarket speaker with 2-ohm impedance to avoid a loss in overall volume. There's no wiring harness adapter available for the Bose version, so you'll either need to cut the wires and splice in your aftermarket tweeters, or (easier option) use a set of Posi-Products speaker connectors to hook everything up. Replacement speakers will work fine with the factory Bose amps, or you can power them with your own amps.
Tools needed: Panel tool, 7mm & 10mm drivers, drill with 1/8" bit, flat blade screwdriver, needle-nose pliers

The speakers you choose for the rear doors will depend a bit on how you use your truck (Crutchfield Research Photo)
Removing the rear door speakers
With the base stereo, the same sorts of speakers that fit in the front doors will also work in the back. Again, GM used 4-ohm speakers in the rear doors, so you can drop just about any speaker in there if you're keeping the factory radio. A speaker adapter bracket is required, and it's included free with your speaker purchase.
The sizing is the same for the rear Bose speakers, but they're 3.6-ohm models. Normal 4-ohm aftermarket speakers will work fine here, but you'll need another set of Posi-Products connectors to hook everything up.
If you rarely have passengers in the rear seats, you might consider using these locations for midrange speakers that really fill out your music’s sound. If you do a lot of people hauling, replace the rear speakers with full-range units to maintain some high notes for back-seat passengers.
Tools needed: Panel tool, 7mm & 10mm drivers, flat blade screwdriver, needle-nose pliers
Read our Car Speakers Buying Guide for more information.
Shop for speakers that fit your GMC Sierra

This JL Audio Stealthbox is designed to fit right into your truck
Bass in your Silverado or Sierra
If your Silverado came equipped with the Bose system, there is a small woofer mounted in the center console, along with the amplifier that powers all your factory Bose speakers.
This package is very hard to reach and replace, so if you want more bass and don't want to take your truck apart, it’s a good idea to simply bypass this woofer and add a new, larger sub with a more powerful amp.
There are several custom enclosures designed for the Extended Cab Silverado or Sierra. These custom sub enclosures from JL Audio, MTX, and others allow you to retain valuable interior room and add more kick to your music and movies. To see the entire selection, enter your vehicle info.
Learn more about building a bass system in our Car Subwoofer Buying Guide.
Shop for vehicle-specific subwoofers for your GMC Sierra

Q-Forms Kick Panel Enclosures (components not included) will add a lot to your truck's stereo sound
Other options for your Silverado or Sierra
Here are some other upgrade ideas for your truck.
Add an amplifier (or two)
The factory Bose system includes amps, but they aren’t ideal for use with aftermarket head units or speakers. It’s best to bypass or eliminate these amps in favor of new aftermarket amplifier if you want the best possible sound. You’ll find room for amps in the spaces under and behind your truck's seats or in the center console. Learn more about adding amps to your system in our Car Amplifier Buying Guide.
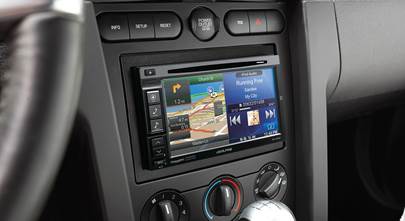
Stay on course with a portable GPS
If you don't want to invest in a big double-DIN receiver, you can still get the nav you need and more with a portable GPS navigation unit. Portable nav is a great solution for a pickup, because it can be transferred from vehicle to vehicle, or just tucked into a storage compartment when not in use, and it doesn't tie up your phone.
Get bigger sound with kick panel pods
If you really want to improve the sound in your Silverado or Sierra, install a set of Q-Forms Kick Panel Pods. These unloaded, custom-fit speaker enclosures fit into the space where your kick panels are now. They hold a set of component speakers in an ideal position, angling them to maximize sound quality. They're available in a variety of colors to match your truck's interior. Installation takes some work, but it's not beyond the realm of an experienced DIY-er.
Remote start and security systems
Adding remote start capability to your vehicle lets you warm it up in the winter or cool it down in the summer. The iDatastart system is incredibly convenient and makes it easier than ever to install a remote start system, so we highly recommend it. The module requires a vehicle-specific T-harness (sold separately) to connect with your vehicle's computer, security, and ignition systems, so we ask that you call to order so that we can make sure you get the right harness for your ride.
You can also talk to your Crutchfield Advisor about a security system. They’re not as easy to install (we usually suggest letting a professional do the job), but we can help you choose a system that’ll work in your vehicle.
Let's get started!
Ready to shop? Use our vehicle selector to find the gear that will fit your car or truck. If you have questions of your own, give us a shout via phone, chat, or email


Comments (0)