


2008-2013 Toyota Highlander
How to upgrade the stereo system in your Highlander


In brief: This Crutchfield Research Garage article gives you an overview of your Highlander's stock stereo system and your aftermarket upgrade options. We'll tell you all about:
- The factory stereo system
- Removing the factory radio
- Removing the factory speakers
- Adding more bass
- Other options for your Highlander
Then, use our vehicle selector to find the gear that will fit your Toyota.
Overview of the Toyota Highlander
Is it just us, or is it interesting that Toyota's 4Runner is actually the choice for driving into the highlands, while the Highlander is the one to buy for running around town? Okay, maybe it is just us….
Theoretical nomenclatural absurdity aside, the third-generation Highlander is pretty much everything you'd want in a family-style SUV. The Camry-based chassis is competent, the interior is comfortable, and it's not a minivan. There's plenty of cargo room for all the things you need to ferry from one place to another, and available third-row seating means it'll hold up to eight people, provided that the last few are either small children or full-grown adults you don't like very much.
The Highlander is a reliable, versatile vehicle that'll give you years of quality service, and you'll enjoy those years a lot more if you upgrade to a higher-quality audio system.

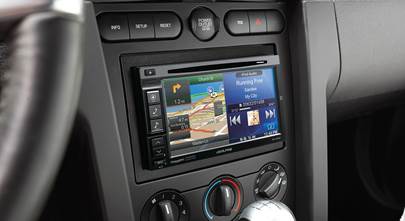
The standard radio isn't that hard to replace, but the nav receiver is a different story (Crutchfield Research Photo)
The factory stereo system
Toyota knows its customers, so they made sure the Highlander stayed in step with the technological times. The base stereo system was decent enough, and the optional 9-speaker JBL system was better still. The AM/FM/CD receiver could be upgraded to a navigation receiver, too. Like we said, not bad. But not great, either.
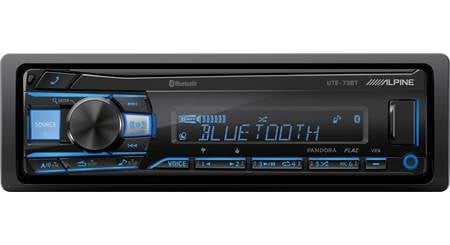
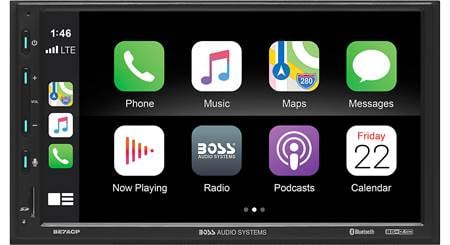
If you have the regular factory receiver, you can choose from a healthy number of single-DIN (2" tall) and double-DIN (4" tall) aftermarket receivers. You'll lose some factory functions when you remove the old one (USB, AUX, satellite radio, and hands-free calling, for example), but you'll be able to replicate them with a new receiver.
Detailed stereo and speaker removal instructions

Highlanders with factory navigation systems
Replacing the nav receiver is a lot tougher, because there's no dash kit available at the moment — unless you have the 2013 Highlander.
There are some other ways to improve your sound without replacing the receiver, and we'll touch on some of them in this article. You can also speak to a Crutchfield Advisor to learn more about your options.
When you order your new receiver from Crutchfield, you'll save big on the dash kit (where applicable) and wiring harness adapter needed for installation. That harness also allows you to retain your factory backup camera or add an aftermarket model.

There are some slight differences in how you approach the 2008-2012 and 2013 radios (Crutchfield Research Photo)
Removing the factory radio
Removing the stock radio is a pretty uncomplicated process, so even a first-time DIY-er can probably handle it with the help of the Crutchfield MasterSheet that's included with your stereo or speaker purchase. You'll need some basic tools and a bit of patience, but it's totally do-able.
The first thing you'll need to do is set the parking brake and disconnect the negative battery cable to prevent any electrical short. Once that's handled, crawl into the driver's seat and, using the shift lock release, place the gearshift in its lowest possible position.

Use the shift lock release to move the gear shift (Crutchfield Research Photo)
Use a panel tool to pry out the climate control panel to release the retaining clips. Disconnect the harnesses and remove the panel. Remove two exposed 10mm screws from the lower radio brackets, then pry out the upper vent trim panel to release those retaining clips and remove the panel. Remove the two exposed 10mm screws from the upper radio brackets, then pull out the radio assembly and disconnect everything.
Depending on the model year, there are some mild differences in how you'll install your new receiver. The 2008-2012 trucks (and some 2013 Canadian models) are all the same, but the 2013 U.S. models differ just a bit. None of this is hard to deal with, though, and it's all explained in your MasterSheet.
Once the new stereo is in place, be sure to test it out to make sure it's working. You'll do this by reconnecting all of the wiring harnesses including the airbag, then reconnecting the battery. If everything's working properly, you're ready to put the dash back together. Just don't forget to disconnect the battery again before you start on the speakers.
Tools needed: Panel tool, 10mm socket, ratchet and extension
Read our Car Stereo Buying Guide for shopping tips and advice.
Shop for car stereos that fit your Toyota Highlander
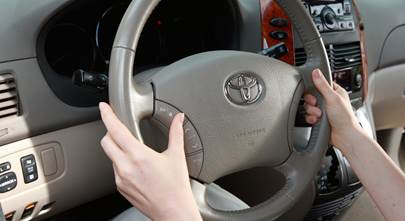
Steering wheel audio controls
In most cases, it's reasonably easy to retain your Highlander's steering wheel audio controls when you install a new stereo. When you enter your vehicle information, our database will choose the adapter you need to make your factory steering wheel controls work with a compatible aftermarket receiver.

If you're a DIY-er, replacing the Highlander's speakers is a rewarding way to spend an afternoon (Crutchfield Research Photo)
Removing the factory speakers
Speaking of speakers, the Highlander has them in the dash and doors, plus the JBL-only rear hatch subwoofer. When you're replacing any of the low-impedance JBL speakers, remember that installing higher-impedance aftermarket speakers will result in lower volume levels. Shop accordingly.

Replacing the dash speakers is a reasonably simple task (Crutchfield Research Photo)
Removing the dash speakers
The dash speakers, which can be found in both standard and JBL systems, are pretty easy to deal with. Just pry up the rear edge of the speaker grille to release two clips, then get the grille out of the way. Remove the two 10mm screws securing the speaker, then pull it out and disconnect it.
A variety of component speaker tweeters will fit here, and the only real hitch is with the wiring. If you have the standard system, you can connect the new tweeter's wiring adapter to the vehicle speaker harness. With the JBL system, you'll need to splice, solder, or use Posi-Products speaker connectors to make that connection.
If you're installing 2-3/4” aftermarket speakers, just secure the new speaker using the screws previously removed. You may need to open the screw holes on the new speaker just a bit to line up with the factory screw holes.
If you're installing tweeters, just secure the tweeter to the speaker adapter bracket following the instructions included with the bracket, then secure the speaker/bracket assembly.
Tools needed: Panel tool, 10mm socket, ratchet and extension
Hybrid note
A hybrid's gas-electric hybrid powertrain makes replacing the stereo is a little more complicated. As you might expect, hybrid Highlanders contain some very sensitive electronics, so here are a couple of things to keep in mind:
- Be sure to only use a multi-meter when testing wires. NEVER use a test light to test wires in this vehicle. Doing so could cause some serious (by which we mean dangerous and expensive) damage.
- A hybrid Highlander is not the SUV to choose if you want to build a massively powerful audio system. The thirsty current draw of a high-powered stereo is not a good thing for the hybrid system, so don't exceed a 30-amp current draw or 350-watt RMS power rating.

The JBL speaker system announces itself with these little orange emblems (Crutchfield Research Photo)
Removing the front door speakers
The front door speakers aren't hard to deal with, but there are some minor differences between the base and JBL speakers. Nothing complicated, but worth noting. Which is why we noted them in your Crutchfield MasterSheet.
You'll need to remove the door panels, a process that begins with prying off the sail panel. Start at the top and work gently.
Pry out the screw cover behind the door release and remove it, then remove the exposed Phillips screw. Starting at the bottom edge, pry off the door pull handle cover, then remove the two exposed Phillips screws. Pry around the sides and bottom of the door panel to release those retaining clips. Disconnect the door lock and release cables, then disconnect the wiring harnesses and remove the door panel.
Removing the speakers is pretty uncomplicated, but this is where you run into those differences we talked about. The JBL's are a bit easier, mostly because you'll need to drill new mounting screw holes to replace the base models. The drilling is easy enough, but you are drilling into your own truck, so know what's around the area you're drilling into, work carefully, and wear eye protection.
If you need mounting brackets, they'll be included with your speaker purchase. You might need mounting screws, too, and they might not be included with your speakers. Check the speaker box to make sure they're there before you get started.
Once everything's installed, test the speakers to make sure they're working before you put the doors back together. Also check to be sure that the speaker wires don't interfere with the windows and locks.
Tools needed: Panel tool, Phillips screwdriver, cordless drill and bits (non-JBL only)

Replacing the rear door speaker isn't hard, and it's well worth the effort (Crutchfield Research Photo)
Removing the rear door speakers
Replacing the rear door speakers starts with removing the door panels. A variety of speakers will fit, and the adapter brackets for the smaller speaker are available at a deep discount with your Crutchfield speaker purchase.
With the base speakers, the process is quite similar to what you did up front, including the drilling. Be patient, wear eye protection, and be sure to check the drilling depth and location to avoid damaging the vehicle. Your MasterSheet contains detailed, illustrated instructions for the entire process.
The JBL system's rear speaker replacement process is also similar to the front door version. Unlike the non-JBL system, you won't have to do any drilling. Remember, replacing the low-impedance JBL speakers with higher-impedance speakers will result in lower volume levels.
BTW, if you're been looking for the eighth and ninth speakers in your JBL system, you've found them. Toyota counts the tweeters on these speakers as separate speakers, and they're wired in parallel with the woofers.
Tools needed: Panel tool, Phillips screwdriver, cordless drill and bits (non-JBL only)

Replacing the hatch-mounted subwoofer is easy to do, but it might be hard on your neck (Crutchfield Research Photo)
Removing the hatch door subwoofer
The JBL sub in the rear hatch is an 8" dual-voice coil model. That said, it's a bit larger than a standard 8" sub and has a non-standard bolt pattern, so you'll need to fabricate a bracket to install an aftermarket sub. There's also no wiring harness adapter available, so you'll need to use Posi-Products speaker connectors to connect it to the factory wiring.
The factory amp (located under the front passenger's seat) only sends bass frequencies to this location, so if you install anything that isn't a sub back here, it'll only play bass. Like the other JBL speakers, the sub is a low-impedance model, so installing higher-impedance aftermarket speakers will result in lower volume levels. We recommend installing a 2-ohm subwoofer.
You'll need to remove the trim panel to get to the sub, a process that begins with prying off the upper window trim panel to release the retaining clips. Remove that, then pry off the power liftgate arm cover.
Pry off the left and right side window trim panels. Pry off the screw cover and remove one exposed 10mm screw from the pull handle anchor, then pry around all sides of the liftgate trim panel to remove the panel. Remove the four 10mm screws and two retaining clips securing the sub to the door, then disconnect the wiring harness and remove the sub.
Fabricating a mounting bracket requires a certain amount of "handiness," so if you're not comfortable doing that, consult your local car audio installation professional.
Tools needed: Panel tool, 10mm socket, ratchet and extension
Read our Car Speakers Buying Guide for more information.
Shop for speakers that fit your Toyota Highlander

If you're thinking about addind a sub box, the Highlander offers all the space you'll need (Crutchfield Research Photo)
Bass in your Highlander
Like most SUVs, the Highlander offers plenty of space for a subwoofer box. With the third row seats in the "up" position, we measured a 43" W x 14" H x 7"/10" D space, but obviously there's more if you don't have the third-row seats at all.
The size of the sub box you want will depend on how much bass you like to hear and how much space you need to hang onto for gear, groceries, and stuff. If you like space more than bass, you can go with a smaller powered subwoofer.
Learn more about building a bass system in our Car Subwoofer Buying Guide.

Seal in sound and seal out road noise with Dynamat
Other options for your Highlander
Here are some other ways to upgrade your Highlander.
Sound damping to block noise
Highlanders are reasonably quiet as SUVs go, but as trucks age, creaks and groans can start to intrude on your driving serenity. A Dynamat Xtreme Door Kit is the perfect way to seal in sound. This heavy-duty insulating material is easy to install, and it really makes a difference. One kit will take care of the front doors in your SUV. The rear doors and the rear hatch are also good areas to target if you build a serious sound system.
Add an amplifier (or two) for better sound
A new amplifier will help you get the most out of your new speakers. You'll get cleaner power (and a lot more of it), which will result in much, much better sound. A 4-channel amp will help your new speakers deliver crystal-clear details in your music, and a mono amp can provide the juice your subwoofer needs to pump out the bass. Learn more about adding amps to your system in our Car Amplifier Buying Guide.
Floor mats to protect your carpet
No matter how much you pamper your Highlander, you're eventually going to get involved in some sort of truck-like activity that gets you and/or it dirty. When that happens, it's a good idea to have a set of WeatherTech liners on the floors and especially in the cargo area. These incredibly durable mats trap moisture, contain dirt, and keep your factory carpets looking good. To see all the mats that fit your truck, enter your vehicle info.
Security systems to protect your stuff
Installing a security system in your Highlander isn't easy (security systems rarely are), but it's less complicated than it could be. Our Crutchfield Advisors can help figure out what you need to get the job done, but we usually recommend taking your car and your new security gear to a professional installer.
Let's get started!
Ready to shop? Use our vehicle selector to find the gear that will fit your car or truck. If you have questions, give us a shout via phone, chat, or email


Mark from Fort Wayne
Posted on 9/23/2022
I have a 2012 Toyota highlander hybrid limited with JBL stereo. I replaced the radio but now I have an srs airbag warning. The aftermarket airbag and hazard module doesn't support the passenger airbag warning that was in the original stereo unit. Is there a way to bypass it?
Crutchfield Writing Team from Crutchfield
on 9/26/2022
Juan from Dorado
Posted on 8/11/2022
Hi: Highlander 2013 owner. Where is the best place below the driver seat to attach the ground cable for an amplifier?
Jon Paul from Crutchfield
on 8/11/2022
Colton Shepherd from Knoxville
Posted on 2/1/2022
Hello could I use this guide for a 2007 Toyota Highlander?
Jon Paul from Crutchfield
on 2/2/2022
Adam Jacunski from Chesterfield
Posted on 10/14/2021
I have a 2012 Limited Highlander with Nav and the JBL system, and I am shopping for a replacement 8" sub for the rear hatch. I saw you recommend an 8" replacement with a 2-ohm impedance. Do you have any indication of the allowable depth? Would love to take the hatch apart just once if possible...
Jon Paul from Crutchfield
on 10/15/2021
Kay Carver from Eugene
Posted on 7/21/2021
Hey there, 2010 Highlander with base radio. I have the metra harness wired up to the Boss radio harness, but where in the car do I tap into for reverse input and parking brake input?
Jon Paul from Crutchfield
on 7/22/2021
George
Posted on 3/5/2021
Hello I have an 08 highlander sport. I am looking at upgrading the oem system (non jbl) to a double din unit with apple car play. My highlander has the oem rear entertainment DVD system. It currently will play through wireless toyota headphones or the entire car stereo if I push the aux button on oem radio. Does crutchfield know if I go with a double din unit if i can retain the usability of car stereo for the rear entertainment system? Thank you!
Jon Paul from Crutchfield
on 3/8/2021
Prince Puliprath from Taxes
Posted on 2/26/2021
Hi my 2010 Highlander CD player is not working, what is your suggestion and can you do upgrade. How much it cost.
Jon Paul from Crutchfield
on 3/1/2021
Ian from Chico
Posted on 6/16/2020
Hello I need to install new front door speakers in my 2008 toyota Highlander, the system is stock with non JBL speakers. both of my speakers have blown. Can you recommend a 4 ohm 20Watt replacement 6x9 speakers set which will plug and play easily with out resodering the harness connections thank you
Jon Paul from Crutchfield
on 6/16/2020
Gomez from san jose
Posted on 5/3/2020
Hi, my wife has a 2009 Highlander Limited with factory nav, JBL system, steering wheel controls, and factory reverse cam. She can care less about using the nav, but would like to keep using the reverse cam. If available, can you give me part numbers to a dash kit, wire harness, and whatever else I may need to retain the factory steering wheel controls and reverse camera when installing a double din?
Jon Paul from Crutchfield
on 5/4/2020
KJ from Lake St. Louis Misso
Posted on 4/15/2020
I have a 2013 Toyota Highlander with JBL package. I would like to upgrade the 4 door speakers with 4 ohm units and get away from the factory crossover points. I would like to change out the amp because I believe the factory crossover points are not adjustible. I would like to keep the factory head unit if possible. Are the crossover points set by the factory JBL amplifier or the factory head unit?
Jon Paul from Crutchfield
on 4/16/2020