2015-2020 Ford F-Series Pickups
How to upgrade the stereo system in your Ford F-Series pickup

In brief: This Crutchfield Research Garage article gives you an overview of your truck's stock stereo system and your aftermarket upgrade options. We'll tell you all about:
- The factory stereo system
- Removing the factory radio
- Removing the factory speakers
- Adding more bass
- Other options for your F-Series
Then, use our vehicle selector to find the gear that will fit your Ford truck.
Overview of the Ford F-Series
Like Old Man River, the Ford F-Series just keeps rolling along. From the incredibly popular F-150 line to the beefy, hard-working Super Duty trucks, the F-Series is as close to being America’s Truck as any pickup can be. Interestingly, it's also Canada’s Truck, judging by the sales numbers up north.
The F-Series is, as always, available in a variety of trim levels – from bare-bones fleet trucks to maxed-out luxo-trucks that are arguably nicer inside than most luxury cars from even five years ago. Whether you want to move a house or drive a truck that costs (almost) as much as a house, there’s an F-Series for you.
The latest generation of the F-Series is a big leap forward in pickup technology, with revolutionary aluminum body panels, adaptive cruise control, and a host of other features that moved the bar quite a bit in the intensely competitive full-size pickup category. And we didn’t even mention the Raptor, which is basically the GT500 of off-road trucks and is therefore awesome.
If you’re looking for stereo gear for your F-150, F-250, F-350, F-450, or, yes, Raptor, you’ve come to the right place.

The 4.2" factory LCD can be replaced with a healthy number of aftermarket receivers (Crutchfield Research Photo)
The factory stereo system
When you’re talking about the stock stereo system in an F-Series, you could be talking about anything from a plain old AM/FM radio (with a clock!) to a 10-speaker premium system with pretty much every bell and whistle available. For our purposes, though, it all comes down to what you can replace and what you can’t. The more basic the system, the easier the upgrade.
Trucks with the 4.2” radio
Trucks with the 4.2" receiver can be upgraded pretty easily, though you may have to modify the subdash a bit to make certain receivers fit into the cavity. We’ll make sure you get the correct wiring harness adapter and dash kit you need for your installation, and we’ll even give you a nice discount when you order if from Crutchfield.
With the 4.2" receiver, you’ll need the iDatalink KIT-FTR1 factory system adapter (along with the Maestro ADS-MRR module, sold separately). This combo will give you everything you need to install an aftermarket stereo and wire it up to your Ford pickup. With any car stereo, this package retains your amplifier and backup camera (if equipped), along with your steering wheel audio controls.
Detailed stereo and speaker removal instructions
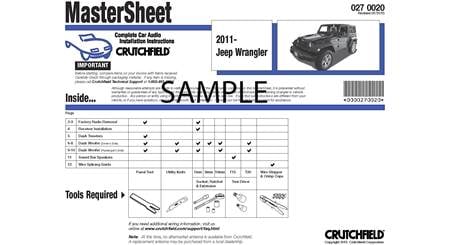
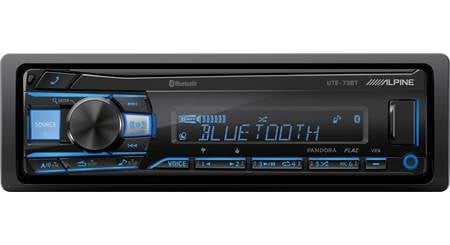
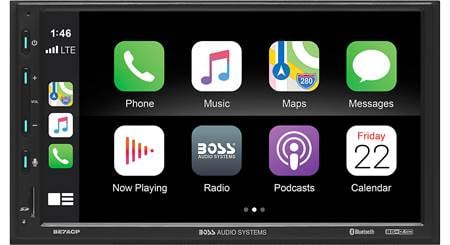
If you install an iDatalink-compatible stereo from Alpine, JVC, Kenwood, or Pioneer, you'll be able to retain:
- your truck's SYNC features, including hands-free calling and music streaming
- fader control and factory amp functionality
- the rear seat entertainment system (if present)
You can set up gauges on your new stereo's touchscreen to check engine performance and other vehicle data, such as tire pressure, battery voltage, and various warnings. You can choose which gauges you want to see on the screen, and you'll even be able to check the engine codes when a warning light comes on.
Trucks with the 8” radio or Premium audio system
For trucks equipped with the 8" LCD and/or the Premium audio system, the situation is quite similar. You'll need an iDatalink-compatible receiver, a dash kit, and the appropriate IDatalink module. Enter your vehicle info to see the aftermarket stereos that will fit your Ford truck.
Got questions? We’re guessing you do, and we’ll be happy to answer them for you. Give us a call and talk to one of our expert Crutchfield Advisors. We’ll help you get everything you need.

Removing and replacing the 4.2" radio is a do-able DIY project (Crutchfield Research Photo)
Removing the factory radio
Before you do anything with any of the stereo gear on your F-Series truck, eject whatever might be in the disc player, then set the parking brake and disconnect the negative battery cable to prevent any electrical short. This will also prevent you from accidentally deploying the airbag, getting a nasty shock, or finding out what it’s like to be one of those junk cars at a monster truck show.
When you’re removing the stock 4.2" LCD receiver, you’ll start by pulling up the rubber mat inside the top dash tray. Remove the two exposed 7mm screws, then pry up the rear edge of the top dash tray to release three retaining clips. Disconnect the wiring harness and remove the tray, then remove the two exposed 7mm screws.
Next, pry out the receiver/climate control panel to release eight retaining clips, then disconnect the wiring harnesses and remove the panel. Remove the four 7mm screws securing the radio chassis, then remove it and set it aside.
Once the old receiver is out, follow the instructions included with your dash kit and wiring harness to get the new receiver ready for installation. Once that’s done, secure the new stereo using the screws removed earlier, then test it to make sure it’s working properly. If it is, start putting the dash back together.
If you run into a rough spot, remember that every Crutchfield purchase includes free tech support for the life of your gear. Our experts are right here in Virginia, and they’re available seven days a week. They know their stuff, too.
Tools needed: Panel tool, 7mm socket, ratchet and extension
Read our Car Stereo Buying Guide for shopping tips and advice.
Shop for car stereos that fit your Ford F 150 King Ranch

Speaker replacement will improve the audio in any Ford F-Series (Crutchfield Research Photo)
Removing the factory speakers
The number of speakers in your F-Series truck depends on the cab and the audio package. They’re all reasonably easy to remove and replace. We’ll cover all of the cabs and possible speaker locations. You can focus on the ones relevant to your truck.

Your truck's tweeters can be found in the A-pillars (Crutchfield Research Photo)
Front pillar speakers
Removing and replacing the A-pillar speakers in your F-Series isn’t hard, but there are a couple of things you’ll need to do to install the new ones.
To remove the stock speakers, you’ll start by prying open the two screw covers in the pillar trim panel and removing one exposed 10mm screw at each location. Next, pull out the pillar trim panel, disconnect the wiring harness, and remove the trim panel. With the speaker exposed, all you need to do next is remove the two Phillips screws securing the speaker, and get the old speaker out of there.
There’s no wiring harness adapter available for this location, so you’ll want to use Posi-Products connectors to connect the new speakers to the truck’s wiring. You can also splice or solder here, if you prefer. You’ll also need to use our universal backstraps to secure the new speakers, since there are no mounting brackets that work in these cavities. Be sure to test the speakers before you button everything up again.
If you decide to go with tweeters that are larger than the 1.647" factory models, you’ll need to do some cutting and additional fabrication. If you’re not an impressively handy person, you might want to turn a job like that over to a car audio pro.
Tools needed: Small flat-blade screwdriver, 10mm socket, ratchet and extension, Phillips screwdriver

You'll need Posi-Products connectors to connect a new center dash speaker (Crutchfield Research Photo)
Center dash speaker
The 3-1/2" center dash speaker is pretty easy to deal with, too. Pry up the grille to release four retaining clips, then set the grille aside and remove the two Torx T20 screws securing the speaker. Pull the stock speaker out, disconnect it, and set it aside. You’ll probably want to use Posi-Products connectors here, too, but you can splice or solder if that’s your thing. Keep those screws handy, too, since you’ll need them to secure the new speaker.
Tools needed: Panel tool, Torx T-20 driver

The front doors house 6"x9" factory speakers. Replacing them is easy and wothwhile (Crutchfield Research Photo)
Front door speakers
No matter what stereo system you’re starting with, you’ll find a pair of 6"x9" speakers in the front doors of your truck. And while they’re not awful and they’re still pretty new, you can still get much better performance with a set of aftermarket speakers. The job’s not hard and the payoff is pretty impressive, so it’s a good thing to do.
The removal/replacement process begins with prying off the sail panel to release four retaining clips. With that panel out of the way, you can remove the 7mm screw underneath.
Next, you’ll move down the door and, starting at the lower front edge, pry off door pull’s outer cover to release six clips. Remove the outer cover, then remove the two exposed 7mm screws. You’ll then start at the front edge and pry off the screw cover under the door pull. That’ll release two more clips and, after you remove the cover, you’ll be able to remove two more 7mm screws.
From here, you’ll remove two 7mm screws along the bottom edge of the door panel, then pry out the sides and bottom of the panel to release six clips. Disconnect the wiring harnesses and the door release cable, then remove the door panel and store it somewhere safe and out of the sunlight.
All that’s left is to remove the four 7mm screws securing the speaker and get it out of there. Once the new speaker is secured to the adapter bracket that’s included with your Crutchfield speaker purchase and connected to the speaker wiring adapter (also included free), you’re ready to secure the new speaker using the screws you removed earlier.
Test the speakers and make sure they’re working. If they are, you can start putting the door back together. As you’re doing this, make sure the wires aren’t messing with window operation and also check the door lock and release operation to be sure that’s all copacetic.
Tools needed: Panel tool, small flat blade screwdriver, 7mm socket, ratchet and extension

You'll need to remove door panels to replace the speakers in your F-Series (Crutchfield Research Photo)
Rear door speakers (F-150 SuperCab)
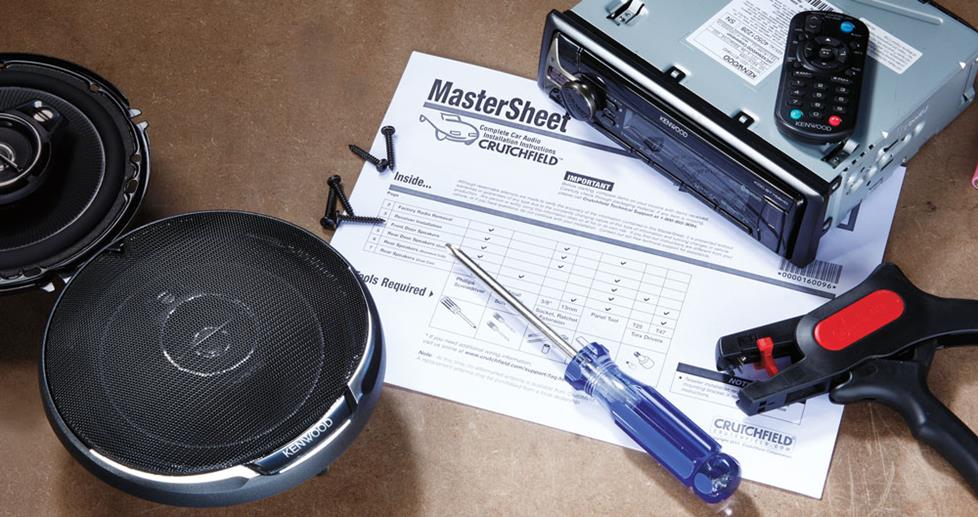
The F-Series SuperCab’s rear door speakers are 6-3/4" models that can be replaced by a pretty healthy selection of aftermarket speakers. The speaker removal and replacement process is very similar to the work done on the front doors, so rather than type out the same basic stuff, we’ll skip the details here. They’re all included in your Crutchfield MasterSheet anyway, so you’ll be just fine.
The important thing to remember when you’re done installing your SuperCab’s new speakers is that in addition to making sure the doors and windows are working like they’re supposed to, you’ll also want to make sure the seat belts are secured properly. Safety matters, so pay attention when you’re putting those back in place.
Tools needed: Panel tool, 7mm & 10mm sockets, ratchet and extension, Torx T-50 driver

The SuperCrew has 6-3/4" speakers in the rear doors (Crutchfield Research Photo)
Rear door speakers (SuperCrew)
In the F-Series SuperCrew, the doors are bigger, but the stock speakers are still 6-3/4" models. You have plenty of replacement options, and since Ford didn’t decide to completely rethink the whole notion of how a door works back here, the job is pretty similar to the front door removal/replacement process. This is a thoroughly worthwhile project for anyone who values great sound, and all the details can be found in your MasterSheet.
Tools needed: Panel tool, small flat blade screwdriver, 7mm socket, ratchet and extension

Premium systems include an 8" subwoofer on the rear wall of the cab (Crutchfield Research Photo)
Rear wall subwoofer (F-150 SuperCrew)
In F-150 SuperCrew trucks equipped with either the Sony or B&O systems, you’ll find an 8" dual voice coil subwoofer in the rear wall of the cab. It’s not hard to reach and replace, but you will need to drill new mounting holes for an aftermarket subwoofer. Not a hard job, really, but any time you’re drilling into a vehicle you’re probably still paying for, you should work carefully, know what you’re drilling into, and always wear eye protection. Also, this is a low-impedance sub, so keep that in mind when you’re shopping for an aftermarket subwoofer.
To remove the stock sub, you’ll start by folding down the rear seat back cushion so you can get to it. Remove one 1/2" bolt and two 1/2" nuts securing the subwoofer enclosure to the back wall. Next, you’ll remove one 8mm screw from the rear of the enclosure and eight 7mm screws from the front of the enclosure. Pull the sub out, then disconnect it and remove it from the enclosure.
Grab your new sub, place it in the enclosure, and mark the new mounting holes. Once that’s done remove the sub and drill the new mounting holes with a 1/8" bit. From here, connect the wiring, secure the sub to the enclosure, and test the sub. If it works, you’re ready to reinstall it on the back wall.
Tools needed: 7mm & 8mm sockets, ratchet & extension, deep-socket 1/2" socket, ratchet and extension, power drill with 1/8" bit
Rear wall subwoofer (Super Duty trucks)
A rear wall sub is also available in the bigger, brawnier 2017-up Super Duty trucks, and while the removal/replacement process is similar, there are some key differences. For one thing, this 8" sub is a 4-ohm model, so keep that in mind when you’re shopping.
You’ll start by folding down the right rear seat back cushion, then lifting the left rear seat back cushion up. Reach behind that left seat back and pull upward on the latch pin to release the seat back, then fold the seat back cushion down.
Remove one 13mm bolt and two 13mm nuts securing the subwoofer enclosure, then disconnect the harness and remove the enclosure. Remove the four Torx T-20 screws securing the subwoofer to the enclosure and disconnect harness, then remove the grille. Pry out the subwoofer and remove it.
Grab your aftermarket sub and place it in the enclosure. Mark the new mounting holes, then remove the sub and drill the new mounting holes with a 1/8" bit. From here, connect the wiring, secure the sub to the enclosure, and test the sub. If it you hear the pleasingly thumpy sounds you want, you’re ready to reinstall the whole shebang on the back wall of the cab.
Tools needed: Panel tool, deep-socket 13mm socket, ratchet & extension, Torx T-20 driver, drill and 1/8" bit
Read our Car Speakers Buying Guide for more information.
Shop for speakers that fit your Ford F 150 King Ranch

Your SuperCab or SuperCrew truck offers a limited amount of space for a subwoofer enclosure (Crutchfield Research Photo)
Bass in your F-Series
If you don’t have a stock sub in your truck and you want to boost the bass, you have a 56" wide x 6" high x 10" deep space to work with under the rear seats of your F-Series SuperCab or SuperCrew. That’s not a ton of room for a sub box, but it’s better than the Regular Cab truck, which offers pretty much nothing. A compact powered sub might work, though. Give us a call and talk to an advisor.
There are also some great-sounding custom-fit bass options for your F-Series truck, including thunderous JL Audio Stealthbox enclosures. Enter your vehicle information to see what’s available for your Ford.
Shop for vehicle-specific subwoofers for your Ford F 150 King Ranch

Adding Dynamat to your truck's doors will help quiet road roar
Other options for your F-Series
Here are some other cool upgrade ideas for your F-150, F-250, or F-350
Quiet the roar with sound damping
Your Ford F-Series is to smaller vehicles what a Plott Hound is to a Yorkie. It’s big, it's buff, and it's only slightly less aerodynamic than the RV it's probably towing. To prevent wind noise and road roar (espeically if you're running big, knobby tires) from undoing the great work your new stereo is doing, make sure you install Dynamat when you're replacing your speakers. This soundproofing material is a great way to dampen the sounds you don't like and get more enjoyment from the ones you do.
For more information on installing Dynamat in a pickup, check out an informative series of articles on our 2004 F-150 project truck. The details are a bit different, but it's a neat way to see what's possible.
Improve visibility with a rear-view camera
With or without a trailer, these trucks are big, tall, and hard to maneuver. A rear-view camera can be a massive help when you're backing up in a crowded parking lot. Or an open field, for that matter. We offer cameras from Kenwood, Alpine, Pioneer, and more. Some are designed to work with same-brand receivers only, but others come with a composite video connector and will work with almost any video receiver.
Preserve your carpets with floor mats
If you drive an F-150, F-250 or F-350, you're probably going to track some mud and muck into your truck every now and again. When that happens, it's a good idea to have a set of WeatherTech Floor Liners protecting the carpeting. These incredibly durable mats trap moisture, contain dirt, and keep your factory carpets looking good.
Security systems and remote start
Installing a security system in your Ford pickup won't be easy (security systems rarely are), but it's definitely a good idea if you tow long distances and stop overnight. Our Crutchfield Advisors can help figure out what you need to get the job done, but we usually recommend taking your truck to a professional installer.
Adding remote start capability to your truck lets you warm it up in the winter or cool it down in the summer. Installation is usually easier with these systems, but we still ask that you call to order so that we can make sure you get the right harness for your ride.
Let's get started!
Ready to shop? Use our vehicle selector to find the gear that will fit your car or truck. If you have questions, give us a shout via phone, chat, or email








Henri Wright from New Lenox
Posted on 4/26/2021
Looking for information, I've replace the entire sound system and now I can't get power to the kicker sub. Everything worked fine when the apim was in. Now that the radio has been replaced I can't seen to get power to the sub. DO I need to replace the Kicker sub, and replace it with a different amped sub enclosure>
Jon Paul from Crutchfield
on 4/27/2021
mike
Posted on 9/19/2020
Where do you recommend grounding the amps one these aluminum body F150's? I've read mixed things on this from going to frame or all the way to the battery, However there is a bulletin out from Ford regarding grounding to battery directly as the Ford's have a Battery management system/grounding sensor near the battery.
Jon Paul from Crutchfield
on 9/21/2020
Peter Jenkins from Pembroke Pines
Posted on 9/4/2020
I purchased the JBL's Concert Edition Premium Audio for my 2015 f150 crew cab. However, it does't give the booming bass that i desire. My question is can I purchase and replace the 8 inch woofers, amplifier and add a separate bass button to upgrade this system to get the stronger booming sound? Basically im asking if I can up grade the JBL's Concert Edition Premium Audio system because I love the custom fit under the seat. Is the plastic housing just a good as wood for the bass sound?
Jon Paul from Crutchfield
on 9/8/2020