1975-1993 Volvo 240 Series
How to upgrade the stereo system in your 240

In brief: This Crutchfield Research Garage article gives you an overview of your Volvo's stock stereo system and your aftermarket upgrade options. We'll tell you all about:
- The factory stereo system
- Removing the factory radio
- Removing the factory speakers
- Adding more bass
- Other options for your 240
Then, use our vehicle selector to find the gear that will fit your vehicle.
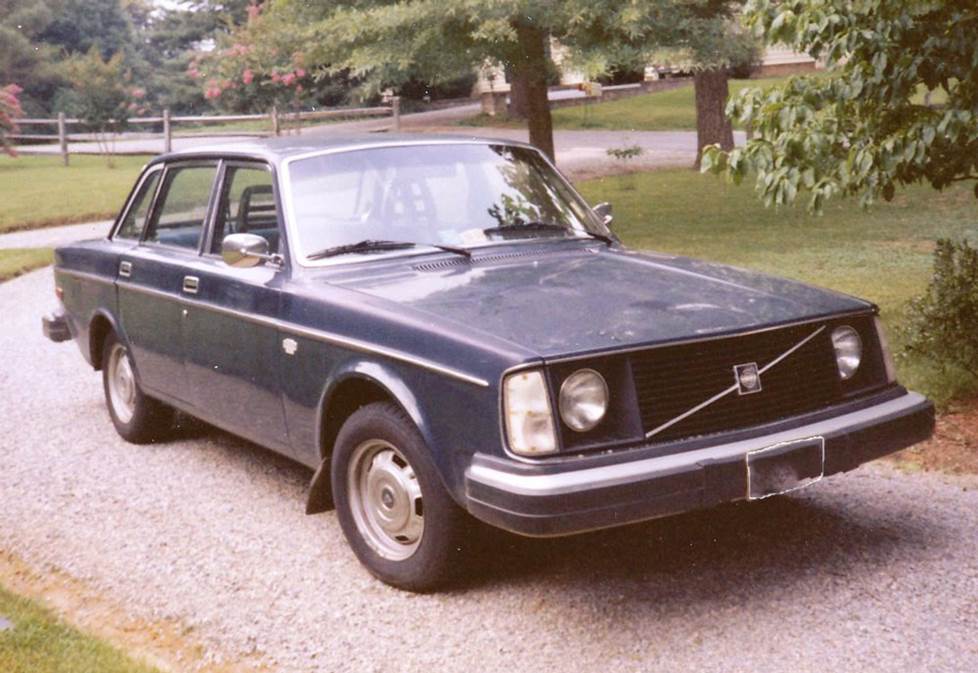
Overview of the Volvo 240 Series
Like most college towns, Charlottesville has a laid-back vibe, a fun music scene, good cheap food, annoying gameday traffic, and absolutely no place to park. It also has a remarkable number of well-loved Volvo 240's trundling around in various states of repair, which is the most college town thing ever and has been for the last forty-odd years.
We kid because we care, of course. A few of those 240's can be found in our parking lot, and if a certain writer doesn't snap out of his reverie by the end of this article, there might be another one sometime soon. Hey, not everyone's midlife crisis car is a red Corvette, okay?
Boxy, boring, safe, slow, and as comfortable as a well-worn pair of loafers, the 240 deserves every bit of its status as an anti-status kind of car. If properly maintained, they'll run long enough for you to take your grandkids to soccer practice in the same car you used to drop off their parents. If poorly maintained, a four-cylinder car will still start and (mostly) run after shooting a rod through the engine block. Don't ask us how we know that.
Ahem. The 240's stock stereo gear was pretty weak to begin with, and older aftermarket gear won't give you the connectivity you need today. An audio upgrade will make the next hundred thousand miles as much fun as the first few.
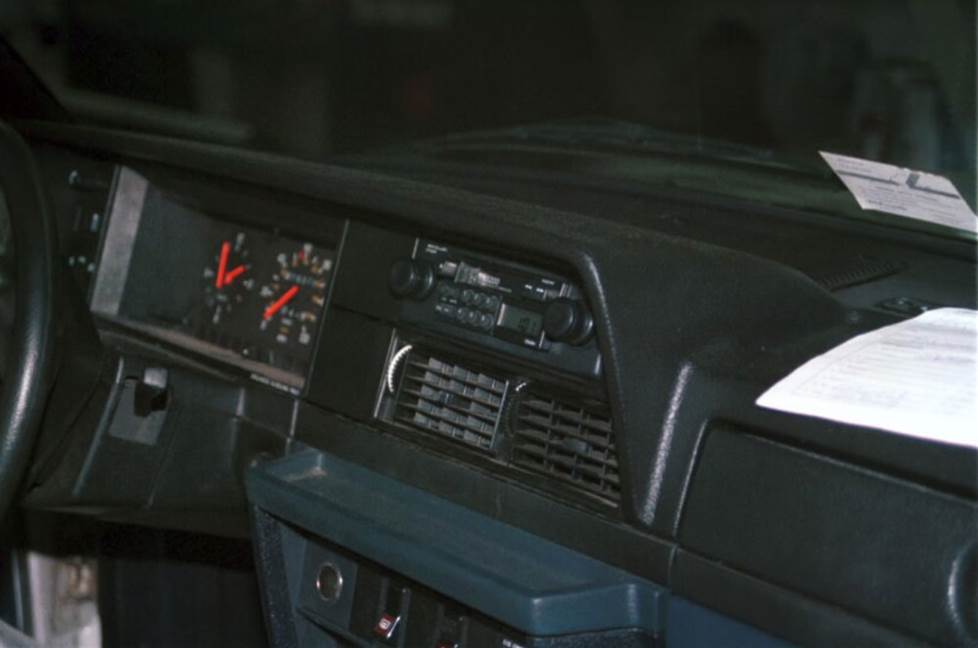
Over the years, the stock radios migrated from the lower part of the dash to the upper part (Crutchfield Research Photo)
The factory stereo system
What's in your car now is less important than where it is. Over the 240's long, long production cycle, the factory radio migrated from the bottom of the dash to the top. A basic AM/FM radio was standard, but cassette and even 8-track decks were available, too. There was even a graphic equalizer, because the eighties were awesome.
None of that gear is really worth keeping, unless you have the most pristine, factory-fresh 240 on the planet, in which case we'd like to drop by your garage and stare at it for a while — especially if it's a Bertone coupe or a turbo wagon. If your 240 is like pretty much every other 240 on Earth (still cool!), you can safely install a new single-DIN (2" tall) receiver without disturbing the provenance.
Depending on the age of your car, a stereo wiring harness adapter may not be available. In that case, you'll need to use Posi-Products connectors to connect the new receiver to the car's wiring. In some cases, you may need to run speaker wire, too. When you enter your vehicle information, our Kit Finder tool will tell you what you'll need to install a new stereo and speakers.
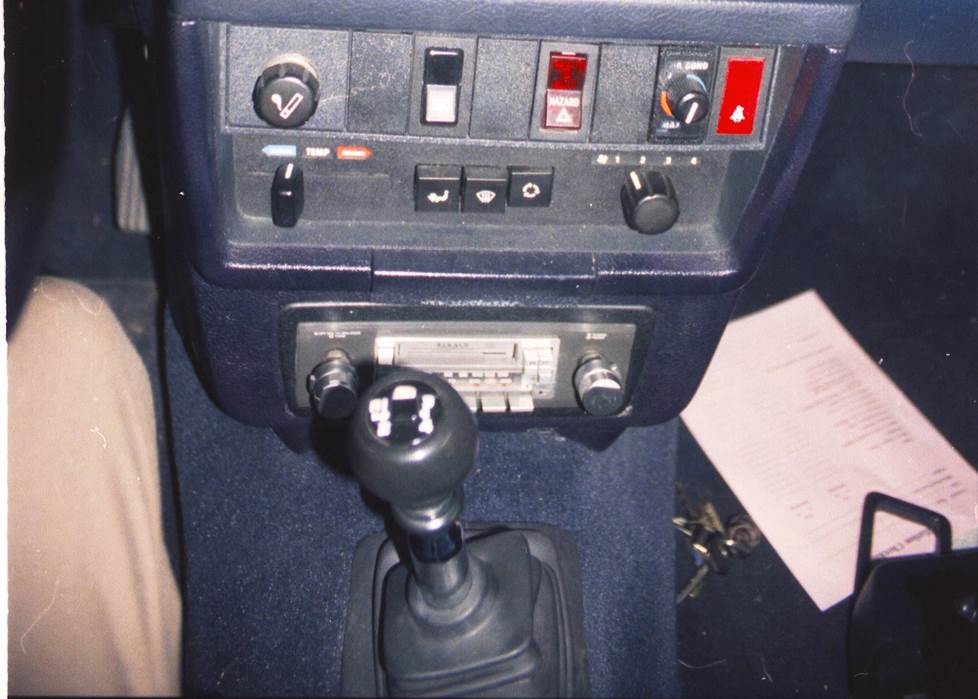
Things are a bit tight when you're replacing the lower dash model (Crutchfield Research Photo)
Removing the factory radio
Before you do anything else, set the parking brake and disconnect the negative battery cable to prevent any electrical short. Volvos are known for safety, so it'll look really bad if you get run over by your own car in your own driveway. And the jokes will pretty much write themselves.
Lower dash location
We'll start with the lower dash location used in older 240s. You'll note that there are some variations mentioned here, and honestly, there might be some more that we didn't even know to mention. The good news, both here and with anything else 240-related, there's a ton of knowledge out there in owners' forums. The job's not too hard, but work carefully — those panels are old.
Remove two Phillips screws (Torx T- 30 on some cars) from the upper sides of the center console side panels. Next, remove one retaining clip from each side of the lower sides of the center console by turning each one 1/4 turn counter-clockwise.
Remove two Phillips screws (TORX T-20 on some models) from the lower front portion of the center console, just below the factory radio opening. Some models will also have two Torx T-20 screws located in recessed holes above the cigarette lighter and also above the seat belt warning indicator.
Detailed stereo and speaker removal instructions

Carefully pull out on the front panel of the lower console, taking special care not to disconnect or damage any of the switches and controls mounted to the panel. This isn't as hard as it might sound, because the panel only needs to be pulled out far enough to access the radio mounting screws and to allow the radio to be removed from its cavity.
Remove four Phillips screws securing the radio mounting bracket to the dash substructure. On some models (We keep saying that, don't we?), there may also be two Phillips screws securing the radio from the sides of the radio cavity. If so, you'll need to remove those. Remember to hang onto all the screws you remove, because you'll need them to put the dash back together.
Locate the radio connector behind the driver’s side panel of the console, then disconnect it and the antenna cable from the radio and remove the radio.
Space is kind of tight in this area, so if the trim panel is proving difficult to remove, you may need to remove the gear shift trim.
Once the old one's out, secure the receiver mounting bracket to the dash using the screws you removed during the disassembly process. Remove the DIN sleeve and trim ring from the receiver (if they're in place), then slide the DIN sleeve into the opening in the receiver mounting bracket and secure the sleeve by bending the tabs. Connect the receiver wiring adapter (If one is available, it'll be included at a discount with your Crutchfield purchase) to the vehicle’s harness and plug the antenna connector into the receiver’s antenna receptacle. If there's no harness for your car, use Posi-Products connectors.
From here, just slide the new receiver into the DIN sleeve and attach the trim ring. Test it out, make sure it works, and if it is, start putting the dash back together.
Tools required: Phillips screwdriver, flat blade screwdriver (and possibly Torx T-20 and T-30 drivers)
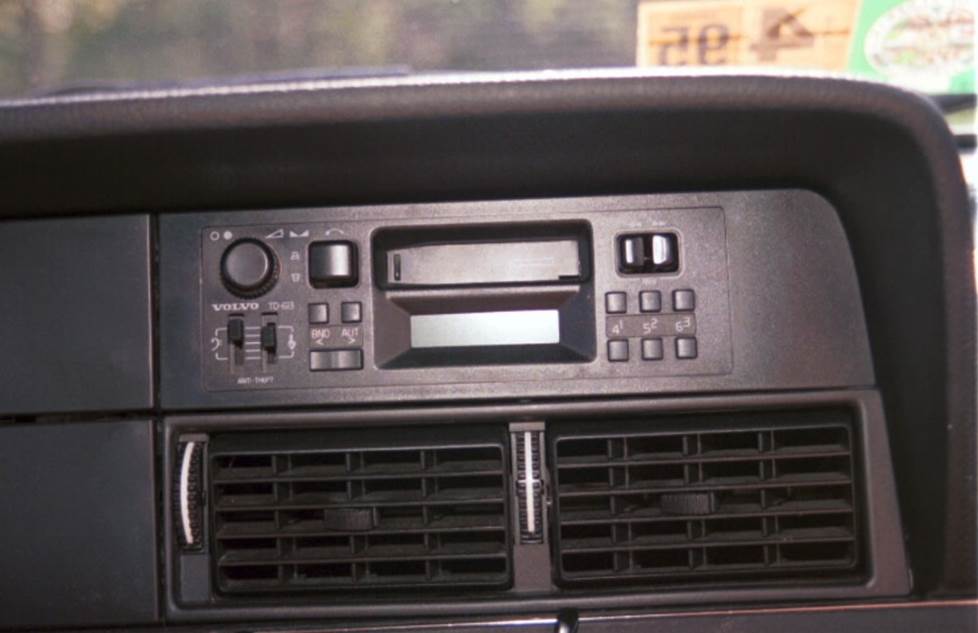
The 240's radios change a lot over the years, but they're always single-DIN (2" tall) models (Crutchfield Research Photo)
Upper dash location
If your car's receiver is in the upper part of the dash, the process is totally different and the working conditions are a little nicer. You'll start by unsnapping the small square panel (or ring around the clock, if your car is so equipped) to the left of the factory radio. Remove the two Phillips head (or Torx T-25) screws on the left of the radio, then pull the radio toward the driver’s side of the vehicle and out of dash cavity.
The radio might not move at all after you remove those two screws, but don't be alarmed. There may be a rear support bracket attached to the radio. To disconnect that support, open the glove compartment door and remove the seven Phillips screws securing the glove compartment. When you remove the glove compartment, you'll be able to access the rear of the radio from the opening and remove an 8mm screw from the rear of the radio.
Once you've done that (Hopefully, you won't have to, but…), pull the radio out of the dash cavity and disconnect the radio connector and antenna cable. If the connector cannot be located at the radio location, remove the console side panel and look for it in there. You'll deal with the panel by removing a Phillips screw from the top and turning the lower retaining clip 1/4 turn counter-clockwise. If necessary, route the radio harness to the radio and reassemble the center console side panel.
Installing the new receiver is basically the same process used on the lower dash radio, and all the steps are detailed in the Crutchfield MasterSheet included free with your Crutchfield purchase.
Tools required: Phillips screwdriver, panel tool, flat blade screwdriver (also possibly a Torx T-25 driver and maybe an 8mm driver)
Read our Car Stereo Buying Guide for shopping tips and advice.
Shop for car stereos that fit your Volvo 240 Series
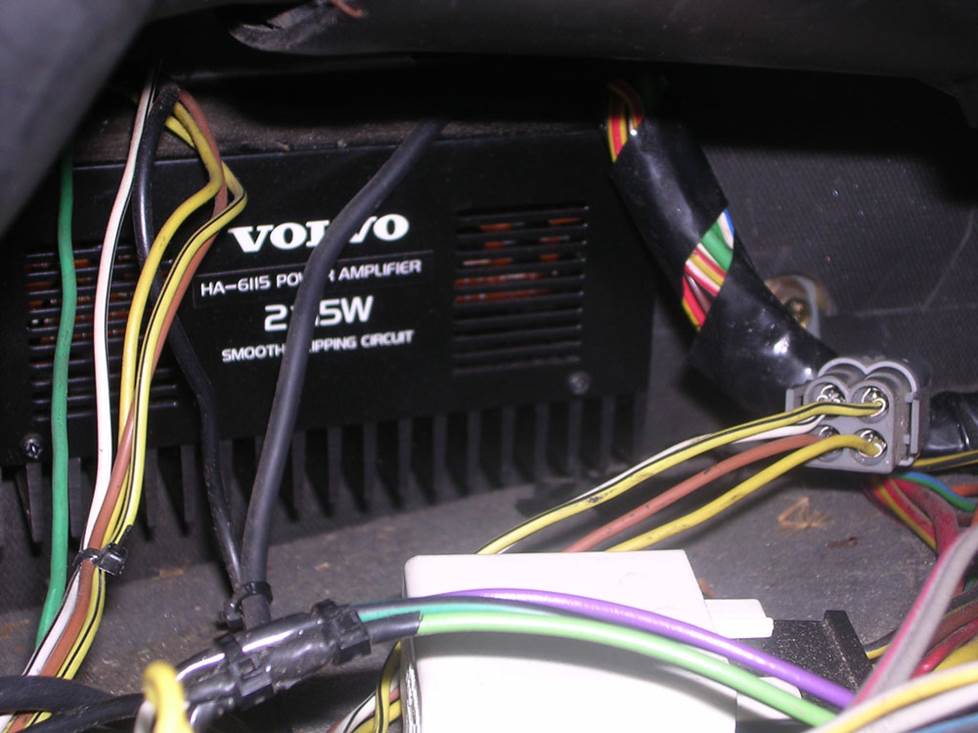
This amp is located behind the glove box. If you have one, you'll need to bypass it when you install a new radio. (Crutchfield Research Photo)
Bypassing the amplifier
If your car is equipped with rear speakers, but you don't see a rear speaker harness at the radio, that means there's an amplifier located in one of two places. Neither amplifier will work with any radio other than the stock model, so you'll need to bypass it when you install an aftermarket unit.
On older 240s, the amp is located behind the glove compartment. On newer models, it's mounted to the rear side of the lower dash storage pocket. The means of getting to them and bypassing them vary, of course, and all the details can be found in your Crutchfield MasterSheet.
This bit can be a bit challenging for the first-time DIY-er, but if you're reasonably experienced with this sort of stuff, you'll be fine. In either case, remember that your Crutchfield purchase includes free tech support for the life of your gear. Got questions? Give us a call. We can help you get the job done.
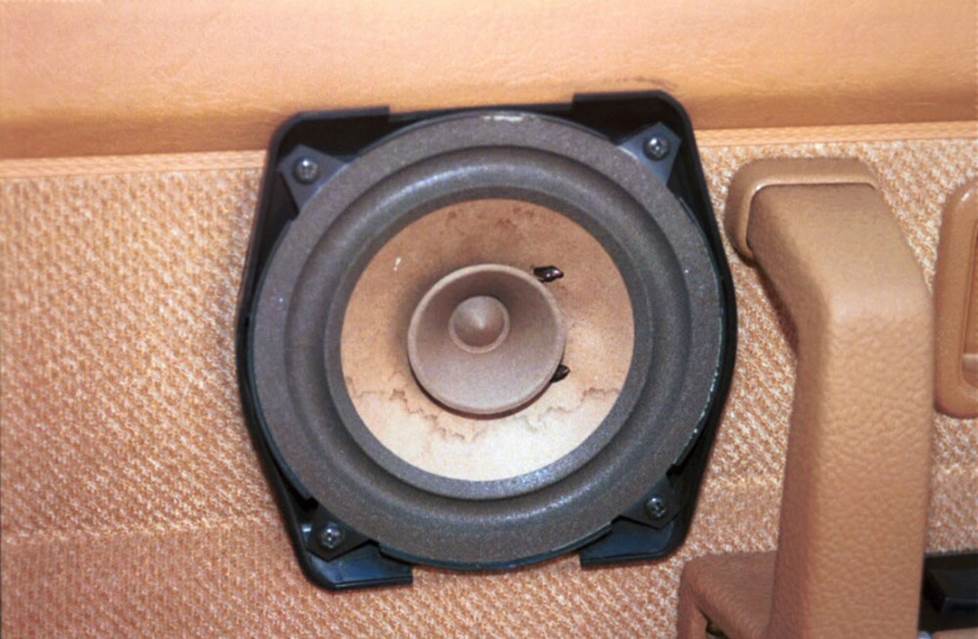
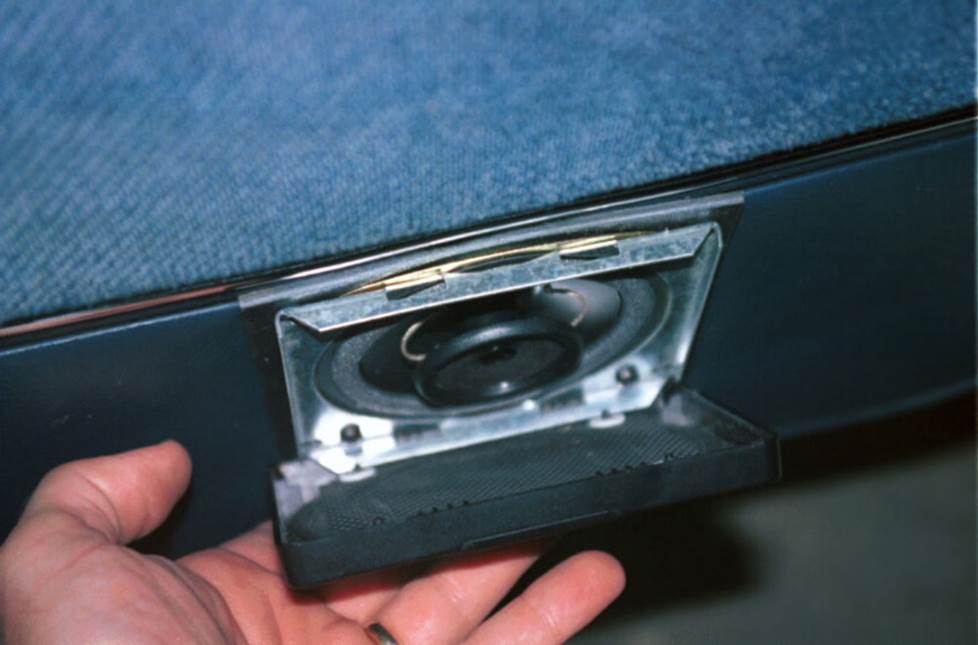
The front speakers are pretty weak, but they're well-located (Crutchfield Research Photo)
Removing the factory speakers
Depending on model year and factory specs, the Volvo 240 will have speakers in the front and rear doors, plus the rear deck (sedans and coupes) and rear side panel (wagons).
The're not the best-looking speakers and they're also not very powerful (Crutchfield Research Photo)
Front door speakers
The 240's front door speakers aren't big (4" or 5"), but unlike most door speakers, they're closer to your ears than your ankles. That means better sound staging, which in turn means you'll really hear the improvement when you install aftermarket speakers.
Replacing the speakers isn't hard, generally speaking, but there are some interesting parts. How many and how interesting depends on your car's model year and standard features. There might be some cutting, there might be some drilling, and you might need to order speakers that come with their own grilles. In many cases, you will need our universal backstraps to mount the new speakers. In almost all cases, you'll need Posi-Products speaker connectors to connect the new speakers to the factory wiring. And you might need to run new speaker wire.
All that said, the job's not that awfully hard for the average DIY-er. You'll need some basic tools, a reasonable amount of patience, and our detailed, step-by-step Crutchfield MasterSheet instructions. If you have to use a drill, remember to survey the area around the drilling spots, work carefully, and wear eye protection.
Tools required: Phillips screwdriver, flat blade screwdriver, panel tool, pliers, possibly a drill

The rear door speakers are a little lower, but they're still reasonably easy to replace (Crutchfield Research Photo)
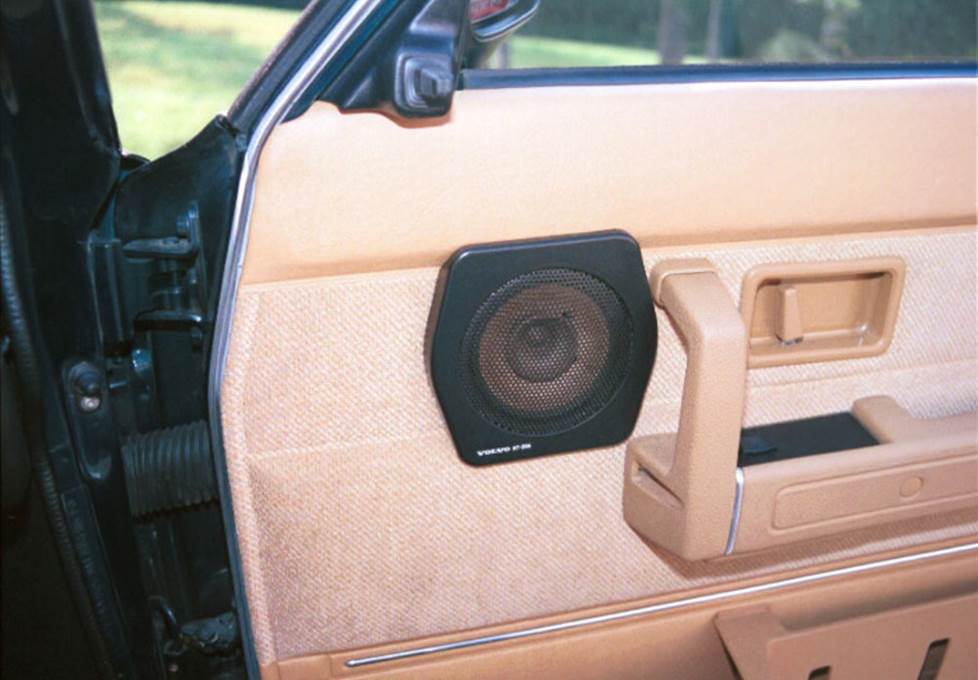
Rear door speakers
The rear door speakers are a bit lower on the door panel than the fronts, but they're removed and replaced in largely the same way. Various different stock speakers were used over the 240's long lifespan, so there will be some differences depending on model year and factory equipment. If you’re replacing older aftermarket speakers, all bets are off, but if the previous installer wasn't a total hack, some steps might be a bit easier.
Complete, step-by-step rear speaker removal instructions can be found in your MasterSheet, and help from our expert tech team is just a phone call away.
Tools required: Phillips screwdriver, panel tool, pliers
If your 240 has rear deck speakers, you'll definitely want to replace them (Crutchfield Research Photo)
Rear deck speakers (Sedan and Coupe)
If your 240 sedan or coupe has factory rear deck speakers, there are three possible mounting methods to choose from. None of them are especially difficult, so this is a good DIY project. It's also a highly recommended project, because anything that sits in that deck for a long time will be totally fried by sunlight. Depending on the car, you can install 5-1/4", 6-1/2", or even 6"x9" speakers back here, but be sure to measure the available space before you order.
In Method 1, you'll start by removing the two wing nuts below the rear deck that secure the speaker and grille to the deck. Disconnect the speaker connectors and lift the speaker/grille assembly out of the deck. Remove the four screws securing the speaker to the grille and remove the speaker. Secure your replacement speaker assembly to the grille, connect the speaker connectors, and reinstall the speaker/grille assembly.
Method 2 is a bit easier. Pry off the speaker grille with a panel tool, then remove the four screws securing the speaker to the grille. Pull the speaker out of the grille and disconnect the harness. With the old one out of the way, all you need to do is connect and secure the new ones. In some cases, the stock speakers are riveted to the rear deck. In that case, the rivets must be drilled out and replaced with screws.
Method 3 is a lot like Method 2, but the speaker/grille assembly is attached to the rear deck with Torx screws. You'll need a Torx T-20 driver to remove them.
If your car didn't come with rear speakers and none of the previous owners got around to adding any, you can install your own. You'll need to cut the appropriate holes in the deck and do the wiring, though. This isn’t a big deal for the experienced DIY-er, but might be a bit much for a beginner. Assess your skill level appropriately.
Tools required: panel tool, Phillips screwdriver or T-20 Torx driver
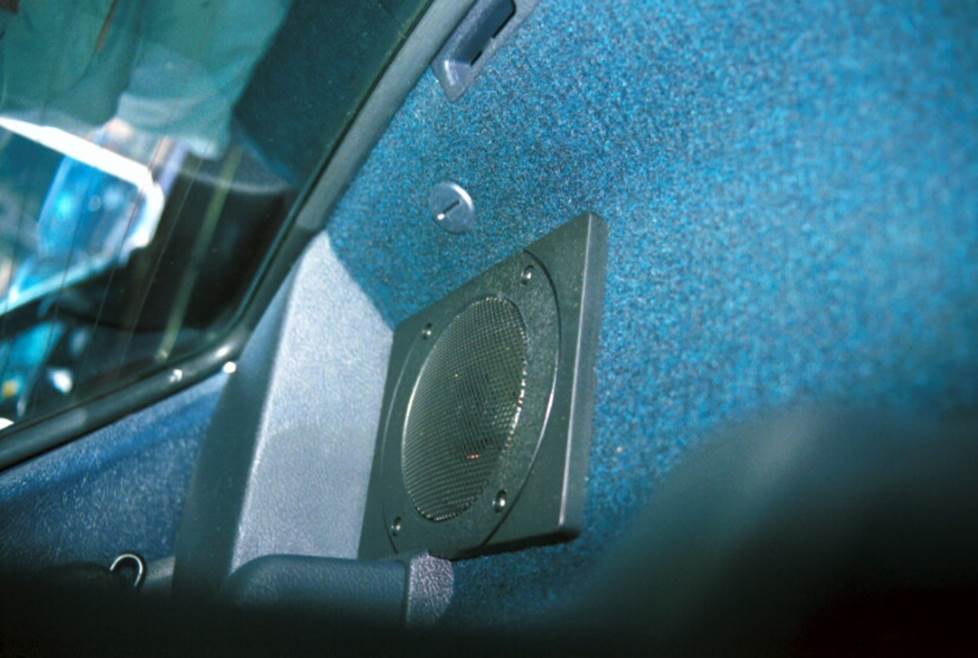
You'll find rear side panel speakers in some 240 wagons (Crutchfield Research Photo)
Rear side panel speakers (Wagon)
Volvo 240 wagons are among the coolest cars around, and anyone who says otherwise will be challenged to a duel. Of wits, we mean, Okay, not even that. Hey, it's a free country; think what you want. But these are awesome cars, and new speakers will make an awesome wagon even awesomer. Is that a word yet? Spellcheck says no, but hey, it's the Internet, so maybe soon.
Anyhoo, you'll start the removal process by using a panel tool to pry off the speaker grilles. Remove the four Phillips screws securing the speaker to the side panel — unless they're riveted to the side panels, in which case you'll need to drill out the rivets. This isn't hard, but any time you're using a drill, remember to work carefully and wear eye protection.
Pull the speaker away from the side panel and disconnect it. Connect the new speaker wiring to the car's wiring (adapters or Posi-Products speaker connectors will be required). Secure the new speakers to the side panels using the hardware supplied with your speakers. You may need to bend some metal to create the necessary clearance for your new speaker.
Tools required: panel tool, Phillips screwdriver
Read our Car Speakers Buying Guide for more information.
Shop for speakers that fit your Volvo 240 Series
Both the sedan and the wagon offer tons of space for aftermarket subwoofers (Crutchfield Research Photo)
Bass in your Volvo 240
One of the 240's more notable traits is that it offers gobs of storage space. The sedans and coupes have trunks large enough to hold an actual trunk, while the wagons can hold pretty much anything short of an armoire. Needless to say, if you want to add a big subwoofer, there's room to work with. if you're concerned about more practical matters, a powered subwoofer will provide plenty of boom without taking up too much cargo room.
Learn more about building a bass system in our Car Subwoofer Buying Guide.
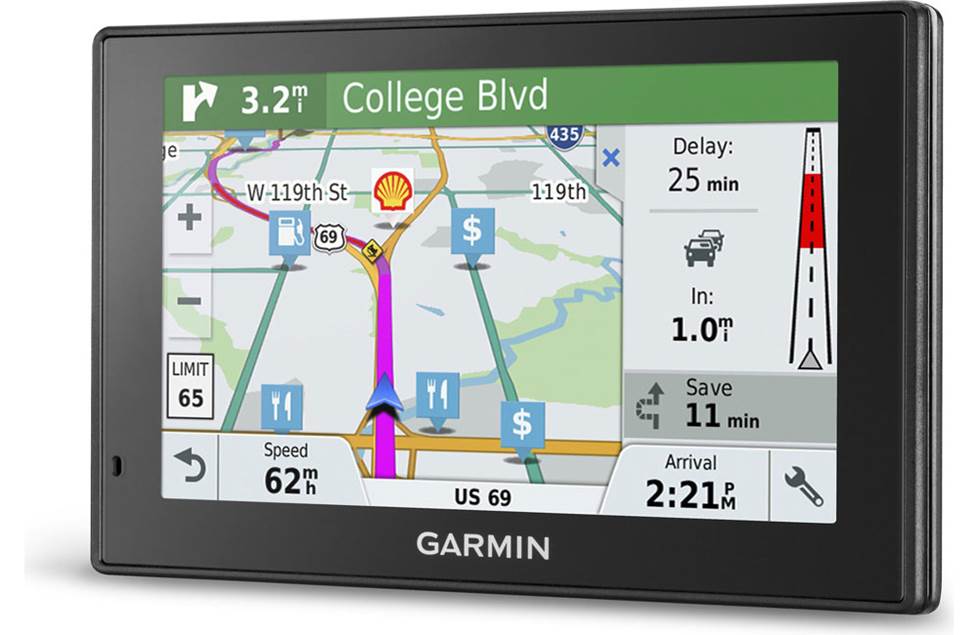
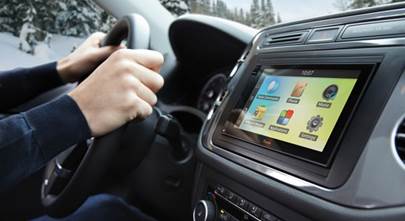
A portable GPS will be a great addition to your 240
Other options for your Volvo 240 Series
Here are some other upgrade ideas for your Volvo.
Portable GPS navigation
You can still get aftermarket nav functionality without installing a touchscreen nav receiver in your car's dash. A portable GPS will mount on your dash and give you turn-by-turn directions, traffic updates, and everything you need to make your road trip go smoothly. Plus, when you get where you're going, you can put the GPS in your pocket and use it to find points of interest around town.
Sound deadening
One good way to get the most out of your new sound system is to keep more of the sound in your car. The Dynamat Xtreme Door Kit is the perfect way to seal out road noise and seal in the sound. This heavy-duty insulating material is easy to install, and it really makes a difference. This is a great thing to do while you’re installing new speakers. One kit will take care of the front doors.
Antenna replacement
Replacing the stock antenna on your 240 will definitely help you get the best possible radio replacement with your new receiver. Aftermarket models are available, and we include detailed replacement instructions in your free Crutchfield MasterSheet.
Security
Installing a security system in your Volvo isn't easy (security systems rarely are), but it's definitely a good idea. Our Crutchfield Advisors can help figure out what you need to get the job done, but we usually recommend taking your car and new gear to a professional installer.
Let's get started!
Ready to shop? Use our vehicle selector to find the gear that will fit your car or truck. If you have questions of your own, give us a shout via phone, chat, or email


Comments (0)