2001-2005 Pontiac Aztek
How to upgrade the stereo system in your Aztek


In brief: This Crutchfield Research Garage article gives you an overview of your Aztek's stock stereo system and your aftermarket upgrade options. We'll tell you all about:
- The factory stereo system
- Removing the factory radio
- Removing the factory speakers
- Adding more bass
- Other options for your Aztek
Then, use our vehicle selector to find the gear that will fit your Aztek.
Overview of the Pontiac Aztek
Despite its, rather, um, distinct styling, the much-maligned Pontiac Aztek has enjoyed a well-deserved reassessment of late. Thanks to a certain award-winning drama series involving a former high school teacher with an entrepreneurial bent, the Aztek has somehow made an improbable leap from awkward freak to geek chic. As weird as it might seem, the one vehicle that even minivan owners openly mocked is now kind of...cool. Sorry about that, minivan owners.
Think of the Aztek as a motorized EDC bag, into which you can cram all the stuff and things you need for an afternoon of tailgating, a weekend of camping, or a lifetime of fleeing the zombie apocalypse. Yes, the front end looks like an '02 Grand Prix with a Saturn Sky growing out of its hood, and no, side cladding will never, ever be considered attractive, but the Aztek's true beauty* lies in its utility. The thing has a removable cooler, for crying out loud. And hey, you can always paint over the side cladding.
There's also plenty of room for stereo upgrades in the Aztek. The unenlightened will probably still make snide remarks about your ride, but with a new receiver, some powerful aftermarket speakers and a thunderous subwoofer, you'll never hear a word.
*Editor's Note: Says a writer who wears cargo shorts every day from late March until sometime in October....
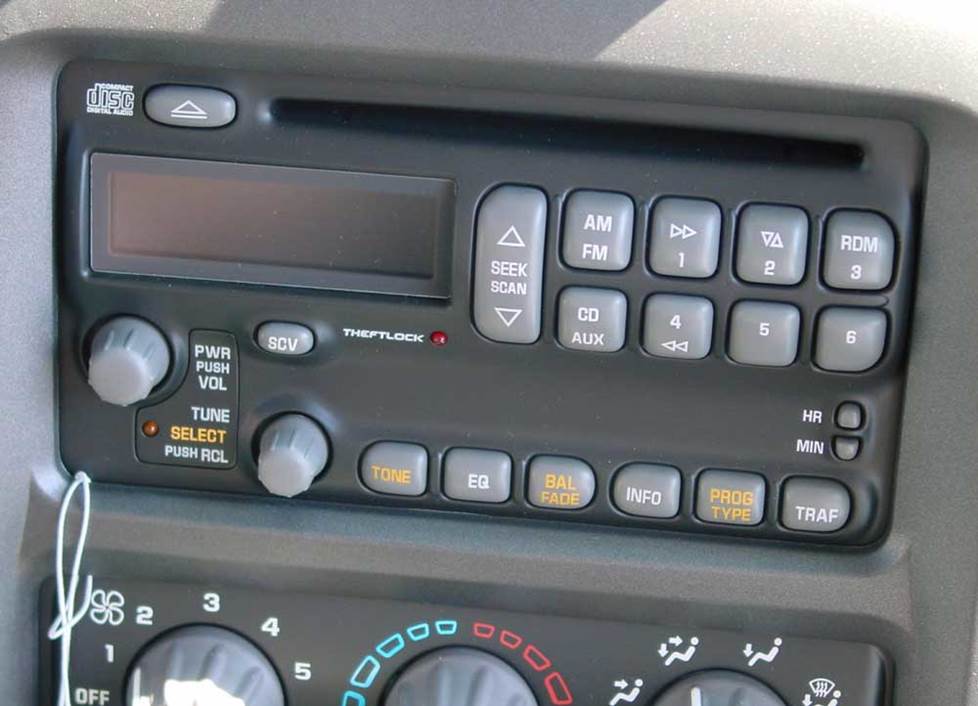
The Aztek's factory radio is a rather basic piece (Crutchfield Research Photo)
The factory stereo system
The Aztek's factory stereo mostly consists of the usual early-aughts GM corporate gear. There was a base AM/FM/CD system with six speakers, and a premium 10-speaker package. An in-dash DVD player was added to the option sheet later on.
The coolest part of the Aztek's 10-speaker system is the control panel at the rear of the vehicle. This is a very handy thing for tailgating or camping. The speakers are even angled to send the sound out to where all the fun's happening.
In terms of performance, his gear wasn't all that awesome to begin with, and it's old now. A new receiver and speakers will really make a difference in your Aztek.
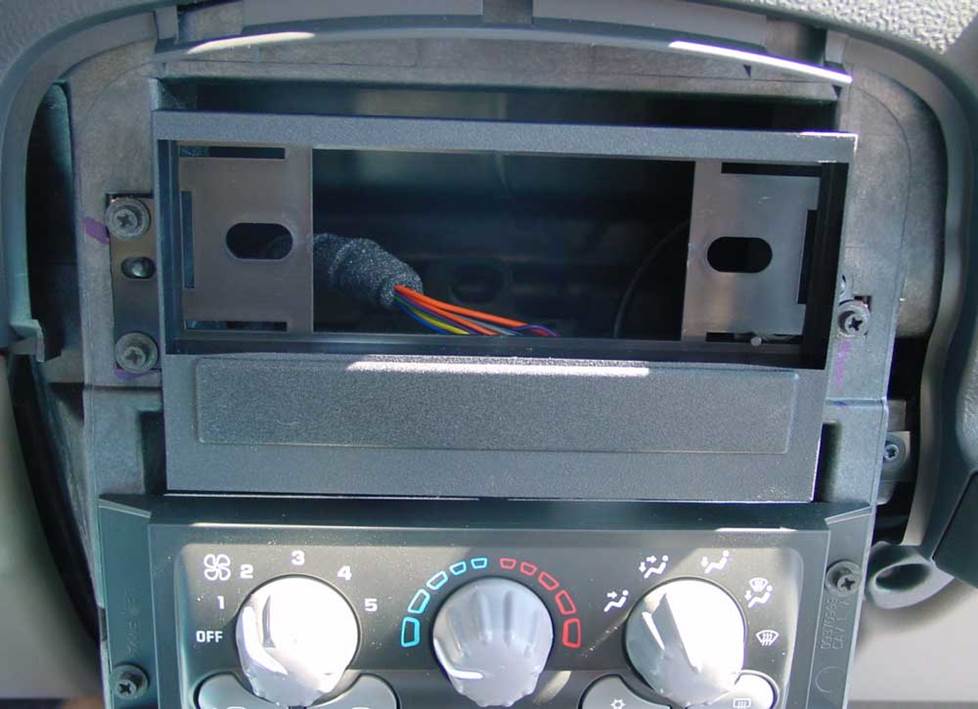
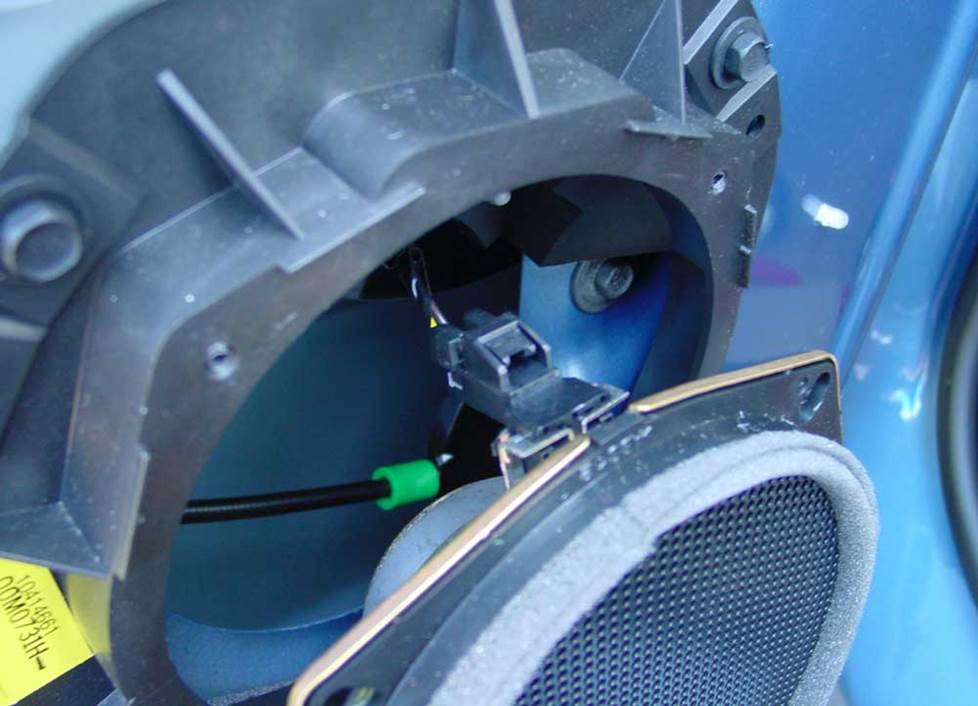
Here's a look at one of the radio kits used to install a new stereo in your Aztek (Crutchfield Research Photo)
Removing the factory radio
Removing and replacing your Aztek's old receiver is a reasonably uncomplicated procedure. You'll start by removing a couple of Torx T-15 screws, one each from the front bottom corners of the radio/climate control trim panel. Next, you'll want to move the gearshift to the lowest gear – but make sure you engage the parking brake before you do.
Now, starting at the bottom, pull outward on the trim panel, work the rubber gasket out, and pry the top portion of the panel loose to release three plastic clips. Remove three 7mm screws from the radio, pull it out, and disconnect the harness.
To install a double-DIN (4" tall) radio or a single-DIN (2" tall) radio with a long chassis, you'll need to unbolt or cut out the factory radio's rear support bracket to make room for your new car stereo.
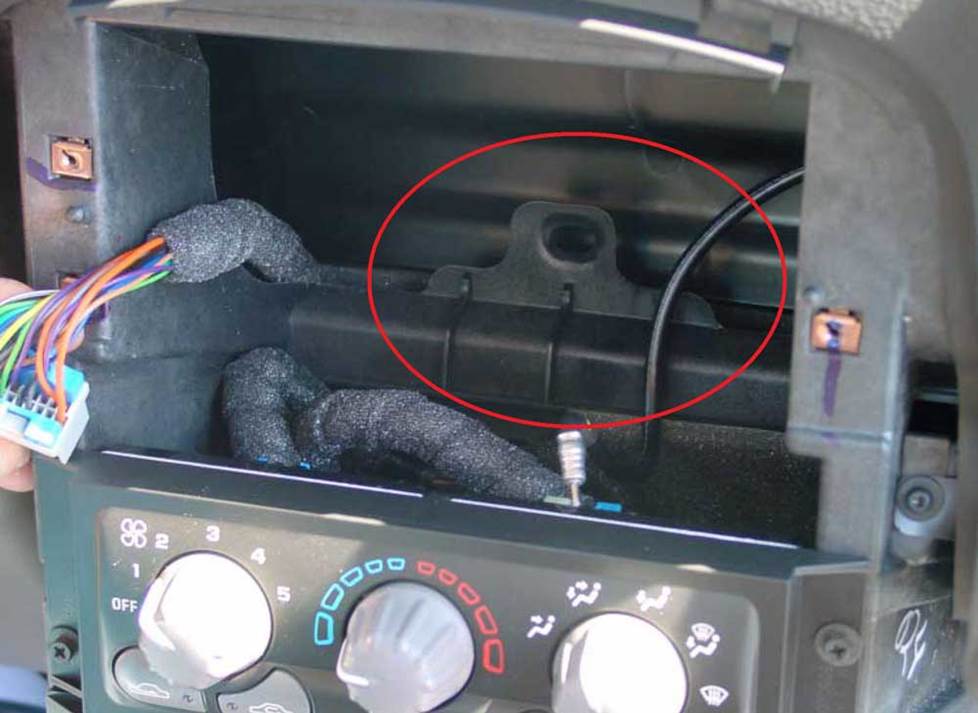
You might have to remove this bracket to make room for your new stereo (Crutchfield Research Photo)
If you're working with a DVD-equipped Aztek, you'll lose the factory satellite radio capability when you replace the stock receiver. And while the DVD player will still work if you replace the radio, you'll only be able to hear audio through the factory headphones.
In order to connect a new stereo, you'll need a special integration adapter. Today’s vehicles have electrical and computer functions running through the stereo wiring, so stereo replacement involves more than just connecting a few wires. The integration adapter lets you install the new stereo without disrupting any other functions and retains your warning chimes and OnStar functionality (if present). Plus, we’ll give you a bit of a discount if you purchase it with your new stereo.
Detailed stereo and speaker removal instructions
Since installing a new receiver will disable the safety warning chimes in your Aztek, we strongly advise that you use the recommended integration adapter to retain these chimes. Crutchfield will not provide technical support for any installation that does not utilize the recommended adapter.
Tools needed: Panel tool, 7mm socket, ratchet, and extension, Torx T-15 driver
Read our Car Stereo Buying Guide for shopping tips and advice.
Shop for car stereos that fit your Pontiac Aztek
Steering wheel audio controls
In most cases, it's reasonably easy to retain your Aztek's steering wheel audio controls when you install a new stereo. When you enter your vehicle information, our database will choose the adapter you need to make your factory steering wheel controls work with a compatible aftermarket receiver.
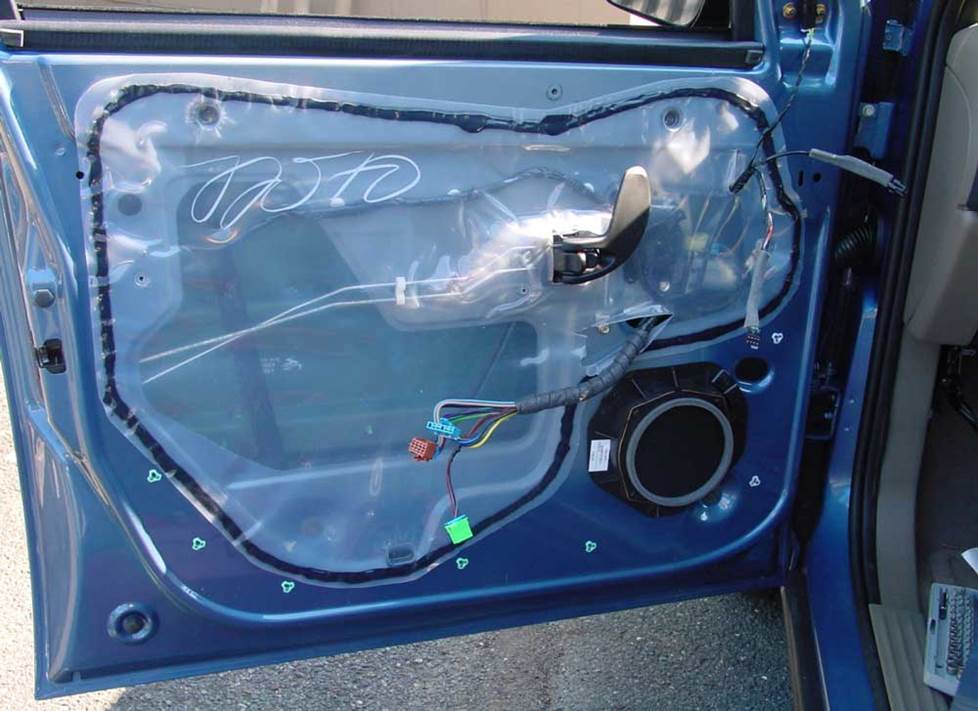
You'll need to remove the door panels to access these speakers (Crutchfield Research Photo)
Replacing the factory speakers
The Aztek's front doors feature woofers and tweeters wired in parallel. There are also speakers in the rear doors, and on some models, the rear cargo area.
Front door woofers
The factory 6-3/4" front door speakers are pretty easy to replace once you remove the door panel. You can replace the speakers with same-size 6-3/4" models, or go with 6-1/2" or 5-1/4" speakers. Smaller models will need adapter brackets to fit into the factory openings, and we'll include those with your purchase, along with the harnesses you'll need to connect the speakers to the vehicle. You may have to cut out the back of the plastic cup or mounting bracket. We can confirm this before you order, so just give us a call.
You'll start by removing two Torx T-30 screws, one at the top of the pull handle and one at the bottom. Next, remove another T-30 screw at the rear of the armrest. You'll then need to remove the power window switch panel, starting at the rear and then gently pulling towards the back of the vehicle. Disconnect the harnesses and remove the panel.
Now, it's on to the door panel. Start at the top of the sail panel and use a panel tool to pry outwards on the side and bottom to release 10 clips. Pull upwards, then work the door pull handle through the opening. Pull out and disconnect the power window switch, then remove the panel. The speakers are held in place by four 7mm screws. Remove them, pull the speaker out, and disconnect the harness.
Tools needed: 7mm socket, ratchet, and extension, T-30 Torx, panel tool, small flat blade screwdriver
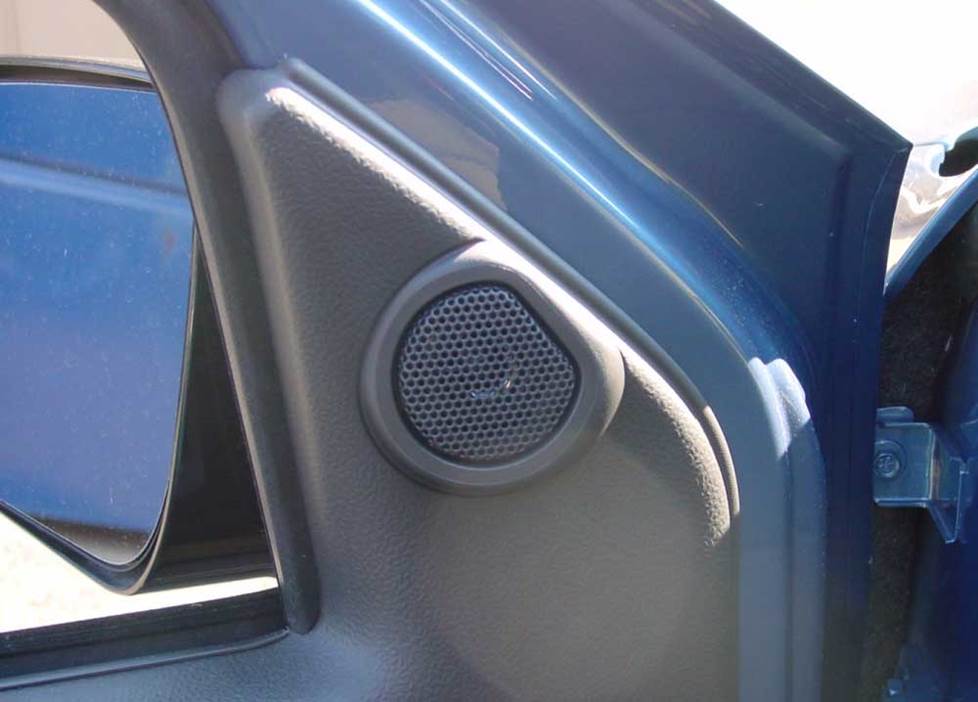
The tweeters are mounted in the sail panels, which are integrated into the door panels (Crutchfield Research Photo)
Front sail panel tweeters
The front tweeters are in the sail panels, which are built into the door panels. Once you've removed the panels, all you need to do to remove the tweeters is pry out three plastic clips, pull the tweeter out, and disconnect the harness. Since the woofers and tweeters are reached the same way at the same time, we recommend installing a set of component speakers in your Aztek.
Tools needed: Panel tool, small flat-blade screwdriver
Here's a close-up look at one of the Aztek's rear door speakers (Crutchfield Research Photo)
Rear door speakers
The factory rear door speakers are, like their front door counterparts, 6-3/4" models that aren't too hard to replace. There are a few steps to the process, but they're not horribly labor-intensive, and as long as you stay organized, you'll be fine.
You can choose same-size 6-3/4" models, or go with 6-1/2" or 5-1/4" speakers. Smaller models will need adapter brackets to fit into the factory openings. Those are included with your speaker purchase, along with the correct speaker wiring harnesses.

A touch of genius: the rear side speakers are angled out for easier entertaining (Crutchfield Research Photo)
Rear side panel speakers
In a vehicle that's chock-full of neat features and smart ideas, the Aztek's optional rear speaker set-up is subtle, but very effective.
The speaker modules, each of which contain a mid-range speaker and a woofer, are angled so that when you're hanging out behind the vehicle at a campsite or tailgate party, the sound will go where you are instead of bouncing off the opposite side panel.
Depending on model year, the mid-range speaker will be either a 4" or 5" model. The woofer is a 6-3/4" speaker in all versions of the Aztek. Like most GM set-ups of the time, the enclosure is bi-amped, so the 4"/5"speaker gets a full-range signal and the 6-3/4" woofer gets a low-pass signal.
Replacements are available for all of these speakers. You'll need to use Posi-Products speaker connectors to connect them to the factory system. You can, however, retain the factory grilles.
Getting to them involves removing the rear side panel, which will nvolve a bit of work on your part. The job's not all that difficult, but there are several steps involved. If you work carefully and stay organized, though, you should be fine. All the details can be found in your Crutchfield MasterSheet.
In 2003-05 models, the speakers are routed through the RSA (rear seat audio) control module. When the RSA module is activated, the rear speakers are muted and the audio signal is sent to the headphone output jacks only. If the vehicle has an RSA module, the factory stereo has a dual-zone capability, so different sources can be chosen for the front and rear audio outputs.
Read our Car Speakers Buying Guide for more information.
Shop for speakers that fit your Pontiac Aztek
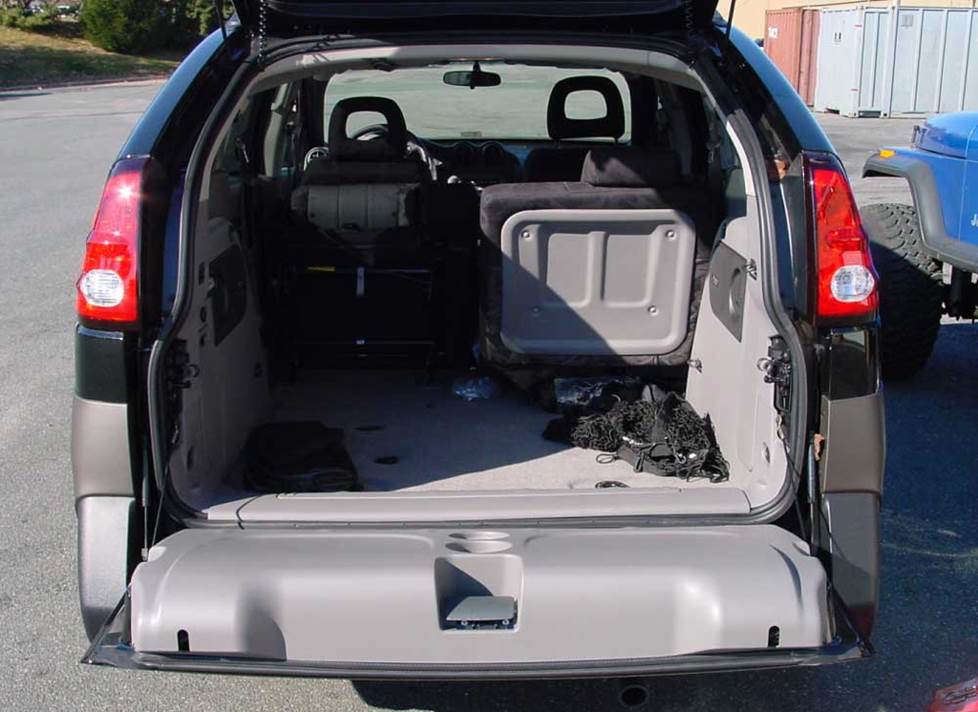
There's lots of space for camping gear back here, not to mention subwoofers (Crutchfield Research Photo)
Bass in your Pontiac Aztek
If you want to add even more bass to your Aztek, you certainly have space for a big subwoofer enclosure. The available area for a sub box measures 44" W x 23" H x 27"/35" D, so you can get pretty crazy with the bass back here if you want to. But if you want to retain as much utility as possible while still enhancing your sound, try a powered subwoofer. They tend to take up a lot less cargo room.
Learn more about building a bass system in our Car Subwoofer Buying Guide.
Other options for your Aztek
In addition to painting the side cladding, there are plenty of other ways to improve your Aztek. Here are just a few ideas:
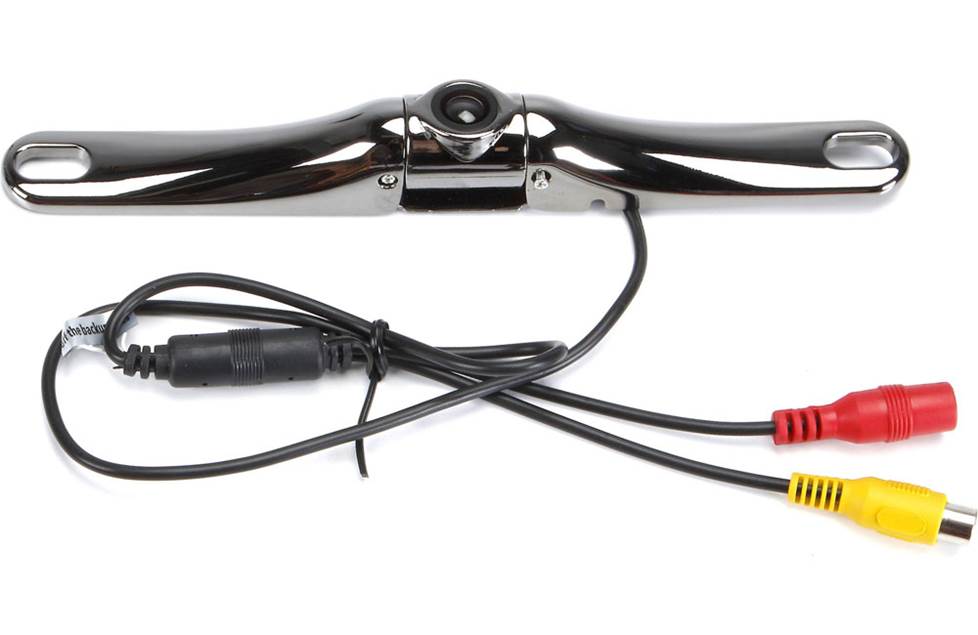
Adding a backup camera to your Aztek will really help with around-town driving
Rear-view camera
The Aztek has a reasonable amount of glass area, but it's a tall vehicle and there are a lot of pillars to look through, so a rear-view camera will be a big help. We offer cameras from Kenwood, Alpine, Pioneer, and more. Some are designed to work with same-brand receivers only, but others come with a composite video connector and will work with almost any video receiver. You'll get a great view of what's behind you in the parking lot, including the people pointing and saying, "Is that an Aztek? Man, you never see those around anymore. Cool!"
Sound deadening
While it's arguably a bit sleeker (less boxy, anyway) than your average SUV, the Aztek can still get a bit loud at speed. To combat wind noise and road roar, you can install Dynamat in the doors and, if you install a big sub, the rear hatch area. This sound-deadening material will keep the noise under control and allow you to really enjoy your music.
Security
The Aztek is generally assumed to be theft-proof, because who'd ever risk jail time to break into an Aztek? But it could happen. And when it does, you'll want to be the wise Aztek owner who, despite gales of laughter from family and friends, invested in a security system. Installing one of these systems isn't easy (security systems rarely are), but our Crutchfield Advisors can help figure out what you need to get the job done. We usually recommend taking your vehicle and new gear to a professional installer, though.
Let's get started!
Ready to shop? Use our vehicle selector to find the gear that will fit your car or truck. If you have questions, give us a shout via phone, chat, or email
Show us your Aztek
If you've installed any car audio gear in your Aztek (or painted that cladding...), let us know! Go to our Custom Car Showroom, submit your story and photos, and we'll add you to our showroom. If you have any questions about selecting new gear for your vehicle, we're here to help.


Mike D. from Bristol, VA
Posted on 11/3/2024
Can I just leave the factory tweeters when I replace the front door speakers?
Jon Paul from Crutchfield
on 11/21/2024
Unit562 from Buckley
Posted on 5/31/2021
What size tweeters can you fit in the sail panels? I can't imagine a set of super tweeters will fit the stock panel.
Jon Paul from Crutchfield
on 6/1/2021