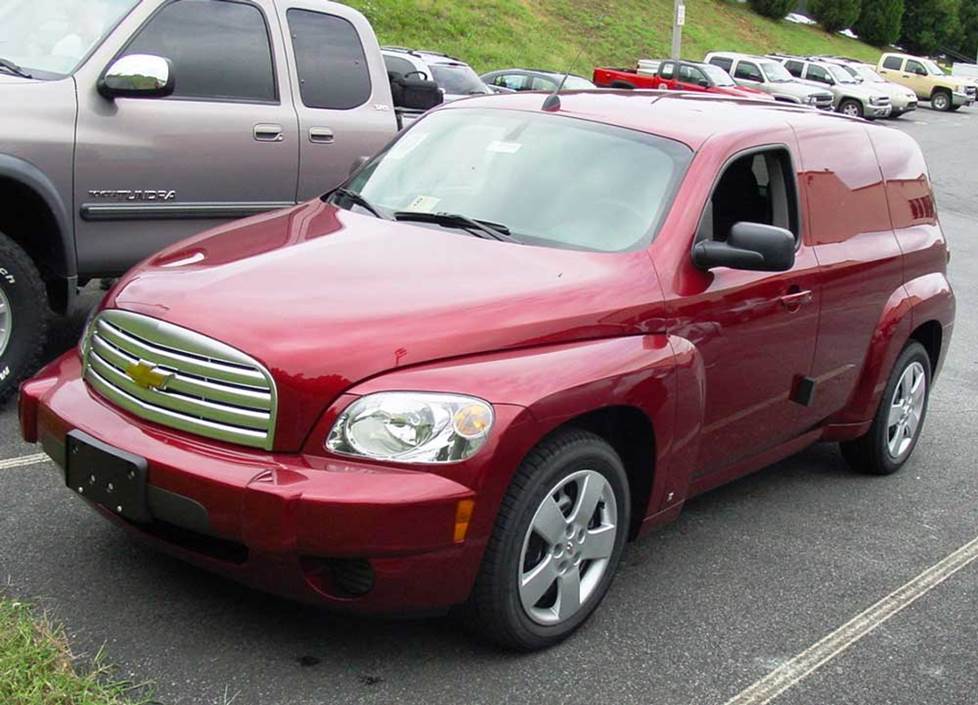
2006-2011 Chevrolet HHR
How to upgrade the stereo system in your HHR

In brief: This Crutchfield Research Garage article gives you an overview of your HHR's stock stereo system and your aftermarket upgrade options. We'll tell you all about:
- The factory stereo system
- Removing the factory radio
- Removing the factory speakers
- Adding more bass
- Other options for your HHR
Then, use our vehicle selector to find the gear that will fit your Chevy.
Overview of the Chevy HHR
The Chevrolet HHR ("Heritage High Roof") is unmistakably retro and proud of it. This compact wagon traces its distinct look all the way back to the 1949 Chevy Suburban, so it comes by its looks honestly.
Often dismissed as a PT Cruiser copycat, the HHR is very much its own kind of ride. Sure, it was styled by the same guy credited with the PT (Bryan Nesbitt, who'd moved over to GM by this time), but the HHR harkens back to a time when vehicles like this hauled gear to job sites or vacationers to remote hunting lodges.
The HHR is a broad-shouldered, brawny little wagon and while it's perfectly happy running errands, you get the feeling that it's willing to do some hard work whenever you are. If you have the high-performance, turbocharged 2008-2010 SS model, it's also ready to play.
Whether you have the standard wagon or the panel wagon, the HHR gives you the everyday utility you'd expect, but without the bland, boxy styling that makes it hard to remember which one's yours every time you walk out of the hardware store. A design like this is going to look cool for years to come, so why not make it sound cool, too?
The factory stereo system
The HHR was available with two basic factory stereo systems centered around a single-disc AM/FM receiver with an auxiliary input. The base package used six speakers, while the premium Pioneer package had seven, including a factory subwoofer.
Options included steering wheel controls, Bluetooth® connectivity, and speed-sensitive volume control. GM's popular OnStar system, an option in 2006 and 2007, became a standard feature in 2008.
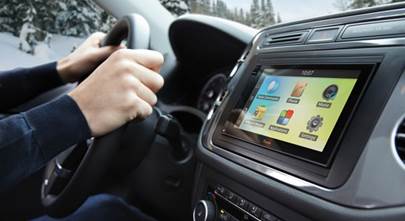
Your HHR's dash will comfortably hold either a DIN (2") or double-DIN (4") receiver, so you can install pretty much anything from a digital media receiver to a big-screen DVD/Nav receiver. A number of receivers will fit, but the HHR's 6-1/2" cavity depth might be a limiting factor.
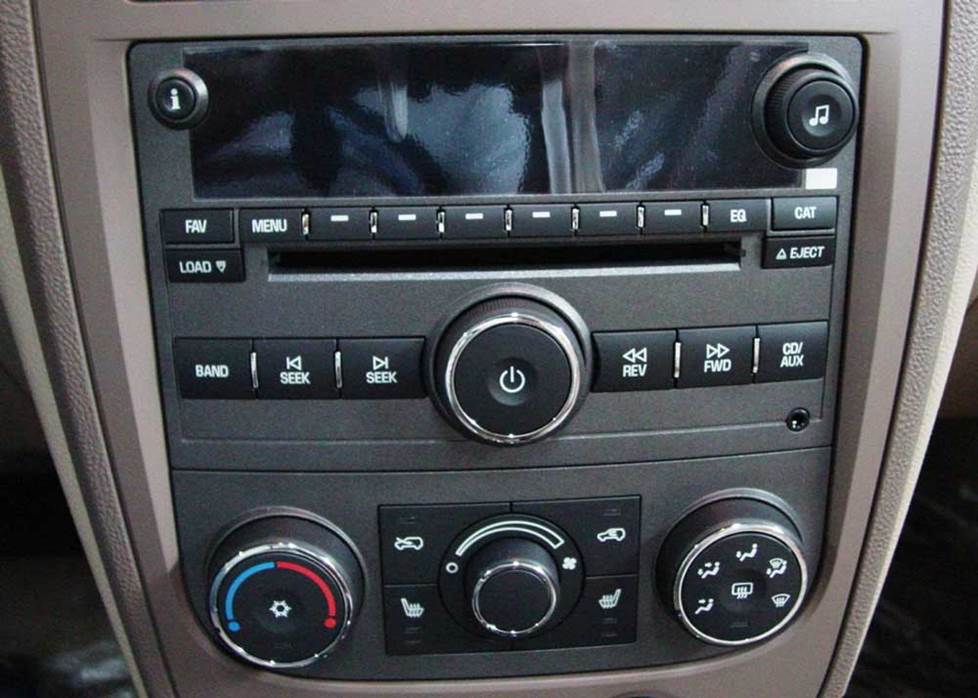
The Chevy HHR's factory radio (Crutchfield Research Photo)
Removing the factory radio
Removing the HHR's factory radio is a relatively simple process that requires nothing more than a couple of tools and a bit of patience.
To start, use a panel tool to gently pry out the receiver/climate control trim panel in the center of the dash, then disconnect harnesses to remove the panel. You'll need to remove the eight 7mm screws securing the climate control unit and the factory radio. Once you've done that, lower the climate control unit and pull the radio out, then disconnect the harnesses, and remove it.
Detailed stereo and speaker removal instructions

Installing your new stereo is largely a matter of reversing the steps above. You will need a mounting bracket that's discounted with Crutchfield stereo purchases. You'll also get complete wiring instructions and a Crutchfield MasterSheet™, which contains in-depth info on how to remove the stock stereo gear.
The HHR's factory warning chimes are built into the radio, and in order to retain them, you must use the factory integration adapter recommended by Crutchfield. This is a safety issue and it's important. In fact, we cannot offer technical support for any installation undertaken without the correct adapter. The good news is that the adapter needed is the same one that allows you to retain OnStar. The better news is that it's discounted when you buy it with a compatible receiver from Crutchfield.
Tools needed: Panel tool, 7mm socket, socket wrench and extension
Read our Car Stereo Buying Guide for shopping tips and advice.
Shop for car stereos that fit your Chevrolet HHR
Steering wheel audio controls
In most cases, it's reasonably easy to retain your Chevy's steering wheel audio controls when you install a new stereo. When you enter your vehicle information, our database will choose the adapter you need to make your factory steering wheel controls work with a compatible aftermarket receiver.
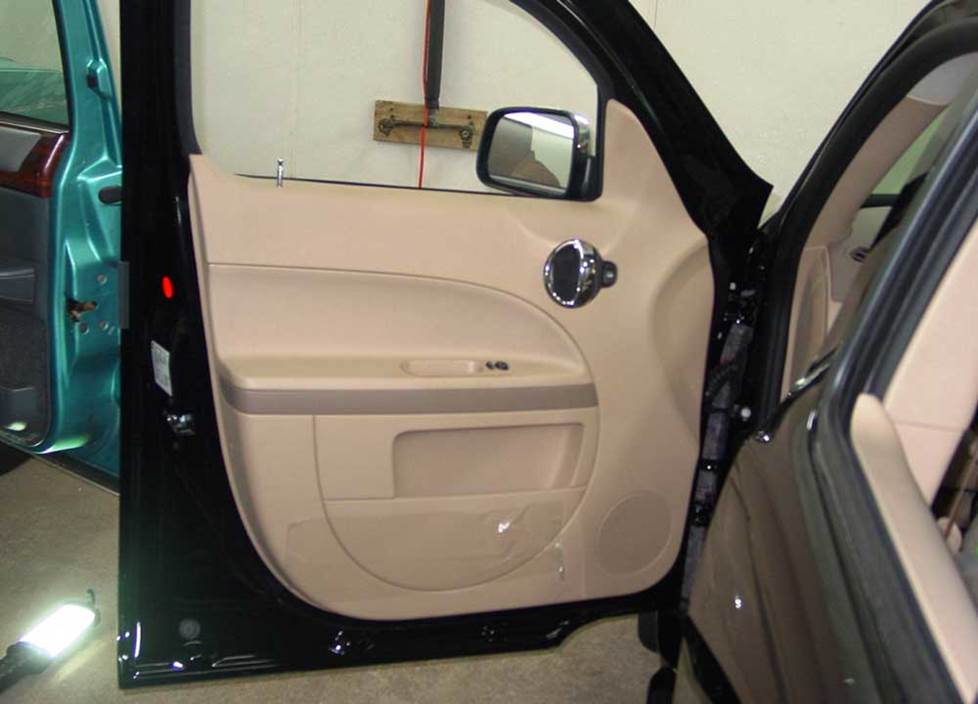
Removing the factory speakers
The HHR has speakers in the front doors, A-pillars, and rear doors.
The HHR's front door speakers (Crutchfield Research Photo)
Front door speakers
As with most vehicles these days, replacing the HHR's factory speakers starts with removing the front door panels. What you find behind the panels depends on your truck's factory stereo system. If your HHR is equipped with the base stereo, you'll find a pair of 6-1/2" speakers. If you have the Pioneer system, they'll be 6-3/4" models.
Removing the door panel is the easy part, but that doesn't mean you can rush through it. You'll be dealing with plastic, clips, and wiring, so take your time and work carefully. You'll find the step-by-step details in your Crutchfield MasterSheet.
The base speakers can be replaced with 5-1/4" or 6-1/2" aftermarket speakers. Those are easy enough to find, but the HHR's spade-shaped opening means you’ll need to drill new screw holes in order to secure the adapter brackets that are included free with your speaker purchase.
The easiest way to do this is to hold up the speaker bracket around the opening, mark where the new holes will go, then drill out the new holes. Be careful when you're drilling, paying attention to things like wiring, windows, and safety devices. And always check your drilling depth and location to avoid damaging your vehicle.
Replacing the Pioneer speakers is a bit less labor-intensive. Aftermarket 5-1/4", 6-1/2", or 6-3/4" speakers will fit, though the smaller ones will need the help of your free speaker bracket. If you're installing an aftermarket 6-3/4" speaker, you might, depending on the size of your new speaker's magnet, need to cut out the back of the plastic cup or mounting bracket.
A wiring harness is not available for the Pioneer package, so you’ll need to cut off the factory connectors and splice the vehicle's speaker wires to your new speaker wires.
Tools needed: Phillips screwdriver, small flat blade screwdriver, panel tool, 7mm socket, socket wrench and extension, Torx T30 driver, drill and 1/8" bit
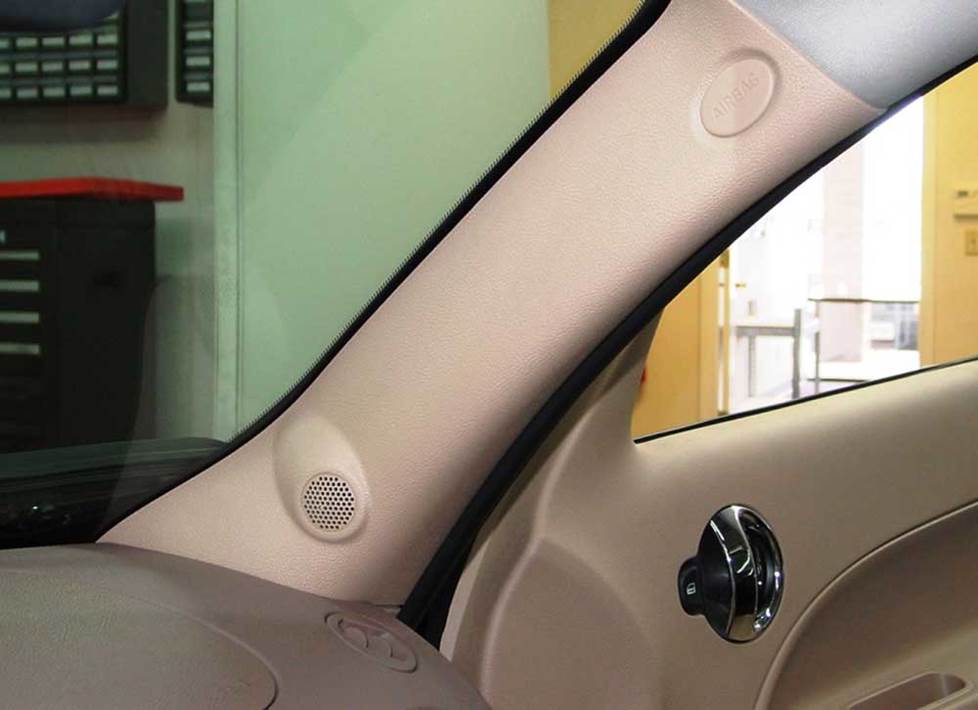
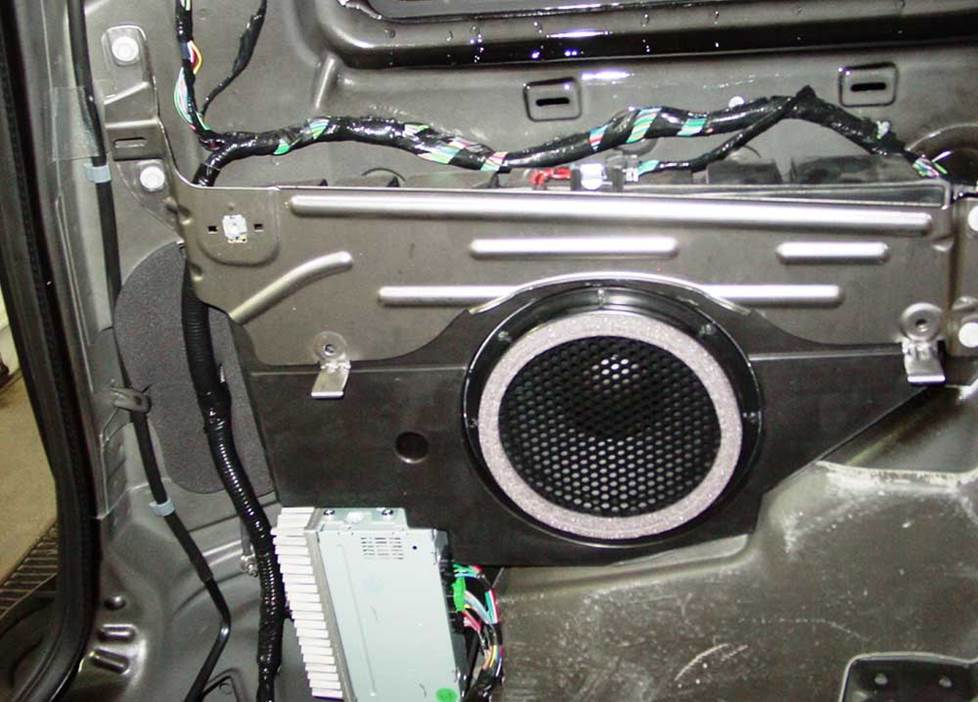
The HHR's tweeters are mounted in the front pillars (Crutchfield Research Photo)
Front pillar speakers
The HHR's 1-1/2" tweeters are located at the base of the A-pillars. Getting to them is easy, but replacing them requires a little creativity. Not a ton, mind you, but a little.
Use a panel tool to pry open the "airbag" emblem and remove the 7mm screw from the pillar trim panel. Pry out the top edge of the trim panel to release the retaining clip. Pull out the trim and disconnect the wiring harness to remove. Remove the two Torx T10 screws securing the tweeters, then remove the tweeters.
You'll need to fabricate a mounting bracket or use a universal backstrap to hold your aftermarket tweeters in place. An aftermarket wiring adapter is not available, so you'll also need to splice into the factory wiring. It sounds like a bit of work, but it's worth it if you're planning to install a set of component speakers. This is a great location, and you'll definitely hear the difference in your favorite music.
Tools needed: Panel tool, Torx T10 driver
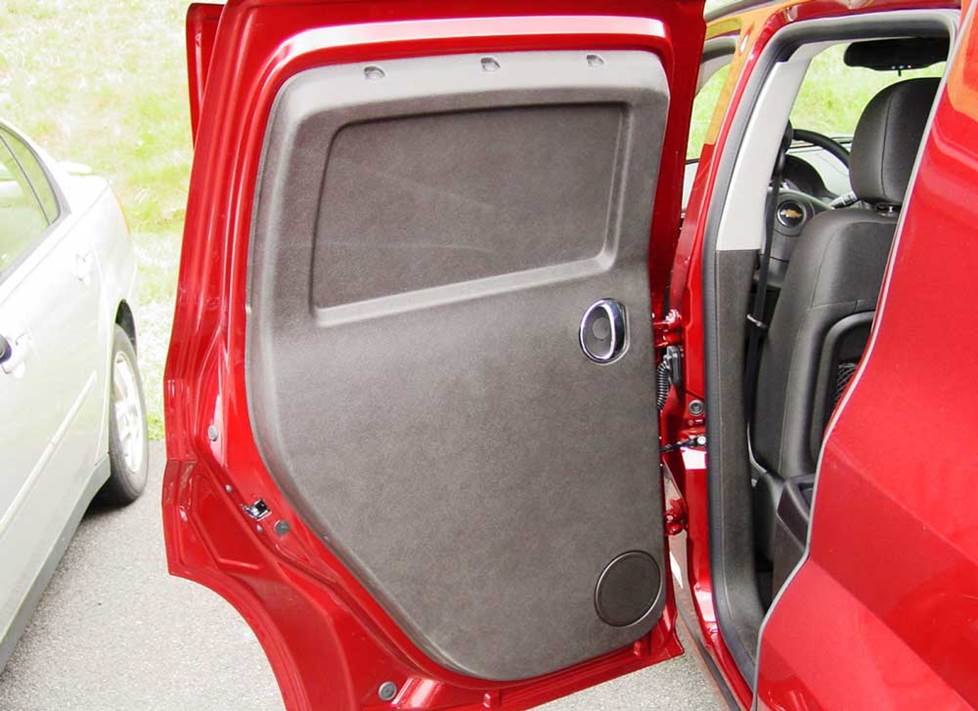
The HHR wagon's rear door (Crutchfield Research Photo)
Rear door speakers
As noted earlier, the HHR was available in a standard wagon with the expected number of windows, or a panel wagon that blocked off both rear side windows to add extra utility and space for corporate logos. Or, we hope, really cool murals involving warlocks and dragons. The mere existence of the two models underlines the fact that the HHR, while technically a "compact wagon," was a true descendant of its hard-working forebears.
In addition to obvious things, like overall utility and the amount of natural light allowed into the cabin, the two HHRs also differ in the amount of work necessary to replace the rear door speakers.
If you have a wagon, the removal and replacement info for the rear doors is essentially the same as it is for the front doors. Your Crutchfield MasterSheet has all the step-by-step instructions, plus photos, but it really is the same basic deal – same sizes, same techniques, same drilling new speaker holes when needed.
The panel wagon, on the other hand, is a bit different. That panel, on the inside of the HHR, is a door-sized piece of plastic. The interior door mechanism is basic, since the doors were primarily operated by buttons on the keyfob and dashboard.
Rear door in the panel wagon (Crutchfield Research Photo)
You'll start by prying off three retaining clips on the top edge of the panel. Pry out the screw cover behind the door release handle and remove one Torx T30 screw. Next, you'll pry out the retaining clip on rear edge of door panel by pressing in the center pin, then prying out the clip. Then, carefully pry out the sides and bottom of the door panel to release 10 clips. Disconnect the door release cable and remove the panel.
As noted earlier, no wiring harness is available for the Pioneer system, so if your HHR is thus equipped, you’ll need to cut off the factory connectors and splice into your new speaker wires. A speaker adapter bracket is required, and it's included free with your speaker purchase. The rest of the front door instructions also apply to the panel wagon.
Tools needed: Phillips screwdriver, small flat blade screwdriver, panel tool, 7mm socket, socket wrench and extension, Torx T30 driver, drill and 1/8" bit
Read our Car Speakers Buying Guide for more information.
Shop for speakers that fit your Chevrolet HHR
The factory subwoofer and amp (Crutchfield Research Photo)
Bass in your HHR
Pioneer-equipped HHRs have an 8", 2-ohm subwoofer located in the cargo area, behind a panel on the driver's side. The factory amp is back there, too. If you replace the sub, you should replace the factory amp as well, just to be sure the sub is getting the power it needs.
Getting to them involves removing the back seat, most of the rear panels, and the cargo floor. In other words, it's a bit labor-intensive, so if you're going to go to the trouble, we'd suggest going with the best sub/amp combo you can fit back there. This procedure is not covered in the Crutchfield MasterSheet for the HHR, but our advisors have all the info you'll need to point you (or your professional installer) in the right direction.
If you want to add big-time bass, the panel wagon offers a lot of room for an enclosed sub. The available space measures 39" W x 28" H x 48"-56" D, so you really can put a massive sub box back there. Thinking about 12" subwoofers? Rock on. The regular wagon offers a reasonable 38" W x 13" H x 28"-34" D space, so if hauling kids and cargo isn't a big part of your life, you can still go big in an HHR.
If you do have real-world concerns like groceries and sports equipment, a powered sub will give you plenty of bass power in a compact, practical package.
Learn more about building a bass system in our Car Subwoofer Buying Guide.

Kenwood's CMOS-320LP universal backup camera with 4 view modes
Other options for your HHR
There are lots of things you can do to make your HHR into an even cooler ride than it is already. Here are few ideas.
Backup camera
The HHR panel wagon offers a lot of utility, but it comes at the expense of visibility. A backup camera will make life in the urban jungle a whole lot easier. We offer cameras from Kenwood, Alpine, Sony, Pioneer, and more. Some are designed to work with same-brand receivers only, but others come with a composite video connector and will work with almost any video receiver.
Foam speaker baffles
To get the most out of your new door speakers, we recommend a set of foam baffles. The baffles compress easily to form a mounting seal that can reduce panel vibration. They also protect the speaker from dirt and moisture. If you use them along with a Dynamat speaker kit, you'll enjoy improved sound and performance.
Remote start and security systems
Adding remote start capability to your vehicle lets you warm it up in the winter or cool it down in the summer. The iDatastart system is incredibly convenient and makes it easier than ever to install a remote start system, so we highly recommend it. The module requires a vehicle-specific T-harness (sold separately) to connect with your vehicle's computer, security, and ignition systems, so we ask that you call to order so that we can make sure you get the right harness for your ride.
You can also talk to your Crutchfield Advisor about a security system. They’re not as easy to install (we usually suggest letting a professional do the job), but we can help you choose a system that’ll work in your vehicle.
Let's get started!
Ready to shop? Use our vehicle selector to find the gear that will fit your car or truck. If you have questions of your own, give us a shout via phone, chat, or email


Andrew Martin from Sarnia
Posted on 9/12/2022
Hello! I see you mention that the factory Pioneer subwoofer is rated at 2-ohm...Mine is blown and I'd like to replace it. After pulling it from my hhr, I see that it is a DVC sub. I can't tell from the factory wiring (four wires go into 4-pin harness individually)... Is this thing wired in parallel for 1-ohm to the amp, or in series for 4-ohm to the amp .. or neither? I was expecting two leads coming from the factory sub box, and instead there are four. Thank you for your help!
Crutchfield Writing Team from Crutchfield
on 9/13/2022
Randy Campbell from Beckley wv
Posted on 2/7/2021
I have an 07 hhr looking to upgrade stereo iv read over your info but mine only has the cruise control and menu button to change the trip and view oil life coolant life on dash . do i need the adopter as well for these to still work once i change stereo?
Jon Paul from Crutchfield
on 2/8/2021
Danny Semore from Florissant
Posted on 10/27/2020
Will a kenwood DPX 303 MBT fit in my 08 hhr,and if so will i be able to use my steering wheel controls. Also what other wires and or adapters will be needed. The car has on star if that matters and the base single disc sterio
Jon Paul from Crutchfield
on 10/28/2020
Darrin Clem from cascade
Posted on 8/1/2020
i have a 2007 hhr with pioneer system, what sub woofer will fit in the factory location? thanks for the info.
Brandon Langdon from Elmira
Posted on 8/4/2019
I would just like to know what Model is the Pioneer stereo is in my HHR, I just got the 09 SS with pioneer system and have no manual or anything on how to use it. Thanks so much.
Jon Paul from Crutchfield
on 8/5/2019
Jon Paulette from Crutchfield
Posted on 4/26/2018
Joe, I've sent your question to our sales team, and they'll be contacting you via email soon. For immediate help, you can contact them via phone or chat.
Joe Bernens
Posted on 4/25/2018
I have a 2009 HHR with the non-Pioneer radio and factory XM. I'm looking to replace this with an aftermarket Kenwood receiver and the Sirius SVX300V1. Can you confirm if the factory sat receiver is located in the rear, passenger side of the vehicle. Although Crutchfield doesn't carry it, there is a Matra extension cable available that would let me use the factory sat antenna with the aftermarket receiver. Any idea if that is correct (Metra part is 40-SIRXM-17).
Jon Paulette from Crutchfield
Posted on 11/20/2017
David, The stock amp is located in the left rear side panel, just below the subwoofer.
David from Gallatin
Posted on 11/19/2017
Where is the amp in a 210 hhr
Jon Paulette from Crutchfield
Posted on 7/10/2017
Sondra, That's not good at all. In a situation like that, it's always better to have a conversation with a real live human. Give us a call and talk to one of our advisors. We can help you find the right wiring harness adapter and give you good advice on how to install it. And if you run into trouble, your Crutchfield purchase comes with free tech support for the life of your gear.