1994-2001 Acura Integra coupe and sedan
How to upgrade the stereo system in your Integra

In brief: This Crutchfield Research Garage article gives you an overview of your Integra's stock stereo system and your aftermarket upgrade options. We'll tell you all about:
- The factory stereo system
- Removing the factory radio
- Removing the factory speakers
- Adding more bass
- Other options for your Integra
Then, use our vehicle selector to find the gear that will fit your Acura.
Overview of the Acura Integra
For a lot of people, the Integra is either the car they always wanted or the car they wish they'd never gotten rid of. If you've had one all along, well, good for you. The Integra was an almost-instant legend when it came out, and after a few years in the used car shadows, interest is picking up again.
With slick styling, tack-sharp handling, an available VTEC engine, and Honda/Acura's usual standards of fit, finish, and reliability, the new-for-1994 Integra was one of the best cars of the nineties. Combine all that with a stellar racing pedigree, and it's no wonder so many car-crazed kids imprinted on this car like baby ducks. Nowadays, the Integra generation is all grown-up and ready to relive the good old days behind the wheel of one of these iconic cars.
Finding a showroom-original Integra is tough, because a lot of these cars were hooned half to death (Fun, though, wasn't it?), raced, customized, and otherwise well-loved. But if you can find a half-decent runner, you'll have a great starting point for a restoration or updating project. Whatever you do with your Integra, a new stereo will make a good time even better.

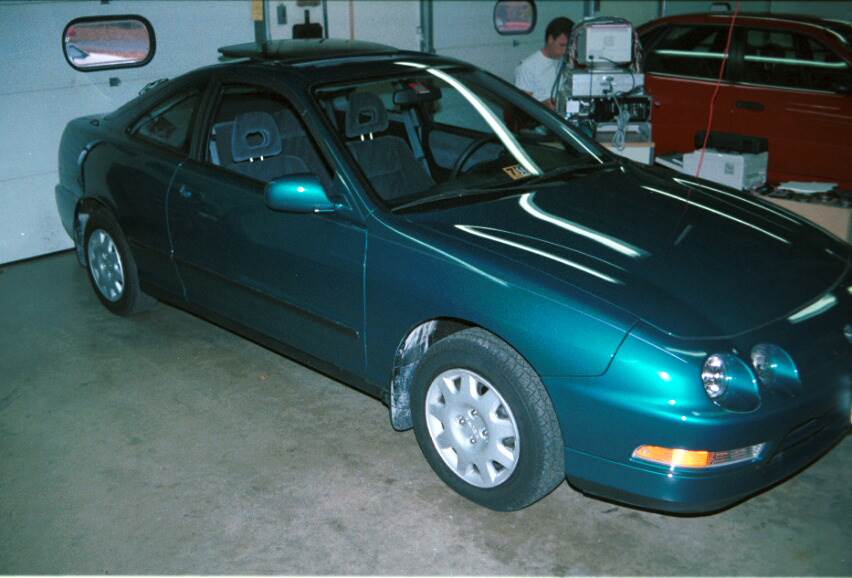
Cassettes were great, weren't they? Okay, they really weren't, but it's easy to add a modern stereo to this car (Crutchfield Research Photo)
The factory stereo system
Given the Integra's heritage, quality "survivor" cars are hard to find, so you might want to keep the stock radio and maintain the car's original look. If you do that, you can still improve the stereo performance with one of our factory system upgrades. New speakers are another smart "out of sight" improvement.
That said, a new receiver is probably the best way to enjoy all the nineties music stored in your cutting-edge smartphone, though. A nice selection of single-DIN (2" tall) and double-DIN (4" tall) receivers will fit in the Integra, but due to the dash design, video receivers with retractable screens won't work in this car.
If you do replace the radio, you should replace the car's factory antenna, too. For one thing, 20-year old antennas can be pretty beat up. For another, it's just easier to do this when you're already in the dash. We won't get into the step-by-step details of that job in this article, but you can find them all in the Crutchfield MasterSheet that's included free with your Crutchfield stereo purchase. The process differs for the coupe and the sedan, but we'll explain both.

A variety of up-to-date CD, navigation, and digital media receivers will fit into this location (Crutchfield Research Photo)
Removing the factory radio
Before you remove the stock radio, you'll need to do a couple of other things in areas that aren't really near the radio. This isn't hard, but there are a few steps involved, so work carefully and stay organized.
First, you'll need to set the parking brake and disconnect the negative battery cable to prevent electrical shorts. This is an essential safety component to any stereo installation, so do this before you do absolutely anything else.
You'll start the radio replacement process by removing the center console. Slide both seats forward, then remove two Phillips screws (one on each side) from the rear portion of console. The forward screw on the rear portion of the console does not have to be removed, by the way.
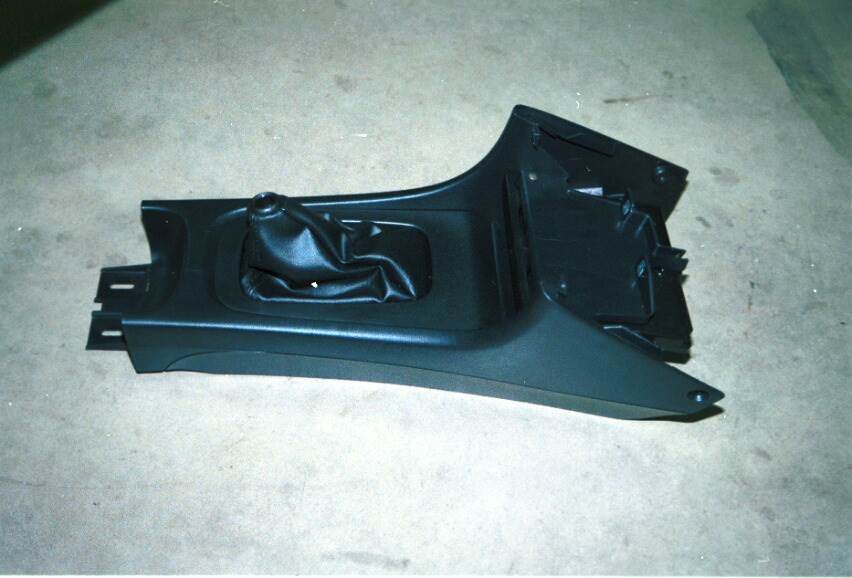
You'll need to remove part of the console, but it's not as hard as you might think (Crutchfield Research Photo)
Pry out the cover panel under the hand brake lever and remove two Phillips screws. Next, lift up slightly and pull the rear portion of the console toward the rear of the vehicle, then lift it over the hand brake lever to remove.
Pull out the ashtray (remember those?) and remove two Phillips screws located below the ashtray bracket in the rear of the ashtray cavity. Unsnap (gently, gently) the cigarette lighter/ashtray panel, then disconnect the electrical connectors and remove the whole thing.
Detailed stereo and speaker removal instructions

Next, you'll remove two Phillips screws from below the radio/pocket assembly, then remove two Phillips screws (one on each side) from the front portion of the console. If your Integra has a manual transmission, unscrew and remove the shift knob. And, after all that, it's time to remove the front portion of the console by lifting the whole thing over the shifter.
Remember the radio? We're there, finally! Using a stubby Phillips screwdriver, loosen the two screws in the plate at the rear of the radio. Pull it out of the cavity, then disconnect the wiring harness and the antenna lead.
Once the new receiver is connected and ready to go, test the stereo to make sure everything's working properly. If it is, do all the stuff you just did backwards.
Tools needed: Phillips screwdriver, stubby Phillips screwdriver
Read our Car Stereo Buying Guide for shopping tips and advice.
Shop for car stereos that fit your Acura Integra
Steering wheel audio controls
In most cases, it's reasonably easy to retain your Integra's steering wheel audio controls when you install a new stereo. When you enter your vehicle information, our database will choose the adapter you need to make your factory steering wheel controls work with a compatible aftermarket receiver.
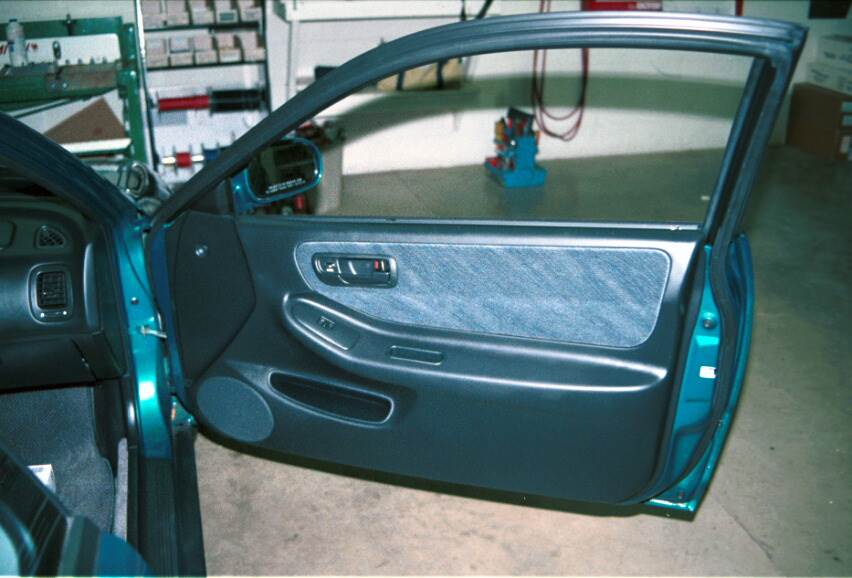
The front door speakers are basically the same in the coupe and sedan (Crutchfield Research Photo)
Removing the factory speakers in your Integra
The Integra's stock speakers were nothing special to begin with, and after a couple of decades of use, they're probably about done. If you want to enjoy some music while you're enjoying your Integra, it's probably past time to replace them.
The door speakers are the same in the coupe and sedan, but the rear speakers are in different places. We'll cover both models here, and further details can be found in your MasterSheet.

Replacing the stock speakers will be a huge sound improvement, even if you don't replace the receiver (Crutchfield Research Photo)
Removing the door speakers
The stock 6-1/2" speakers can be replaced by same-size or 5-1/4" aftermarket models. The plastic mounting cup can accommodate either. Some of those speakers might be a tad deep, so you'll have to cut out the back of the cup to accommodate them. If you'd rather avoid that, we offer some shallow-mount speakers that will fit right in. If the car wasn't equipped with stock speakers (this was a real thing), you'll need to obtain factory speaker grilles and/or mounting brackets.
The process of removing the old speakers begins with removing the door panel. There are some variations depending on whether your car has manual or power windows, and we'll note them below.
Pry open the screw cover in the door release handle trim and remove the Phillips screw underneath. Next, pry out the release handle trim and disconnect the door lock switch (if equipped). If there's an old-fashioned window crank, you'll remove that next.
Remove a Phillips screw from the armrest cup, remove the cup, then remove the Phillips head fastener from the front portion of the door panel. Now you're ready to use a panel tool to pry the panel away from the door. Be careful when you're doing this, because old plastic can be brittle.
Once you've pried it loose (or "aloose," as we say in the South), lift the panel off the window channel, disconnect the power window switch (if equipped) and remove the panel. Remove the three Phillips screws securing the speaker to the door, then disconnect the speaker. From here, just install and secure the new speaker, test everything out, and (if it works) start putting the door back together.
Tools needed: Phillips screwdriver, panel tool
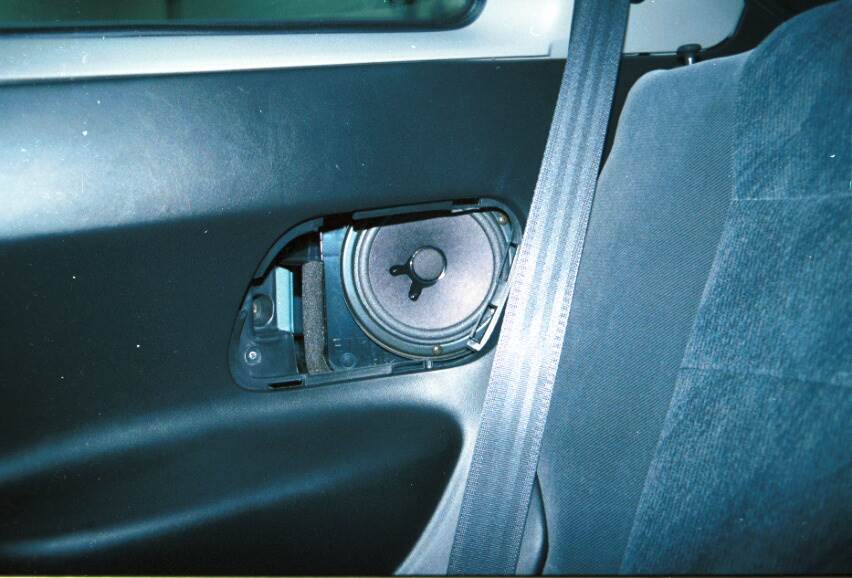
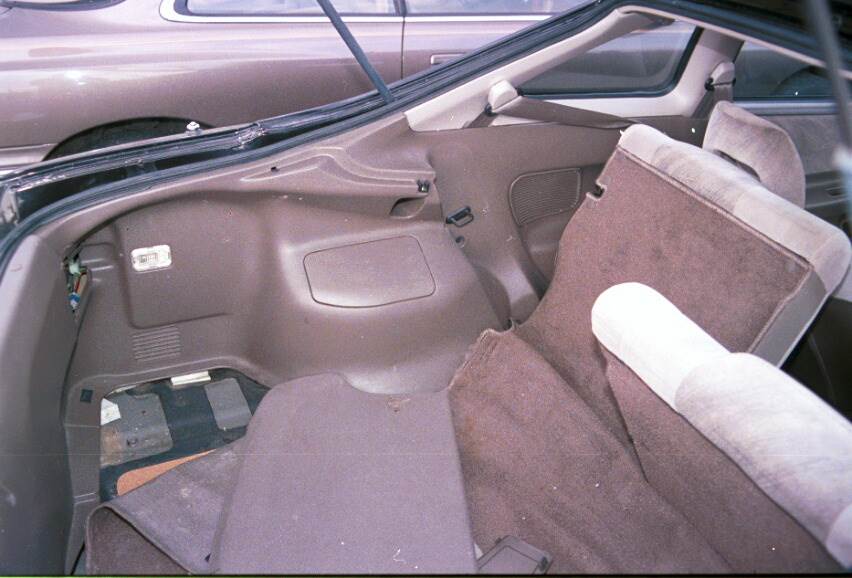
The coupe's rear side speakers are a lot easier to replace than you'd think by looking at this photo (Crutchfield Research Photo)
Removing the rear speakers
Whether you have a coupe or a sedan, speaker replacement is pretty simple in the Integra. You have plenty of choices, and the sound improvement will really be amazing.
Coupe
In the coupe, the 6-1/2" rear speakers are in the side panels. They're pretty easy to get to, because you don't have to remove the panels. You can replace them with same-size models, or, if you're willing to drill some new mounting screw holes, 5-1/4" aftermarket speakers.
To get to them, pry outward at the rear of the speaker grille and slide the grille toward the rear of the vehicle until it's off. Remove the three Phillips screws securing the speaker to the factory mounting bracket, then rotate the speaker a bit and gently pull outward on the bottom edge of the speaker to remove it. Disconnect the wiring harness, then plug it into your new speaker. Secure the speaker, test it, then put the grille back.
Unless you're installing a 5-1/4" speaker, that is, in which case you'll use the new speaker to mark the new mounting hole locations, then drill some holes in your car. This isn't hard for the experienced DIY-er (or anyone else, really), but you are using a power tool, so work carefully, know what's around the area you're drilling into, and wear eye protection.
Tools needed: Phillips screwdriver, panel tool
The sedan's rear deck speakers are reasonably easy to deal with, but you may need to enlarge the opening a bit (Crutchfield Research Photo)
Sedan
In the Integra sedan, the 6"x9" rear speakers are located in the deck. You can replace them with same-size models, but you'll need to enlarge the factory cutout to accommodate aftermarket models. If you go with 5-1/4"or 6-1/2" models, you'll need adapter brackets, which will be included at a discount with your speaker purchase.
Removing the old speakers starts with removing three Phillips screws that secure the grille underneath the deck. Remove the grille, then go back topside and remove the four Phillips screws securing the speaker itself to the rear deck. Lift the speaker, disconnect it, and remove it. Install the new speakers, test to make sure they're working, and then start putting everything back together.
Tools needed: Phillips screwdriver
Read our Car Speakers Buying Guide for more information.
Shop for speakers that fit your Acura Integra
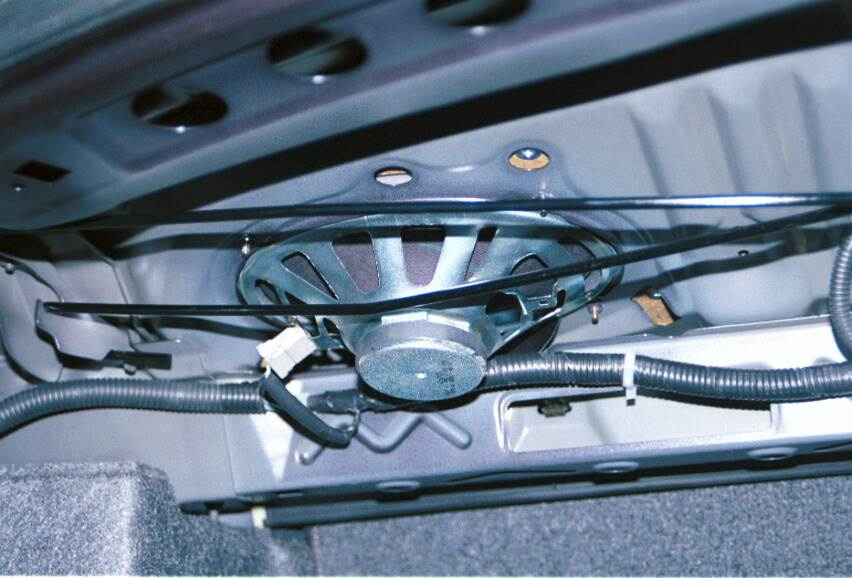
The coupe offers a bit more space for a sub than the sedan (Crutchfield Research Photo)
Bass in your Integra
Unless you're from Mars or haven't paid any attention to car culture in the last 25-odd years, you probably already know that more than a few people have installed subwoofers in their Acuras. In fact, a lot of (then) kids learned about car audio by working on these cars, so it's quite possible that your car already has some aftermarket bass on board.
If that old sub is getting a bit rough-sounding (and/or looking), you'll probably want to replace it.
When you drop a new box into a sedan, you've got a 32" W x 14-1/2" H x 36"/31" space to work with, plus the trunk actually widens in places to 52". The coupe's hatchback cargo area obviously offers a bit more room to play with.
If you prefer a more subtle approach, you can always install a compact powered subwoofer in either car.
Learn more about building a bass system in our Car Subwoofer Buying Guide.

AudioControl LC5iPRO line output converter
Other options for your Integra
There's no shortage of great upgrade ideas for the first-gen Integra. Here are a few things Crutchfield can help you with.
Factory sound processor
If you're keeping the stock radio (a decision we would totally support, by the way...) a sound processor is a great way to get the most out of new speakers. The factory stereo is programmed to make the inferior factory speakers sound as good as they can, which often means dialing back the bass output as the volume goes up. A sound processor will strip out the factory sound shaping and give your aftermarket speakers and amps a clean, flat signal. Learn more in our article about factory sound processors.
Add an amp
A new 4-channel amplifier will help you get the most out of your new speakers, whether you keep the stock radio or not. You'll get cleaner power (and a lot more of it), which will result in much, much better sound. A mono amp can provide the juice you need for a new subwoofer. Learn more about adding amps to your system in our Car Amplifier Buying Guide.
Smartphone adapters
If you don't want to replace the stock radio, you can still enjoy the tunes you have stored on your phone or other device. We offer a wide selection of Apple and Android adapters that let you keep the look of the old analog receiver while still enjoying all your favorite digital music.
Security
Installing a security system in your Integra isn't easy (Security systems rarely are…), but with a car like this, it's definitely a good idea. Our Crutchfield Advisors can help figure out what you need to get the job done, but we usually recommend taking your car and new gear to a professional installer.
Let's get started!
Ready to shop? Use our vehicle selector to find the gear that will fit your car or truck. If you have questions of your own, give us a shout via phone, chat, or email


Comments (0)