2003-2009 Toyota 4Runner
How to upgrade the stereo system in your 4Runner

In brief: This Crutchfield Research Garage article gives you an overview of your 4Runner's stock stereo system and your aftermarket upgrade options. We'll tell you all about:
- The factory stereo system
- Removing the factory radio
- Removing the factory speakers
- Adding more bass
- Other options for your 4Runner
Then, use our vehicle selector to find the gear that will fit your truck.
Overview of the Toyota 4Runner
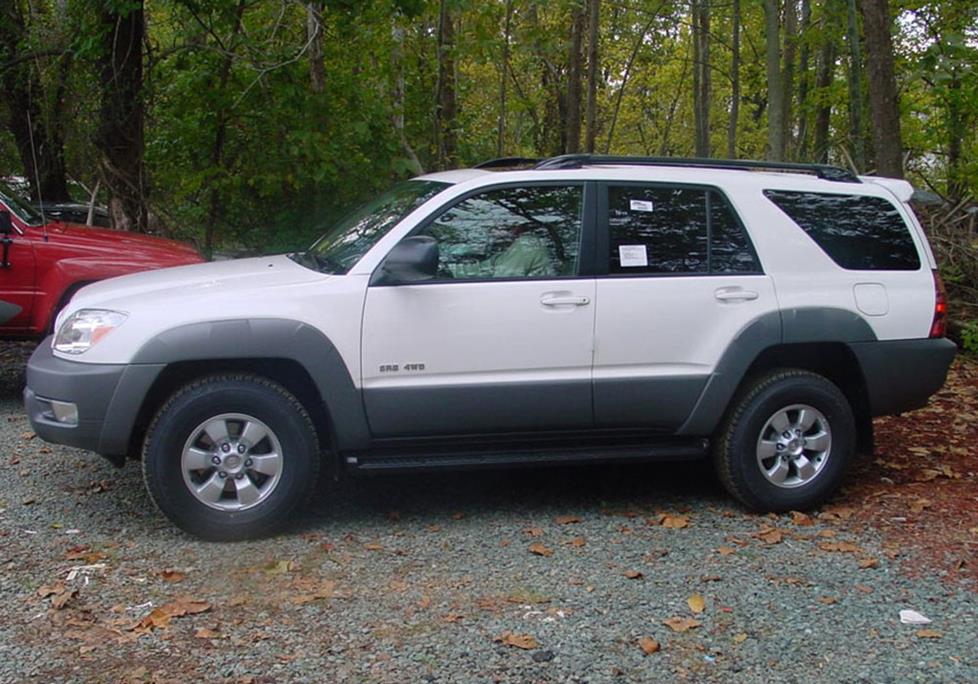
When it comes to SUVs with serious street cred, the Toyota 4Runner is right up there with some of the best. Toyota has a long and healthy history with rugged, go-anywhere utes, starting with the original Land Cruiser and continuing right on to the current lineup. So it's no surprise that the fourth-generation 4Runner continues to be a popular choice for people who need a vehicle that can take them wherever they want to go.
Big, powerful, and surprisingly well-mannered for a truck in this category, the 2003-2009 4Runner has a lot to offer. They're reasonably priced these days, too, so if you can find one that hasn't fallen off a mountain or something, you've got yourself a rugged, reliable vehicle that's ready for a fun-filled weekend in the wilderness or a desperate road trip through a zombie-plagued hellscape. Either way, a new stereo is a great way to improve any drive.
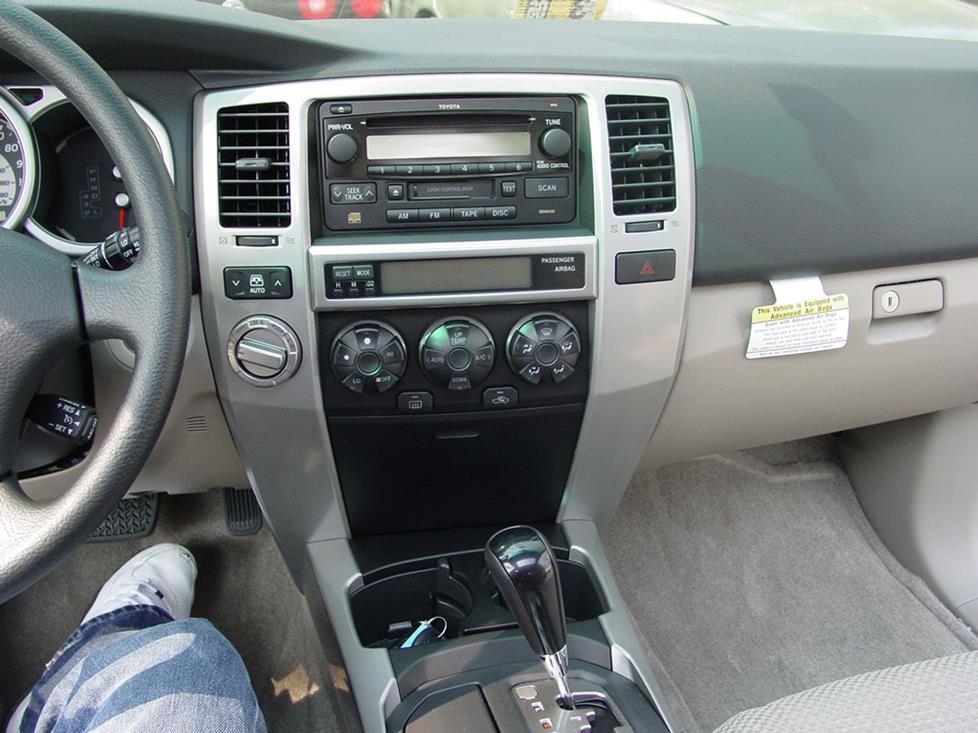
The 4Runner's non-nav receivers are pretty easy to deal with (Crutchfield Research Photo)
The factory stereo system
The 4Runner's factory audio systems came in two basic flavors, base and JBL. The base system has six regular-issue speakers, while the JBL systems feature (what else) JBL speakers and lots of 'em. Removal and replacement is basically the same for either one, but there are some differences and we'll note them below.
In 2008, Toyota introduced the Urban Runner package, which notably featured a receiver with an integrated TomTom portable GPS. This was a cool thing at the time, but these days, it's reminiscent of those old Sony receivers where the cassette player was actually a removable Walkman. Both were truly nifty ideas, but the endless march of technology has rendered them more quaint than useful. If you replace the TomTom receiver, we'd suggest keeping it, just in case Urban Runners suddenly become collectable.
Whichever receiver you're replacing, you'll lose built-in features like (if present) USB and AUX inputs, satellite radio, Bluetooth, and navigation. All of those things can be replaced – and upgraded – with a new receiver. A nice variety of single-DIN (2" tall) and double-DIN (4" tall) receivers will fit with the help of the deeply discounted dash kit that's available with your order. And yes, Urban Runner owners, that does include navigation receivers!
If you're replacing JBL speakers, bear in mind that replacing those lower-impedance speakers with higher-impedance aftermarket speakers will result in lower volume levels. Shop accordingly.
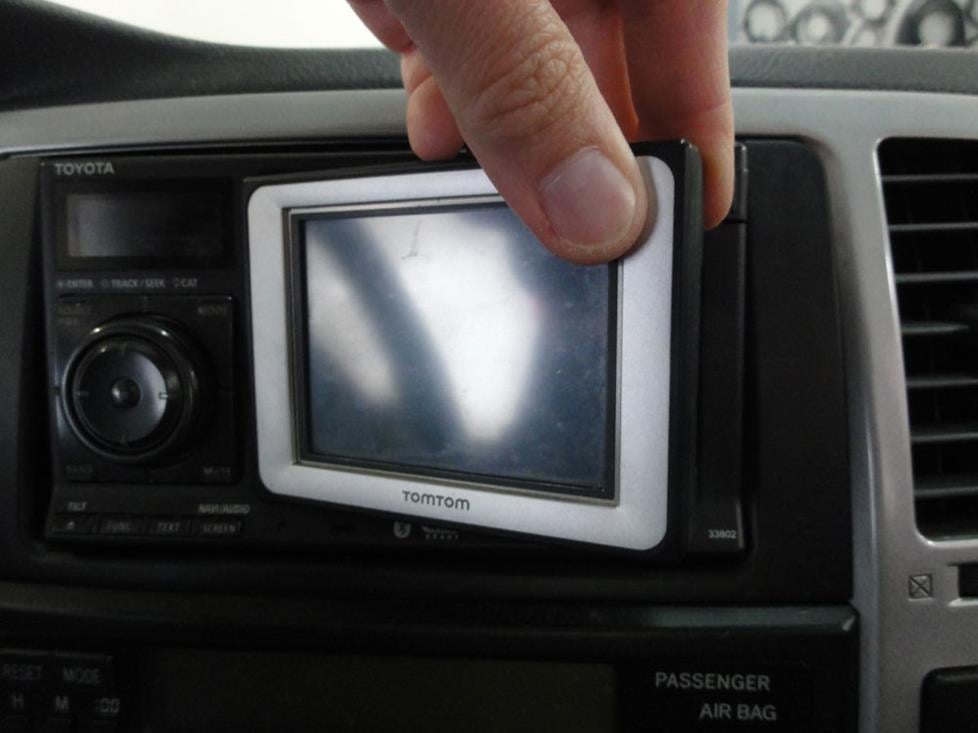
The Urban Runner's portable TomTom GPS is a neat feature, but it's a bit outdated at this point (Crutchfield Research Photo)
Removing the factory radio
The actual job of replacing the receiver isn’t that hard, but there are some things to know before you start. A wiring harness adapter is available for trucks equipped with the regular receivers, but you'll need a set of Posi-Products connectors to replace the TomTom receiver. That's a lot easier than splicing, and it's also a much better connection.
Before you do anything else, set the parking brake and disconnect the negative battery cable to prevent any electrical short. Once that's done, you're safe and set to go.
The 4Runner's dash and console are pretty thoroughly integrated, so you'll need to remove a few things in order to get to the receiver. Open the console compartment door, use a panel tool to pry up the gear shift trim panel, disconnect the wiring harnesses, and remove the panel. Next, carefully pry up the console trim and remove that. Open the storage pocket door and remove one exposed Phillips screw.
Detailed stereo and speaker removal instructions

You'll need to remove two 10mm bolts from the bottom edge of the driver-side knee panel, then pry out the top edge of that panel to release the retaining clips. The ignition trim ring will pop off while you're doing all this, but that's okay. Once it's loose, just let the panel hang while you continue working.
The next step depends on your truck. If you're removing a standard receiver, you'll need to remove one 10mm screw from the lower left side of the receiver trim panel. If your truck is equipped with the Urban Runner Package, you'll need to pry off the receiver trim ring. From here out, the radio replacement process is the same for all trucks.
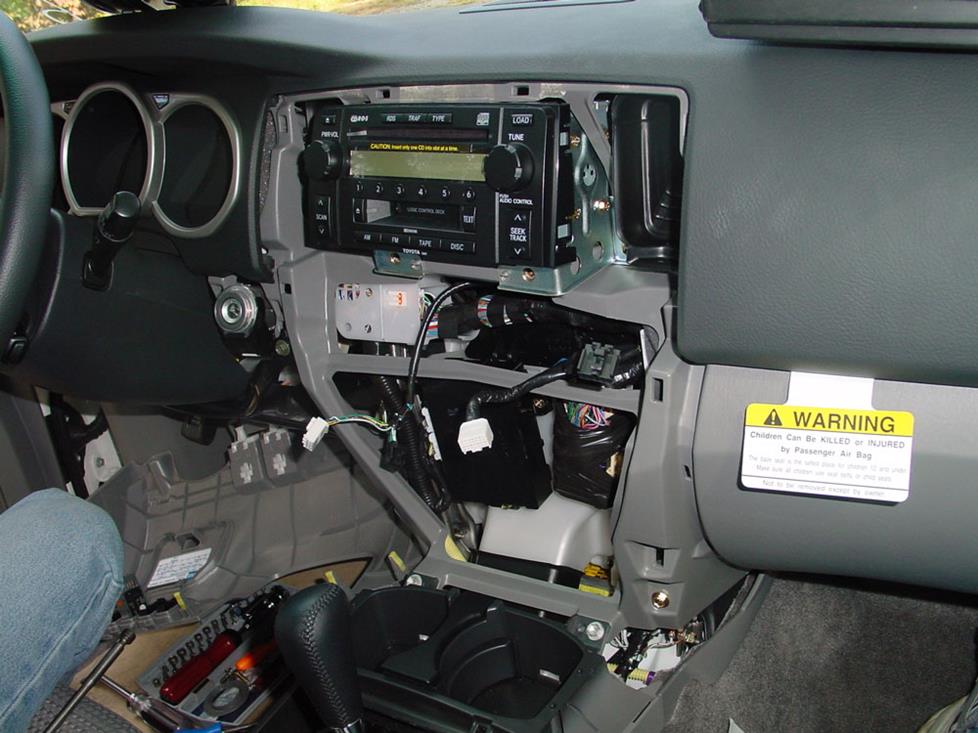
There's a fair amount is dash disassembly involved in this project, but it's do-able for the average DIY-er (Crutchfield Research Photo)
Pry out the climate control panel and remove two exposed 10mm screws, then pry around all edges of the receiver trim panel to release the retaining clips. Work the panel out from the console and disconnect the harnesses to remove it. Finally, you'll remove two 10mm screws from the bracket securing the factory radio. Pull the radio out, disconnect everything, and remove it.
You'll need the factory radio brackets to install any aftermarket stereo. If those have gone walkabout for some reason, you can check with your dealer or probably just find a set online. Between the Crutchfield MasterSheet that's included free with your purchase and the instructions that come with your dash kit and (if applicable) wiring harness adapter, you'll have the info you need to install the new receiver.
If you run into any weirdness (especially on Urban Runner trucks), remember that your Crutchfield stereo purchase entitles you to free tech support for the life of your gear. Got questions? Give us a call.
You'll want to test the receiver before you put the dash back together, but make sure the wiring harnesses associated with the airbag are connected before you turn on the ignition switch. If they aren't connected, the airbag light will come on and you'll need to visit your local Toyota dealer for a reset.
Tools needed: panel tool, 10mm socket, ratchet, and extension
Read our Car Stereo Buying Guide for shopping tips and advice.
Shop for car stereos that fit your Toyota 4Runner
Steering wheel audio controls
In most cases, it's reasonably easy to retain your 4Runner's steering wheel audio controls when you install a new stereo. When you enter your vehicle information, our database will choose the adapter you need to make your factory steering wheel controls work with a compatible aftermarket receiver.
Speaker removal isn't complicated in this truck, but replacement has some nuances (Crutchfield Research Photo)
Removing the factory speakers
The number of speakers in your 4Runner depends on which stock stereo system you have. If you replace the lower-impedance JBL speakers with higher-impedance aftermarket speakers, you'll wind up with lower volume levels. Keep that in mind when you're shopping for new speakers.
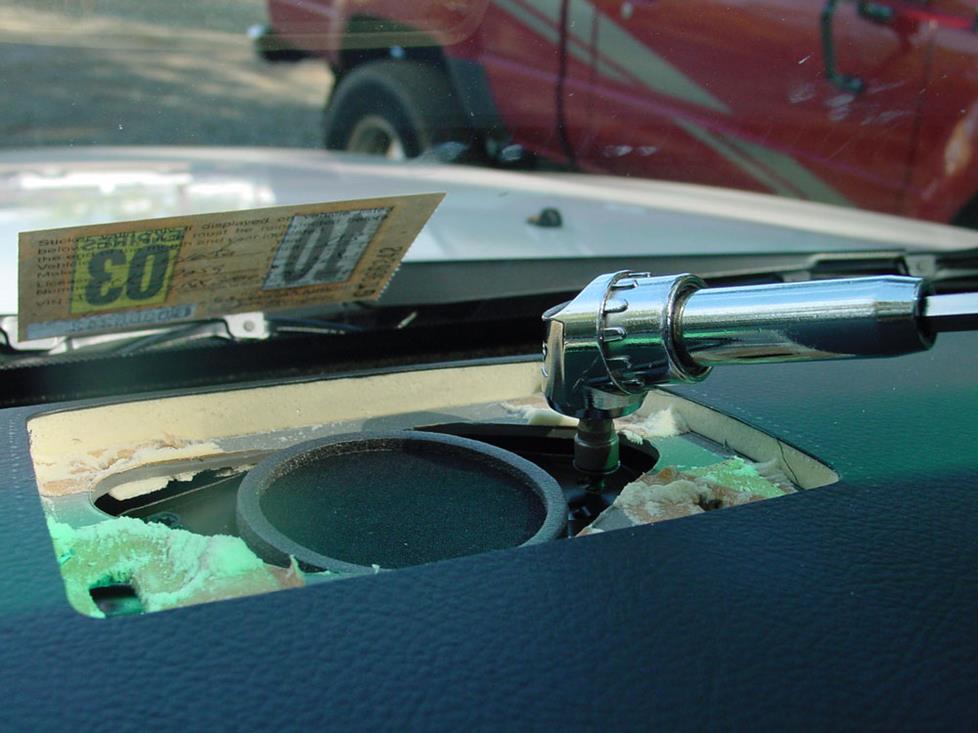
You'll need connectors to replace the JBL dash speaker (Crutchfield Research Photo)
Removing the center dash speaker
The center dash speaker that's part of the JBL package is pretty easy to deal with. Pry up the speaker grille at each corner to remove it. Remove the two 1/4" screws securing the speaker, then pull it out and disconnect it.
There's no wiring harness adapter that works in this location, so you'll need to use two Posi-Products speaker connectors (one for each wire) to connect to the factory wiring.
Tools needed: panel tool, 1/4" socket, ratchet, and extension
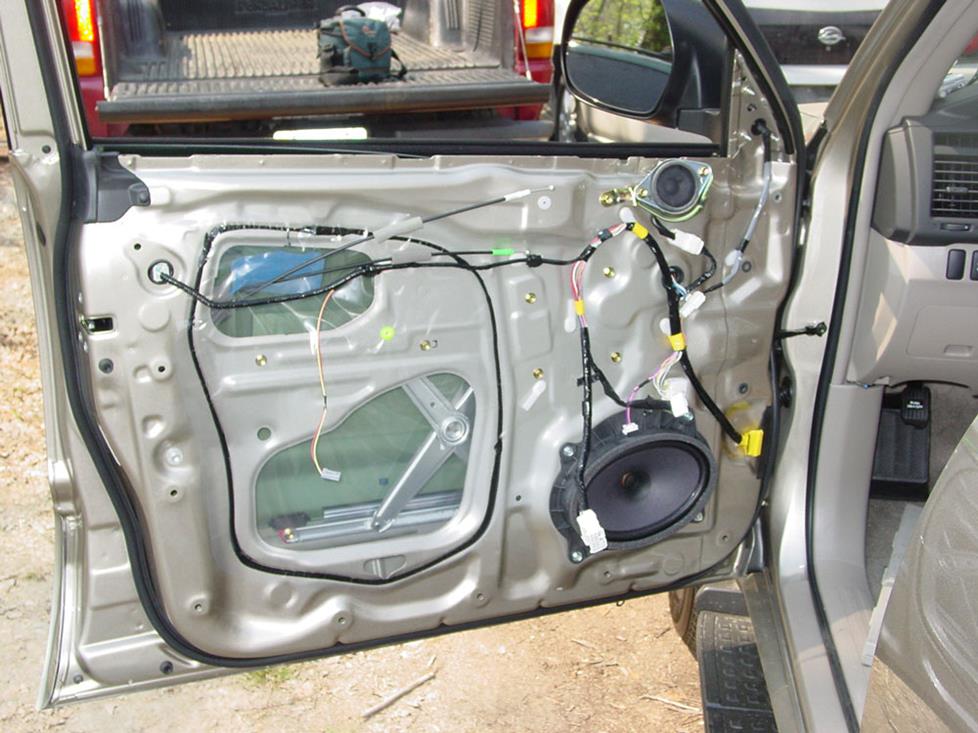
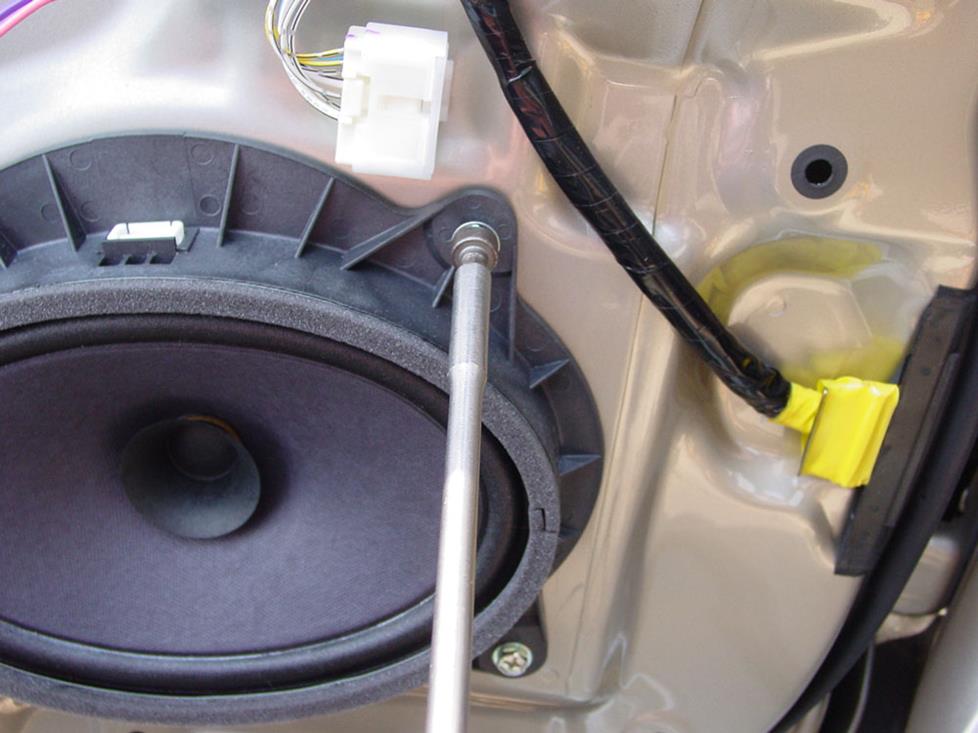
Both the base and JBL systems have component speakers in the front doors (Crutchfield Research Photo)
Removing the front door speakers
The ins and outs of replacing the front door speakers will vary just a tad depending on whether you're working with the base system or the JBL system.
The JBL's are component speakers, with a woofer and a tweeter that can be replaced with a set of aftermarket components. The base component speakers can also be replaced by aftermarket component speakers, but if, for some reason, you're only replacing the tweeters, things get kinda complicated. We can go over the details on the phone if you need to know, but we generally recommend installing components because it's just so much easier.
Once you remove the door panels, there are some other variations in the speaker removal process, and they're all detailed in your Crutchfield MasterSheet. We'd get into them here, but half of that info is guaranteed to bore you, so we'll skip it for now and focus on some things you'll definitely want to know either way.
- If you're replacing the woofers with certain 6"x9" speakers, you'll need to drill out the rivets securing the speakers. This isn't hard, but you're still drilling in your truck, so work carefully and wear eye protection.
- Depending on the speakers you're installing, you may need to cut out the back of the factory plastic speaker grille.
- As noted before, if you're replacing the lower-impedance JBL speakers with higher-impedance aftermarket speakers, you'll wind up with lower volume levels. Shop accordingly, and purchase lower-impedance speakers.
Whatever you wind up putting in there, be sure to test the speakers before you put the doors back together. And check the locks and windows, too.
Tools needed: Phillips screwdriver, small flat-blade screwdriver, panel tool, 10mm socket, ratchet, and extension
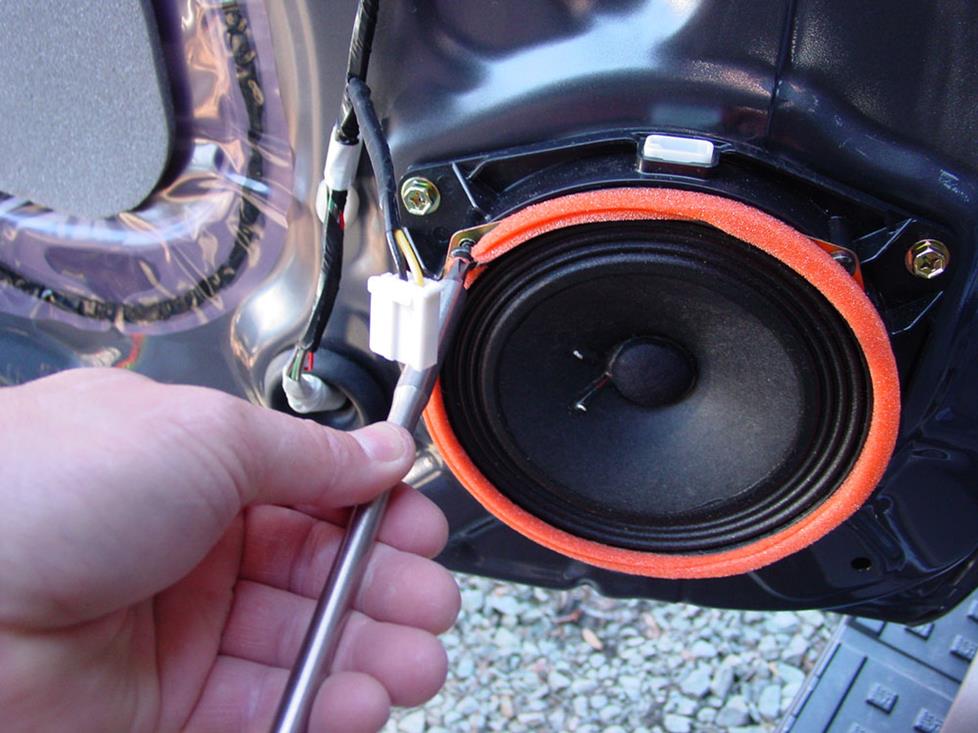
The JBL door speakers have snazzy orange trim (Crutchfield Research Photo)
Removing the rear door speakers
The rear doors are generally similar to the front doors, in that there are some differences in the replacement process for the base and JBL speakers. All the details, from door panel removal to speaker replacement, can be found in your Crutchfield MasterSheet.
Tools needed: Phillips screwdriver, small flat-blade screwdriver, panel tool, 10mm socket, ratchet, and extension
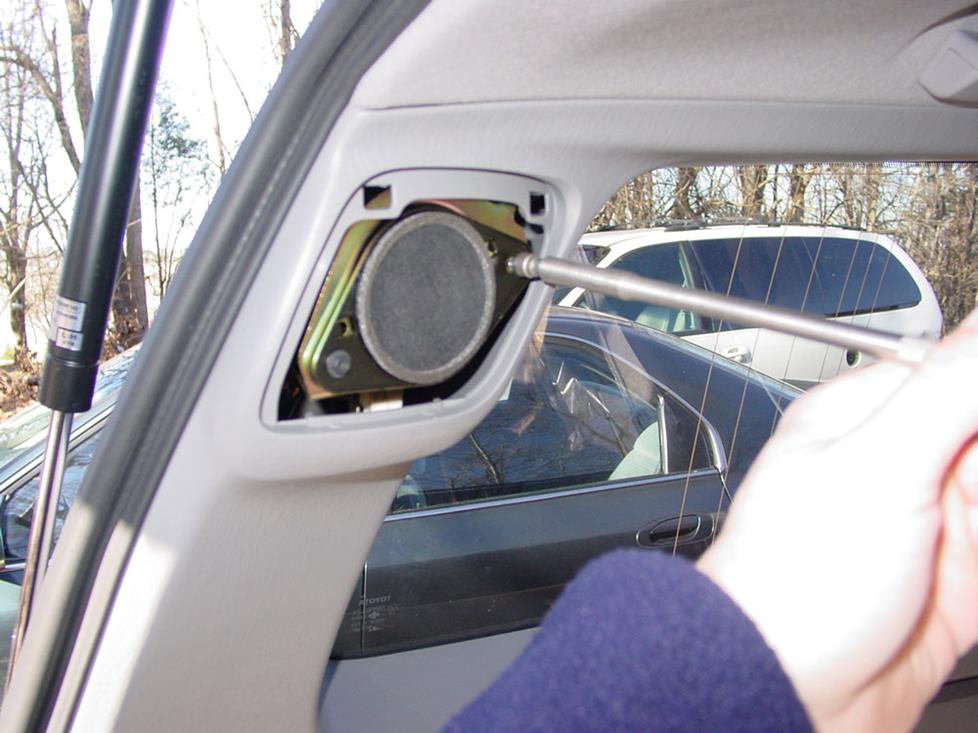
Replacing the rear pillar speakers is a pretty easy job, but you'll need backstraps and connectors for the new ones (Crutchfield Research Photo)
Removing the rear pillar speakers
The JBL rear pillar speakers are, like the dash speaker, pretty easy to reach and replace. You'll start by prying off the speaker grille, starting at the top edge. Remove the two 1/4" screws securing the factory speaker, then pull out the speaker, disconnect it, and remove it. Remember (here and everywhere else on this truck) to hang onto the factory screws. You'll need them to secure the new speakers.
You'll also need universal backstraps to secure the new speakers, and, since there's no wiring harness adapter available, you'll need to use Posi-Products speaker connectors to connect the new ones to the factory wiring.
Tools needed: small flat-blade screwdriver (or panel tool), 1/4" socket, ratchet, and extension
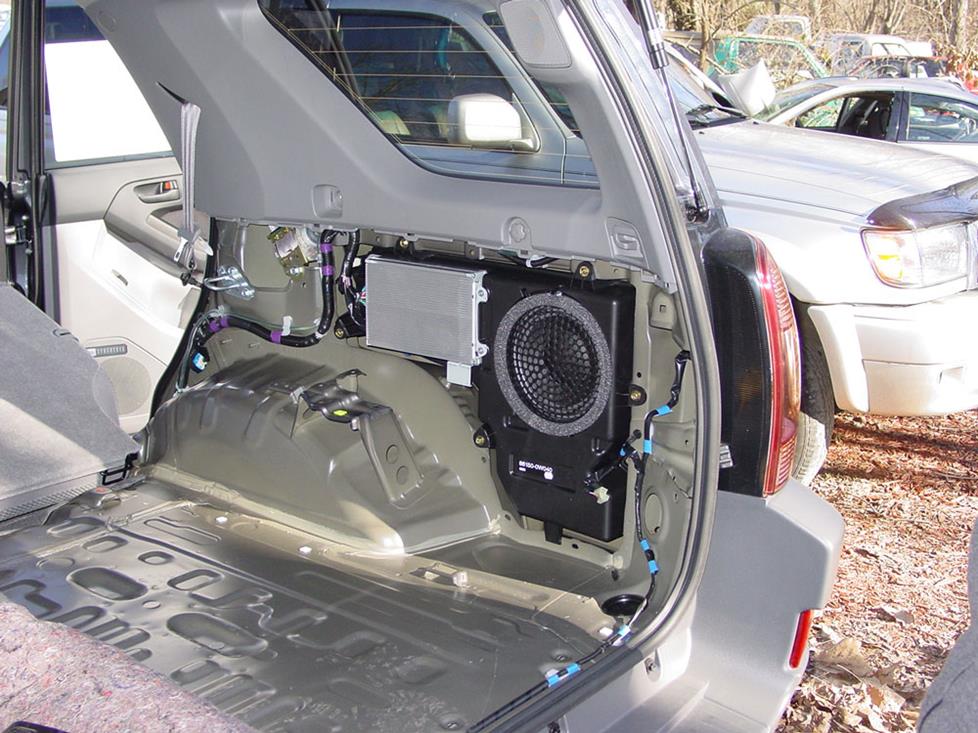
The rear subwoofer isn't all that easy to get to, but it is replaceable (Crutchfield Research Photo)
Remiving the rear side subwoofer
Replacing the JBL rear side subwoofer is a do-able DIY project, but it's not easy. The individual tasks aren't all that challenging, really, but there sure are a lot of 'em – 22, by our count. Can you, the average car audio DIY-er, do this? Yes, but you'll probably want to block off a significant portion of your weekend afternoon to do it.
There's no need to rush this job, because it is what it is and it takes as long as it takes. Work carefully, be patient, and stay organized. If you can do that, you can do this.
The factory system sends only bass frequencies to the stock dual voice coil subwoofer, so a replacement aftermarket speaker will also only play bass. The stock piece is also a low-impedance subwoofer, so replace it with a 2-ohm sub.
Depending on the sub you choose, you may have to drill new screw holes. If so, be aware of what's around the area you're drilling into, work carefully, and wear eye protection.
All the details can, of course, be found in your Crutchfield MasterSheet. And our tech team is just a phone call away if you need them.
Read our Car Speakers Buying Guide for more information.
Shop for speakers that fit your Toyota 4Runner
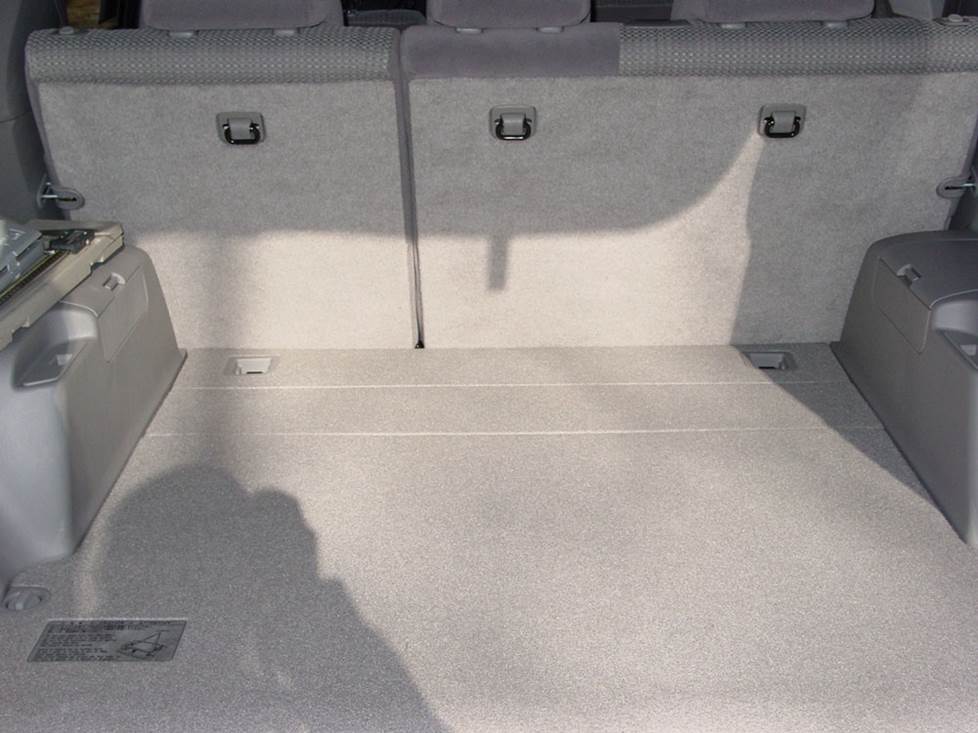
There's a decent amount of space for bass in your Toyota 4Runner
Bass in your 4Runner
A lot of 4Runner owners use their truck's cargo area for hauling, well, cargo. But if you want to add some bass to that space, you have a 40" W x 17" H x 29"/33" D area to work with. That'll definitely hold an impressive subwoofer box.
If you want more bass, but don't want to add something massive, a powered subwoofer will enhance your sound without taking up valuable cargo room.
Learn more about building a bass system in our Car Subwoofer Buying Guide.
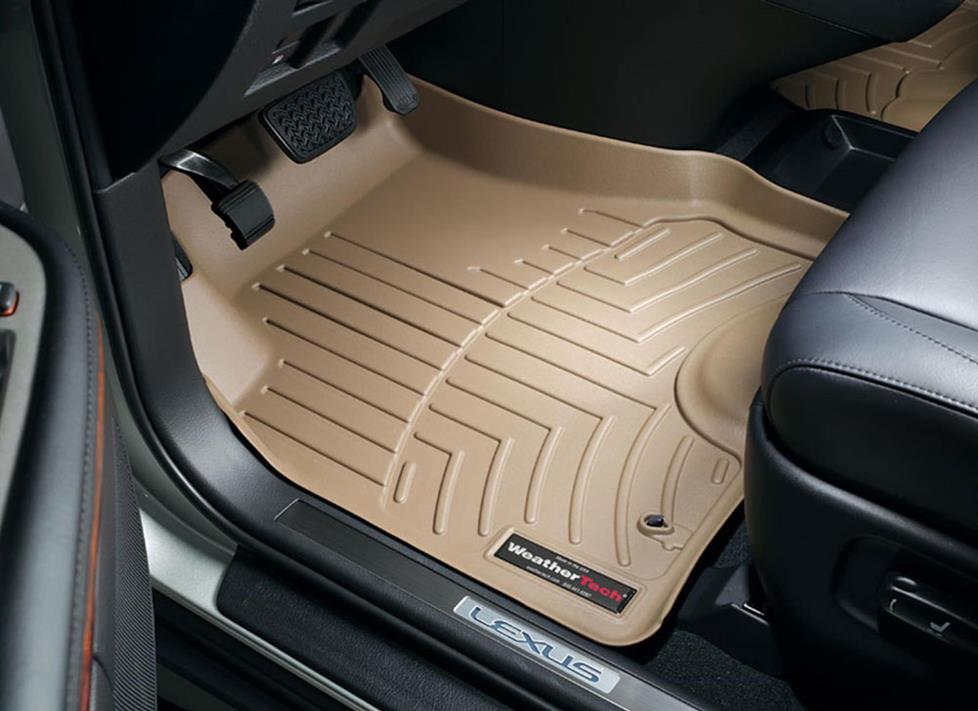
Yes, we know it says "Lexus." It's a stock image, okay? Your awesome new mats will look similar, but different.
Other options for your 4Runner
Here are some other smart, functional additions for your truck.
Floor mats to protect your carpet
When you drive a 4Runner you're eventually going to get involved in some sort of truck-like activity that gets you and/or it dirty. When that happens, it's a good idea to have a set of WeatherTech liners on the floors and especially in the cargo area. These incredibly durable mats trap moisture, contain dirt, and keep your factory carpets looking good. To see all the mats that fit your truck, enter your vehicle info.
Add an amp (or two) for better sound
A new 4-channel amplifier will help you get the most out of your new speakers, especially if you're replacing the base system. You'll get cleaner power (and a lot more of it), which will result in much, much better sound. A mono amp can provide the juice you need for your new subwoofer, too. Learn more about adding amps to your system in our Car Amplifier Buying Guide.
Sound damping to block noise
If you're tired of wind and road noise getting in the way of your audio enjoyment, A Dynamat Xtreme Door Kit is the perfect way to seal in sound. This heavy-duty insulating material is easy to install, and it really makes a difference. One kit will take care of the front doors in your 4Runner.
Security systems to protect your stuff
Installing a security system in your 4Runner isn't easy (security systems rarely are), but it's less complicated than it could be. Our Crutchfield Advisors can help figure out what you need to get the job done, but we usually recommend taking your car and your new security gear to a professional installer.
Let's get started!
Ready to shop? Use our vehicle selector to find the gear that will fit your car or truck. If you have questions, give us a shout via phone, chat, or email


Johnny V
Posted on 11/23/2021
Ok, what wiring connector did you use to keep the aftermarket in-door tweeter in circuit? In other words, I want to use the factory speaker wiring in the front door that connects the tweeter to the mid-bass speaker. I'm installing the Rockford-Fosgate Prime component speaker system.
Jon Paul from Crutchfield
on 11/23/2021
Adrian from Pacifica
Posted on 8/6/2020
What type/size speaker do I need for the dash and rear pillars?
Jon Paul from Crutchfield
on 8/7/2020
Dean D
Posted on 7/21/2020
Didn't you completely forget that 4th Gen 4runners have a boosted double antenna and that replacing the factory stereo will most likely cause poor radio reception? I've tried using the blue/white cable to power the antenna booster and a "Y" adapter for both antennas, but my radio reception is still horrible. I've tried multiple other ways as well as directly giving power to the antenna booster, but nothing works.
Brandon Cash from Norman, Oklahoma
Posted on 2/26/2020
I recently bought a Pioneer AVH 2500 NEX for my 2007 4runner. I bought your steering wheel controls harness and metra 70-114 harness What else will i need for install?
Jon Paul from Crutchfield
on 2/27/2020
Cha Vang
Posted on 1/15/2020
So for my 05 4Runner with the jbl speakers I got a sub and amp kit for Christmas and the amp I got with it was a mono amp. Would it be best to keep the stock amp to run the other speakers. I am also replacing the stock headunit with the pioneer ash-501ex. Really not sure what I need to buy
Jon Paul from Crutchfield
on 1/16/2020
Camron from Paradise
Posted on 5/3/2019
What gauge is the factory speaker wiring? I am running about 75 watts RMS per channel @ 4ohms to the front JL components, and about 85 watts RMS per channel @3 ohms to the rear JBL components. Trying to figure out if I need to put in 14 gauge wire
Jon Paul from Crutchfield
on 5/3/2019
Robert Ferency-Viars from Crutchfield
Posted on 4/12/2018
Thomas, You're right that better wire will help create better sound, but while it would help your speakers sound better, the upgrade won't be all that noticeable if you're using head unit power or a small amp (say 50 watts/channel). In those cases, the factory wire is fine. You really only need to replace the wire if you're powering the speakers with 75 watts RMS or more.
Thomas Puzio from Chicago
Posted on 4/11/2018
What about the factory speaker wire? You show replacing the speakers, but wouldn't leaving in the super thin (24 gauge?) stock wire to send the signal be cutting your speakers off at the knees? Wouldn't you want to upgrade this to 16 or 14 gauge speaker wire to all locations? And if so, how would that work?