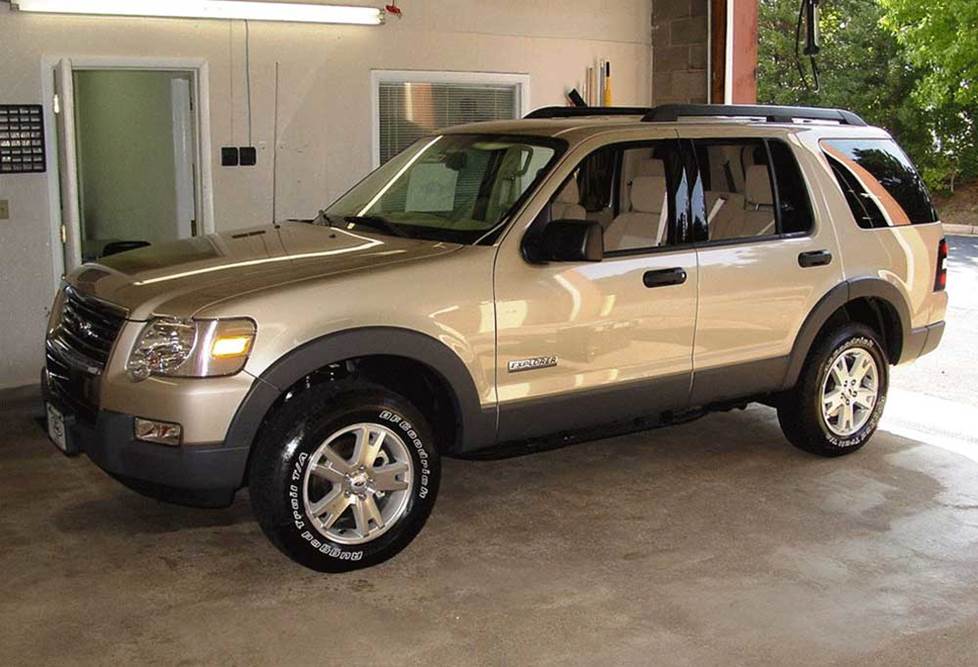
2006-2010 Ford Explorer, Explorer Sport Trac, and Mercury Mountaineer
How to upgrade the stereo system in your Explorer, Explorer Sport Trac, or Mountaineer

In brief: This Crutchfield Research Garage article gives you an overview of your SUV's stock stereo system and your aftermarket upgrade options. We'll tell you all about:
- The factory stereo system
- Removing the factory radio
- Removing the factory speakers
- Adding more bass
- Other options for your Explorer or Mountaineer
Then, use our vehicle selector to find the gear that will fit your Explorer or Mountaineer.
Overview of the Explorer and Mountaineer
The key word for the third-generation Ford Explorer and Mercury Mountaineer is "comfortable." They're comfortable to sit in, comfortable to drive, and, if need be, totally comfortable heading off into the woods in search of…well, whatever you need in the woods. They're also reasonably comfortable on the highway, whether you're shuttling the kids to a soccer game or towing a boat to the lake.
With all that, plus solid good looks, it's no wonder you see so many of them out there. And you will for a while, too, since they are Ford trucks and when properly cared for, they can outlive a Galapagos Tortoise.
Factory stereos, on the other hand, age like mayflies (okay, we're exaggerating, but you get the point), so if you're still enjoying your Explorer or Mountaineer, a new stereo will bring new life to your drive and improved functionality to your day.
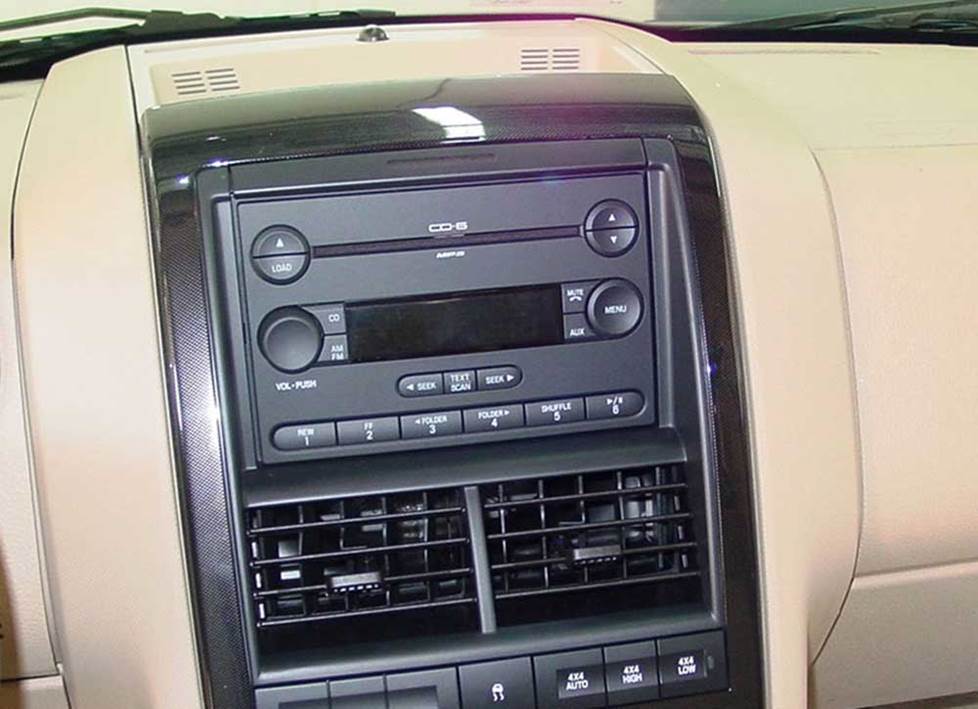
Both the standard (shown) and nav radios are reasonably easy to remove (Crutchfield Research Photo)
The factory stereo system
The factory radios evolved a bit over the years, but the removal and replacement process is the same for any of them. Whether you have the standard AM/FM/CD receiver or the optional Audiophile unit, an upgrade is certainly in order at this point.
You can choose from a wide variety of single-DIN (2" tall) or double-DIN (4" tall) aftermarket models. A single-DIN receiver with a fold-down face is not recommended for these trucks, though.
Detailed stereo and speaker removal instructions

When you replace the radio, you'll lose factory functions like satellite radio, navigation, or the DVD player. That's okay, since any half-decent aftermarket model can offer those same features. You can retain SYNC functionality with the right wiring harness adapter, but if you want to hear audio from the SYNC system, you should pick a car stereo with a rear AUX input.
Finally, the Ford amp is used to getting a 5-volt signal from the stock radio, so the 12-volt signal from a new stereo will cause an audible (and annoying) thump every time you turn on the vehicle. You'll need to purchase an inexpensive 12-volt to 5-volt adapter to cure this problem. Trust us, it's totally worth it, and it's included as part of your installation package when you purchase your new stereo from Crutchfield.
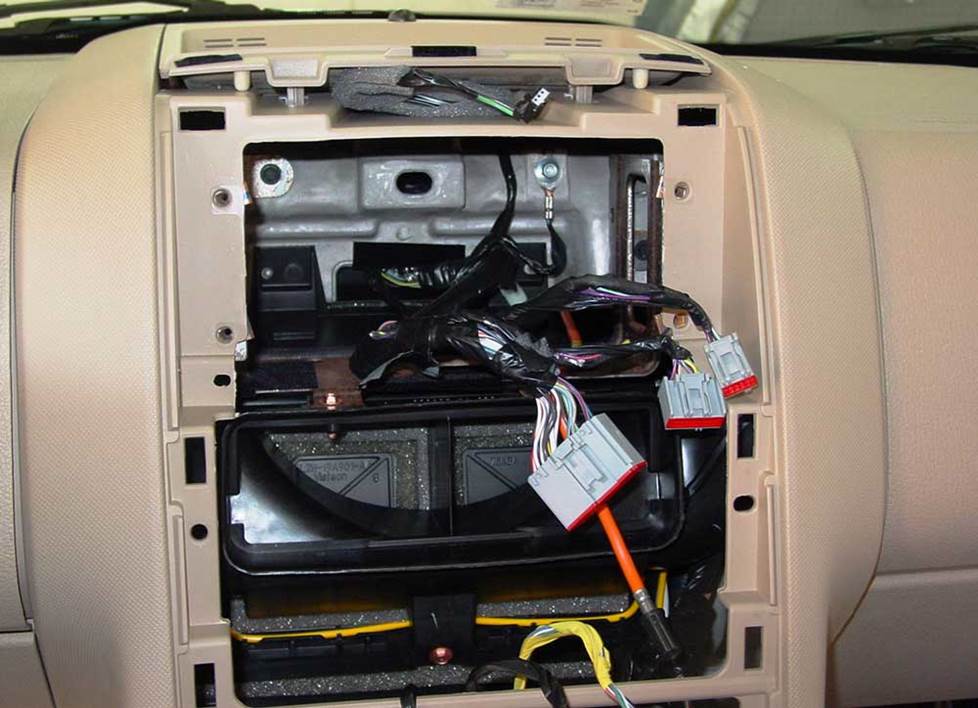
You'll need a dash kit for your new receiver, and it's included at a discount when you buy from us. (Crutchfield Research Photo)
Removing the factory radio
Installing a new stereo is pretty simple in these trucks, which is good news if you're a first-time car audio DIY-er. Heck, it's good news even if you've been swapping out stereos since 8-tracks were still cool.
Before you start, set the parking brake, place the gear shifter in its lowest position, and disconnect the battery cable. Safety first, of course.
With that taken care of, open the center console door and remove two exposed 7mm screws from the gear shift trim panel. Use a panel tool to pry up the gear shift trim ring and remove it, then pry up the trim panel itself. Disconnect the power outlet harness, then lift the trim panel over the shifter and remove it.
Next, you'll pry out the receiver trim panel (starting at the top corners) to release the retaining clips. Work the bottom corners of the trim panel over the edges of the console. Disconnect the wiring harnesses and vacuum hoses from the rear of the receiver trim panel, then remove the panel. Remove the four 7mm screws securing the stock radio, pull it out, disconnect the harnesses, and set it aside.
When you buy your stereo at Crutchfield, you'll get a big discount on the dash kit and wiring harness needed to install your new receiver. Follow the instructions included with each, then secure the new stereo in the dash. Test it out and, if it works, start putting the dash back together.
Tools needed: Panel Tool, 7mm socket, ratchet and extension, small flat blade screwdriver (to remove harnesses)
Read our Car Stereo Buying Guide for shopping tips and advice.
Shop for car stereos that fit your Ford Explorer
Steering wheel controls
In most cases, it's reasonably easy to retain your truck's steering wheel audio controls when you install a new stereo. When you enter your vehicle information, our database will choose the adapter you need to make your factory steering wheel controls work with a compatible aftermarket receiver.
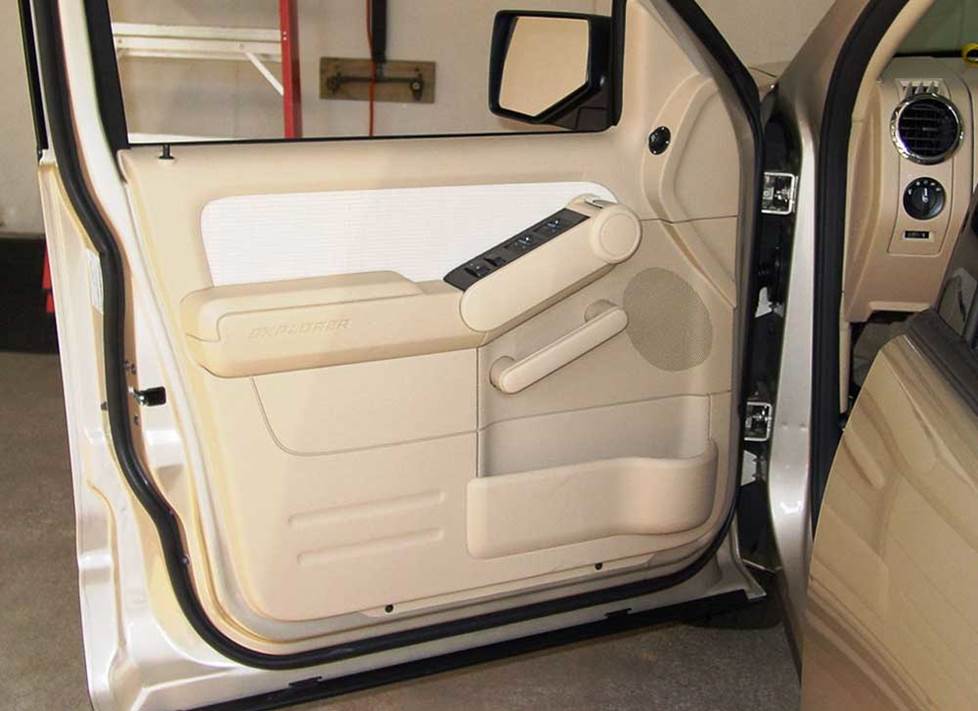
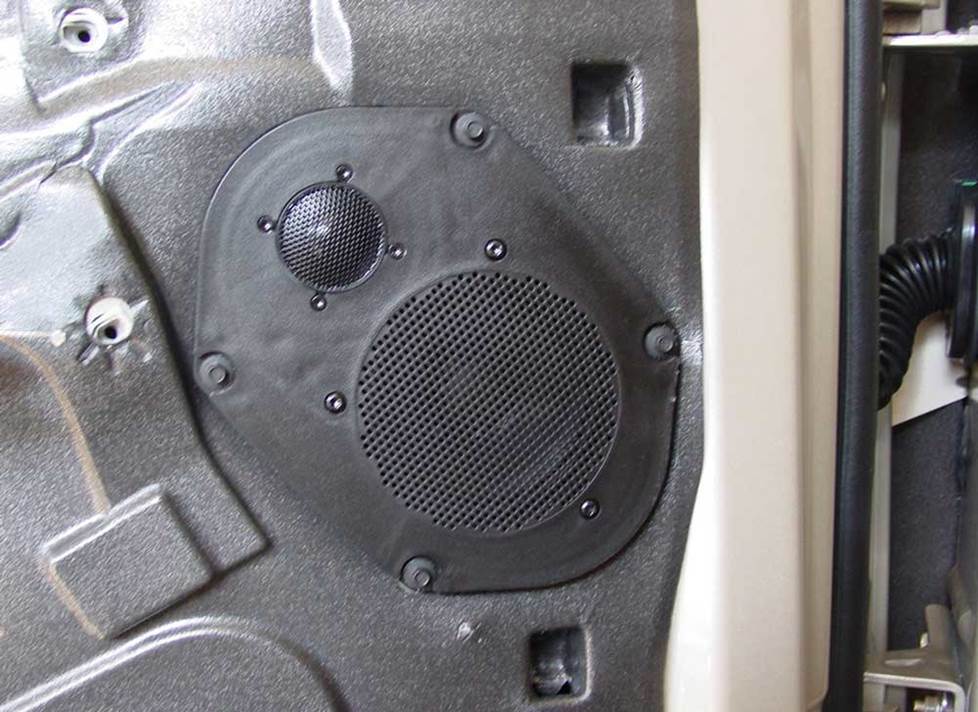
You'll need to remove the front door panels to replace the stock speakers. (Crutchfield Research Photo)
Removing the factory speakers
Whether your Explorer or Mountaineer has the base system or the Audiophile system, you'll find speakers in the front and rear doors. Audiophile trucks also have an 8" subwoofer in the cargo area.
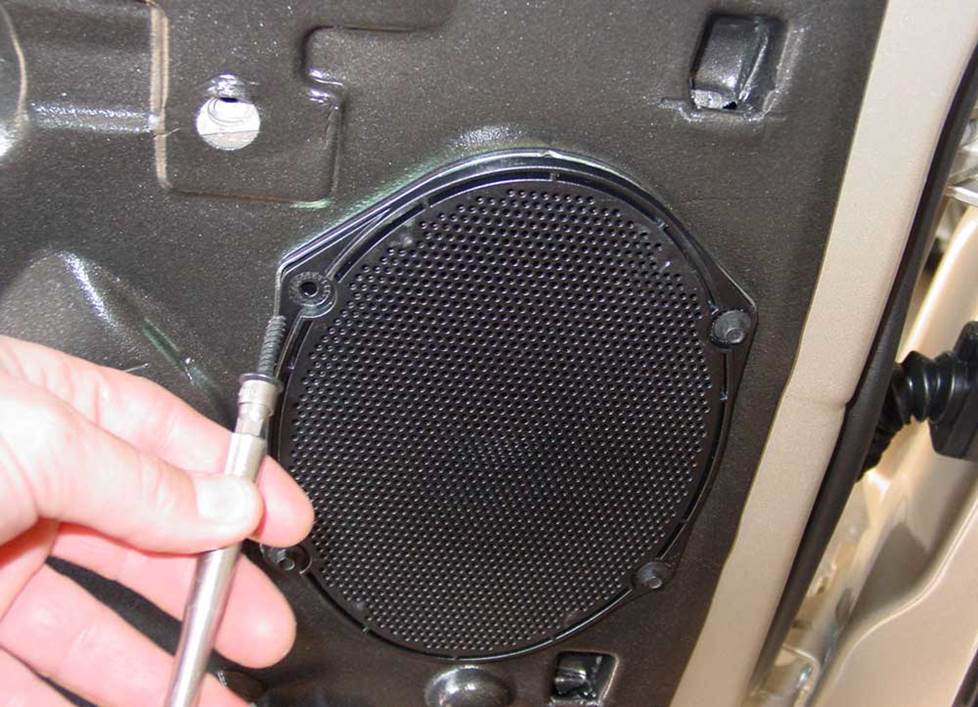
These speakers aren't hard to replace and you have lots of aftermarket replacement options. (Crutchfield Research Photo)
Removing the front door speakers
The stock 6"x8" front door speakers can be replaced by same-size or 5-1/4" models. You'll need mounting brackets to install the smaller ones, and they're included at a nice discount with your speaker purchase at Crutchfield.
The job itself isn’t all that difficult, but you'll want to work carefully and it's always a good idea to use an old saucer or stadium cup to hold all the screws you'll be removing. You'll need them later, after all.
To start, pry off the outer screw cover on the door pull, then remove the two exposed 7mm screws. Remove two more 7mm screws from the bottom edge of the door panel, then pry off the screw cover on the side of the power switch and remove two more 7mm screws.
Once all that's done, you can pop the door panel, disconnect the wiring harnesses and door release cable, and remove the door panel. Store the panels in a clean, safe place until it's time to put them back on.
The rest is easy. Remove the four 6mm screws securing the speaker, then disconnect it, set it aside, and start installing the new speaker using the screws you removed earlier.
Test your new speakers to make sure they work, then start putting the door back together. Make sure the windows and locks work properly before you finish up.
Tools needed: Panel tool, ratchet and extension, 6mm & 7mm sockets, needle nose pliers
Replacing the rear door speakers involves the same tools and techniques you used up front. (Crutchfield Research Photo)
Removing the rear door speakers
Save for the fact that you'll have one less 7mm screw to worry about, replacing the rear door speakers is pretty much the same as replacing the ones up front. Same speaker options, same tools, same basic order of things. Remember to work carefully and keep those screws organized. All the step-by-step instructions can be found in the Crutchfield MasterSheet that's included free with your stereo or speaker purchase.
Tools needed: Panel tool, 6mm & 7mm sockets, ratchet and extension, needle nose pliers
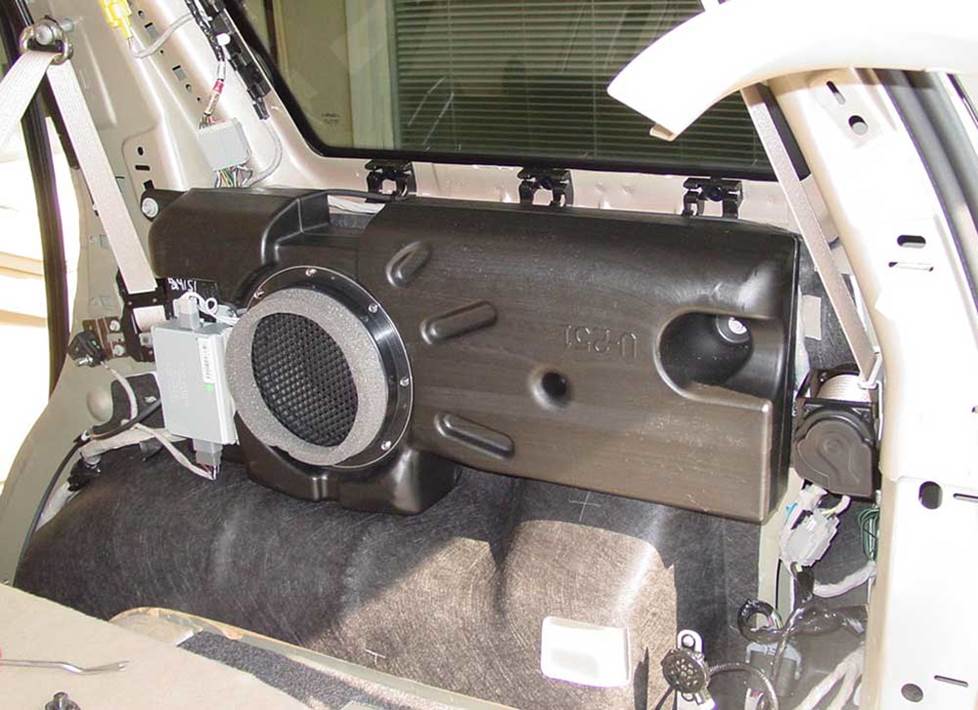
The factory sub is not the easiest thing to get to. It's do-able, but the job is going to take some time. (Crutchfield Research Photo)
Replacing the cargo area subwoofer
If your truck has an 8" subwoofer in the cargo area, you already know how much a subwoofer can add to your musical enjoyment. An aftermarket sub can add even more wonderfulness, so you'll probably want to upgrade to a better 8" sub. We have lots of 'em.
Removing and replacing the factory sub is a do-able DIY project, but it's not a quick one. It's not that the work is hard, it's just that there's an awful lot of it. The rear panel assembly is a rather intricate thing in these trucks, and removing all the panels involves a lot of steps.
There's also no wiring harness available for this location, so you'll need to use Posi-Products speaker connectors to connect the new sub to the factory wiring. It's a lot easier than splicing, plus you'll get a much stronger connection.
It's nothing you can't handle, but you might want to block off a good chunk of time to do the job. All the step-by-step (by step, by step, etc.) instructions are in your Crutchfield MasterSheet, so that'll help. Work carefully, stay patient, and you'll be fine.
Tools needed: Panel tool, Torx T50 driver, ratchet and extension, 7mm, 8mm & 10mm sockets
Read our Car Speakers Buying Guide for more information.
Shop for speakers that fit your Ford Explorer
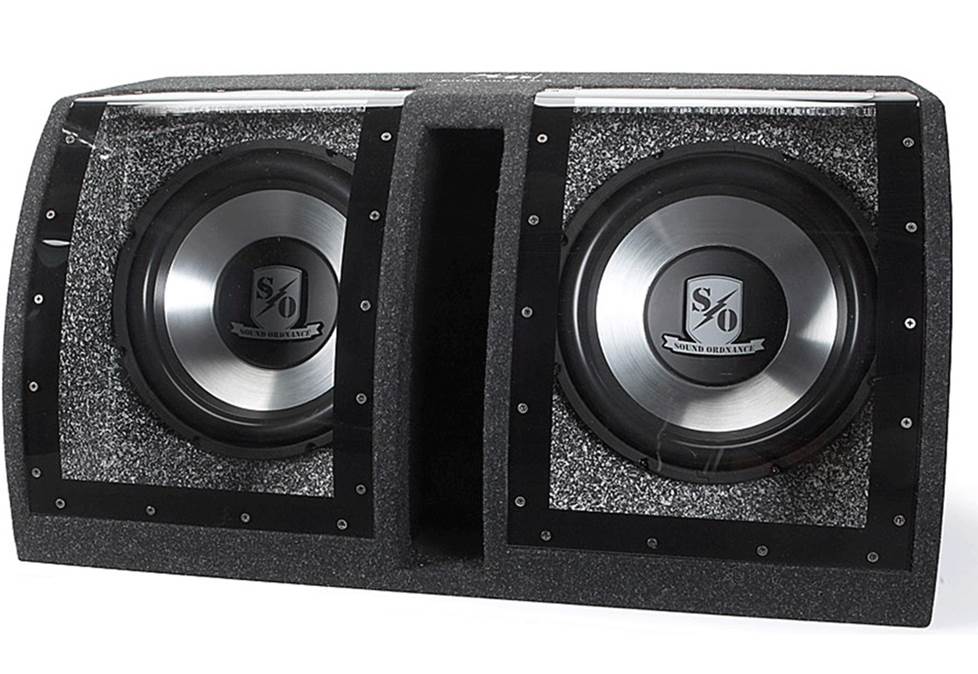
Sound Ordnance B-24 bandpass enclosure with two 12" subwoofers
Bass in your Explorer or Mountaineer
If you don't already have a sub in your Explorer or Mountaineer, there are still plenty of ways to add bass. And plenty of space for it, too, depending on how you use your truck.
There's lots of room back there, even with the third-row seats up. Measured that way, you have a 45" W x 16" H x 8"/11" D space to work with. A subwoofer box can eat up a lot of that, so if cargo space matters to you, a powered subwoofer might be a better idea.
Bass in your Sport Trac
There is a factory sub option for the Sport Trac, too. It's mounted on the back wall and you'll need to remove the wall panel to get to it. In some cases, you'll need to drill new mounting screw holes for your new aftermarket subwoofer. The job's not all that hard, really, but work carefully, know what you're drilling into, and always wear eye protection. All the step-by-step details can be found in your Crutchfield MasterSheet.
The Sport Trac doesn't have a vast amount of space for a subwoofer box, but if you can work with the 16" W x 15"H x 5"/7" W space under the passenger's side rear seat, you can make something happen back here. Those measurements, by the way, were taken with the box on its back and the subs facing upwards. A powered sub is another option, of course.
Learn more about building a bass system in our Car Subwoofer Buying Guide.
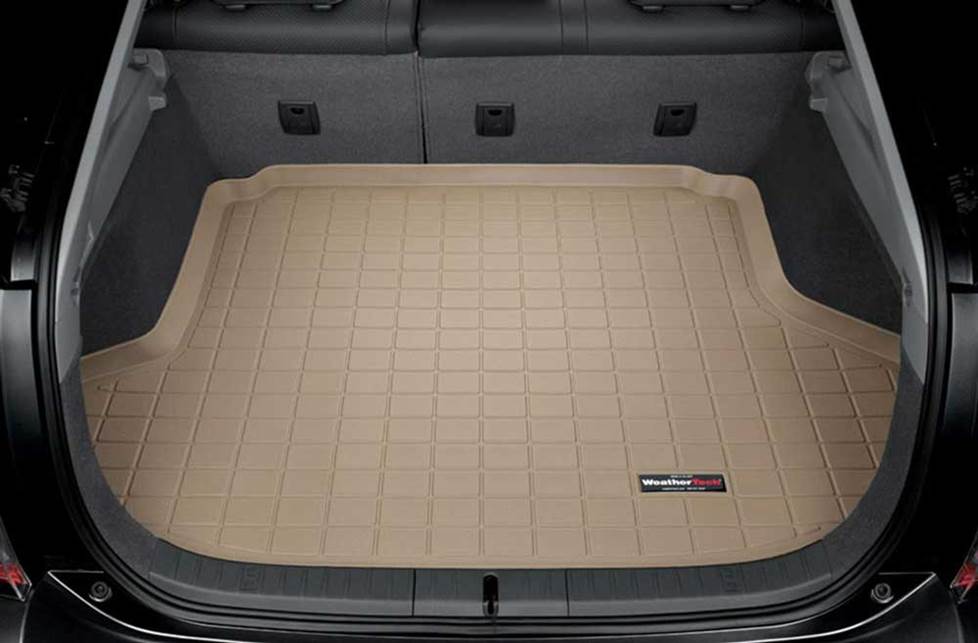
Protect your interior with a custom cargo liner from WeatherTech.
Other options for your truck
Here are some other smart, functional additions for your Explorer, Explorer Sport Trac, or Mountaineer.
Floor mats to protect your carpet
No matter how much you pamper your Explorer or Mountaineer, you're eventually going to get involved in some sort of truck-like activity that gets you and/or it dirty. When that happens, it's a good idea to have a set of WeatherTech liners on the floors and especially in the cargo area. These incredibly durable mats trap moisture, contain dirt, and keep your factory carpets looking good. To see all the mats that fit your truck, enter your vehicle info.
Sound damping to block noise
Upper-end Explorers and Mountaineers are actually kind of quiet for SUVs, but as trucks age, creaks and groans can start to intrude on your driving serenity. A Dynamat Xtreme Door Kit is the perfect way to seal in sound. This heavy-duty insulating material is easy to install, and it really makes a difference. One kit will take care of the front doors in your SUV. The rear doors and the rear hatch are also good areas to target if you build a serious sound system.
A set of inexpensive foam speaker baffles is another way to ensure that your speakers give you the performance you want without the rattling and booming you don't. They'll also protect your speakers from moisture, dust, and other harmful things.
Amplifiers to boost your sound
These trucks offer plenty of room for an aftermarket amplifier, so if you want to take your sound to the next level, you won't have to worry about space in most cases. Our Crutchfield Advisors can help you find the right amp for your system. Learn more about adding amps to your system in our Car Amplifier Buying Guide.
Remote start and security systems
Adding remote start capability to your vehicle lets you warm it up in the winter or cool it down in the summer. The iDatastart system is incredibly convenient and makes it easier than ever to install a remote start system, so we highly recommend it. The module requires a vehicle-specific T-harness (sold separately) to connect with your vehicle's computer, security, and ignition systems, so we ask that you call to order so that we can make sure you get the right harness for your ride.
You can also talk to your Crutchfield Advisor about a security system. They’re not as easy to install (we usually suggest letting a professional do the job), but we can help you choose a system that’ll work in your vehicle.
Let's get started!
Ready to shop? Use our vehicle selector to find the gear that will fit your car or truck. If you have questions, give us a shout via phone, chat, or email


Austin from Flinestone
Posted on 7/2/2024
2006 ford explorer What size door speakers should I get
Crutchfield Writing Team from Crutchfield
on 8/1/2024
edgar ramirez from pittsburg, ca
Posted on 11/28/2020
where do you connector the 12volt to 5 volt convertor too.. location and color of wire.. if i purchase that from you will you guide me in the right direction
Jon Paul from Crutchfield
on 11/30/2020
Patrick H from Bartlett
Posted on 7/20/2020
I'm working on installing a new radio in my 06 explorer. I just had one question involving the parking break: how do you connect the radio to the parking break?
Jon Paul from Crutchfield
on 7/21/2020
Ron from Miramar Beach
Posted on 2/4/2020
I have a 2007 Ford Explorer Eddie Bauer with Factory Audiophile system with factory sub and w/o nav. I want to keep the factory head unit and add in my Audio Control LC6i, along with my JL Audio 5 channel amp, a sub and Infinity Kappa's in the doors. My question is, do I still need an adaptor 12v to 5v? Or any other adaptors to connect system? I'm assuming I'll have to run all new wiring from the head, to the LC6, to the amp and finally to the speakers. Any input would be appreciated. Regards, Ron
Jon Paul from Crutchfield
on 2/5/2020
Paul
Posted on 1/28/2020
What is the power output (RMS and Peak) of the factory subwoofer amp in the 2006 Explorer?
Jon Paul from Crutchfield
on 1/29/2020
Richard Baez Jr from Reading
Posted on 12/8/2019
I'm currently working on a 2007 Ford explorer sport Trac. It does have the factory sub. After connecting the pioneer with the factory harness it was making a popping sound as soon as I started up the vehicle. The sub would then not work. I was able to hear audio from the door speakers successfully. The subwoofer however was going into a protection mode. Intern after researching and found you guys I do realize I need a 12 volt to 5 volt converter. As soon as I receive it and have it installed I'll let you guys know the results. Thank you for the knowledge you have instilled over the years, Crutchfield!
Jon Paul from Crutchfield
on 12/9/2019