2006-2013 Audi A3 Sportback
How to upgrade the stereo system in your A3 Sportback

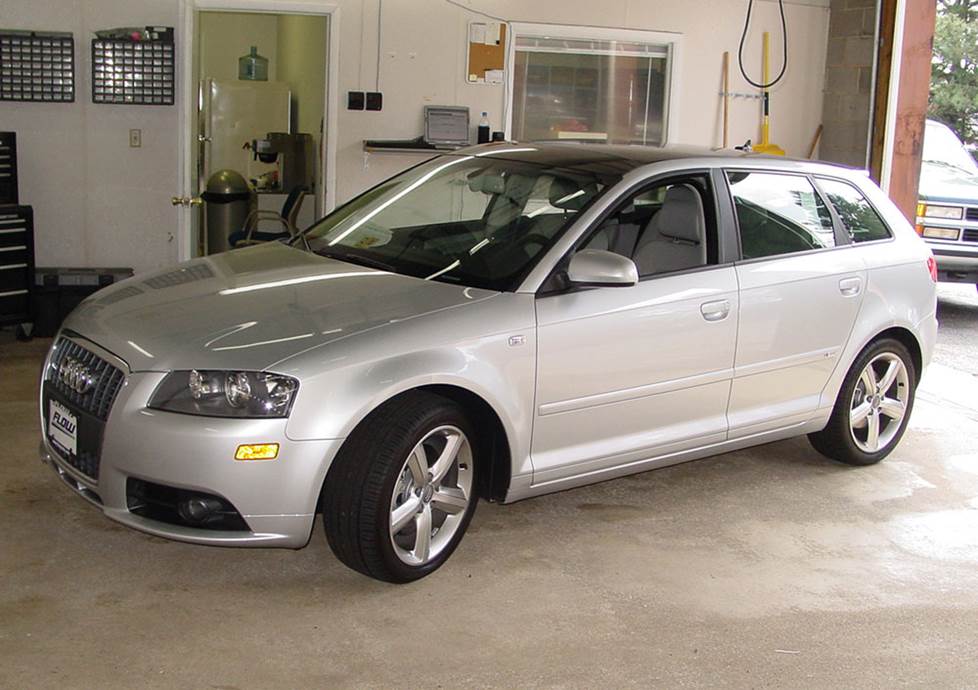
In brief: This Crutchfield Research Garage article gives you an overview of your Audi's stock stereo system and your aftermarket upgrade options. We'll tell you all about:
- The factory stereo system
- Removing the factory radio
- Removing the factory speakers
- Adding more bass
- Other options for your A3
Then, use our vehicle selector to find the gear that will fit your A3 Sportback.
Overview of the Audi A3 Sportback
Who says you can't have it all? The Audi A3 Sportback gives you plenty of useful cargo room while also giving you an excuse to take the long way home if you feel like straightening some curves.
Cars like the Sportback (Don't call it a wagon, even though, y'know, look at it....) are a reminder that practical cars don't have to be boring. A lot of them are, of course, but Audi doesn't really do boring, so practical-minded Audi owners get to enjoy cars like this when they're whizzing through their daily drive.
The stock audio systems weren't awful, but they're also not young anymore, so it might be time for an upgrade. A car this fun deserves an audio system to match, so read on to find out what you can do and how you'll do it.
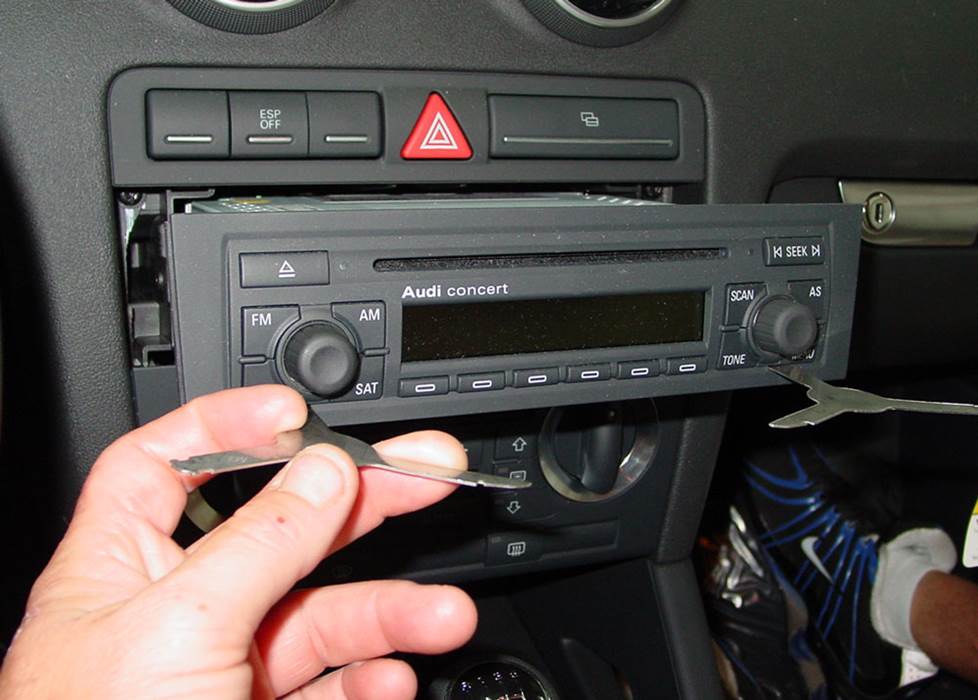
The single-DIN Audi radio is pretty easy to remove (Crutchfield Research Photo)
The factory stereo system
The A3 Sportback was offered with two audio systems. There’s the Concert system which sports an AM/FM/CD receiver with seven speakers and the Symphony system, which has an AM/FM/6-CD receiver with Bluetooth® connectivity and a 10-speaker Bose® audio system.
A variety of aftermarket single-DIN (2" tall) and double-DIN (4" tall) receivers will work in this car, though not all of them will accept a double-DIN. It depends on the model year, so we'll let you know when you enter your vehicle information.
Detailed stereo and speaker removal instructions
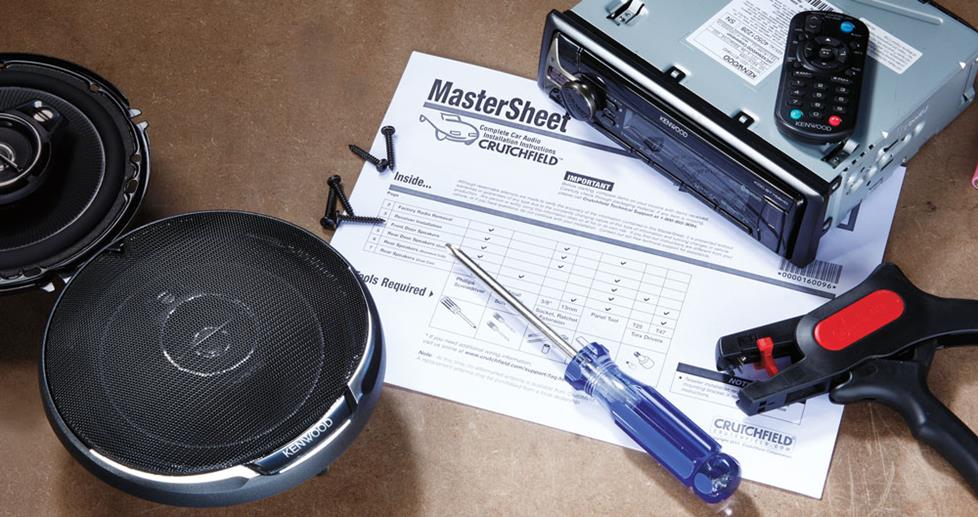
The radios changed a bit over this A3’s run, which means there are some subtle differences in the wiring harnesses you need to use. We’ll stay out of that clump of weeds in this article, but you’ll see all the relevant details when you enter your vehicle info and see the stereos, speakers, subs, and other audio accessories that will work in your car. If you have questions about any of this (and we’re betting you do), give us a call or chat.
And remember that your Crutchfield stereo purchase includes not only detailed, vehicle-specific disassembly instructions, but also free lifetime tech support for the life of the gear. Our experts are right here in Virginia and available seven days a week to help you with any questions or issues that crop up during your DIY installation.
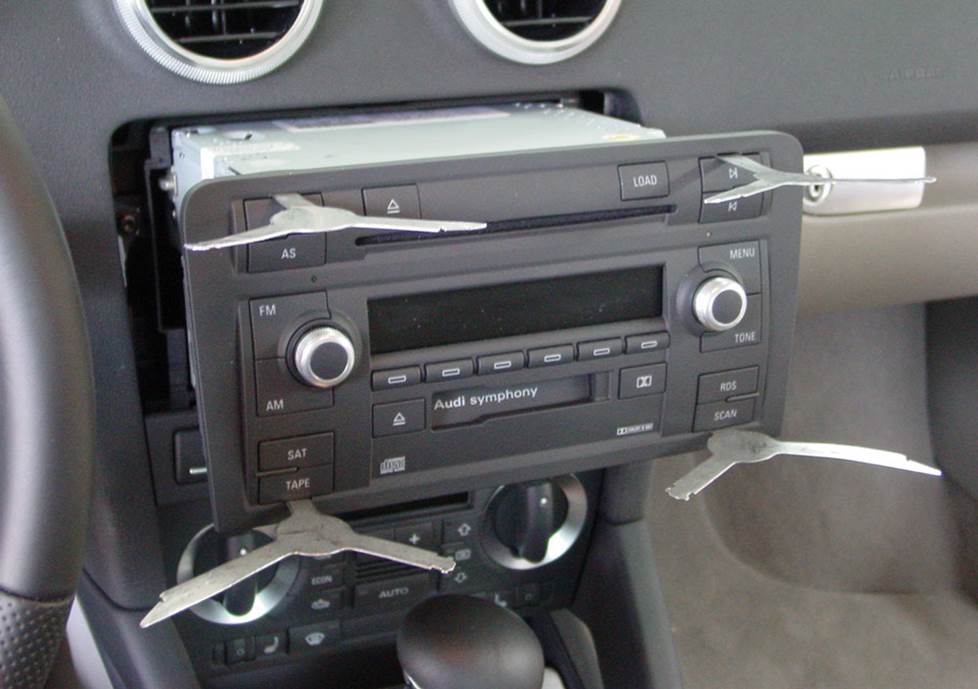
You'll need four of these tools to remove the A3's double-DIN radio (Crutchfield Research Photo)
Removing the factory radio
On the upside, removing the A3’s factory radio is a pretty simple task, regardless of which radio you’re removing. Before you do anything else, though, be sure to set the parking brake and disconnect the negative battery cable to prevent any electrical short.
Using the "keys" included with your order, insert the two (single-DIN) or four (double-DIN) radio removal tools into the slots on the face of the factory radio to release the clips on the sides of the unit. Spread the tools slightly outward and pull the radio towards you. Once it’s out, disconnect the wiring harness, unplug the antenna lead, and remove the radio.
Once the new receiver is connected, be sure to test it out to make sure it’s working before you slide it all the way into the cavity and secure it.
Tools needed: DIN tools (one set or two, depending on factory radio)
Read our Car Stereo Buying Guide for shopping tips and advice.
Shop for car stereos that fit your Audi A3
Steering wheel audio controls
In most cases, it's reasonably easy to retain your Audi's steering wheel audio controls when you install a new stereo. When you enter your vehicle information, our database will choose the adapter you need to make your factory steering wheel controls work with a compatible aftermarket receiver.
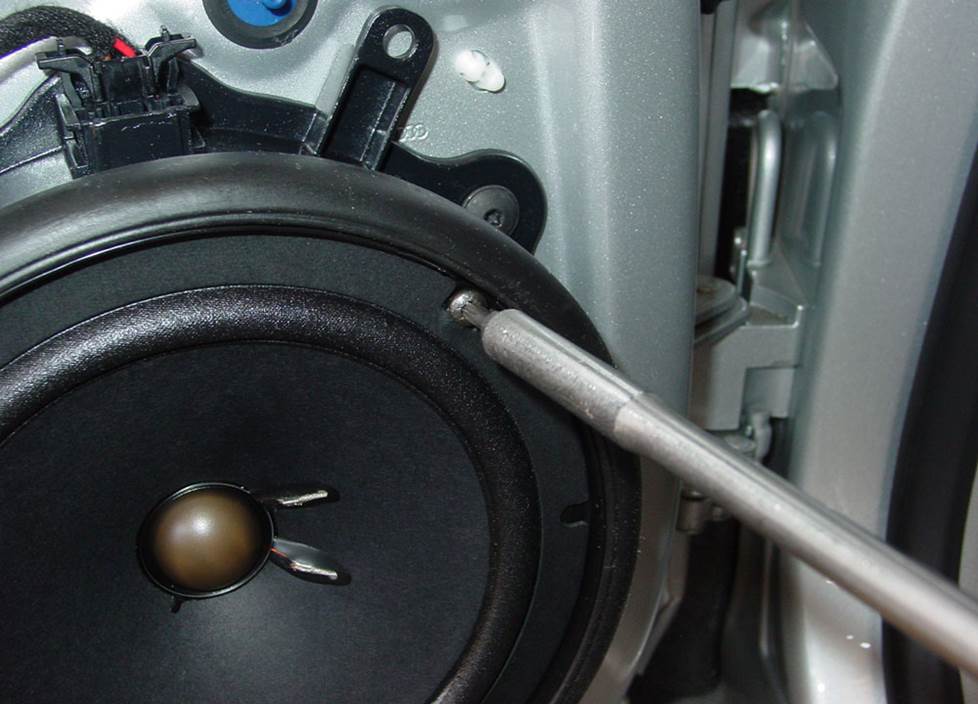
Upgrading your A3's speakers will really improve your audio performance (Crutchfield Research Photo)
Removing the factory speakers
The speaker array stayed consistent throughout this A3's long and healthy run. Generally speaking, speaker replacement is reasonably easy, so it's a good project for the car audio DIY-er.
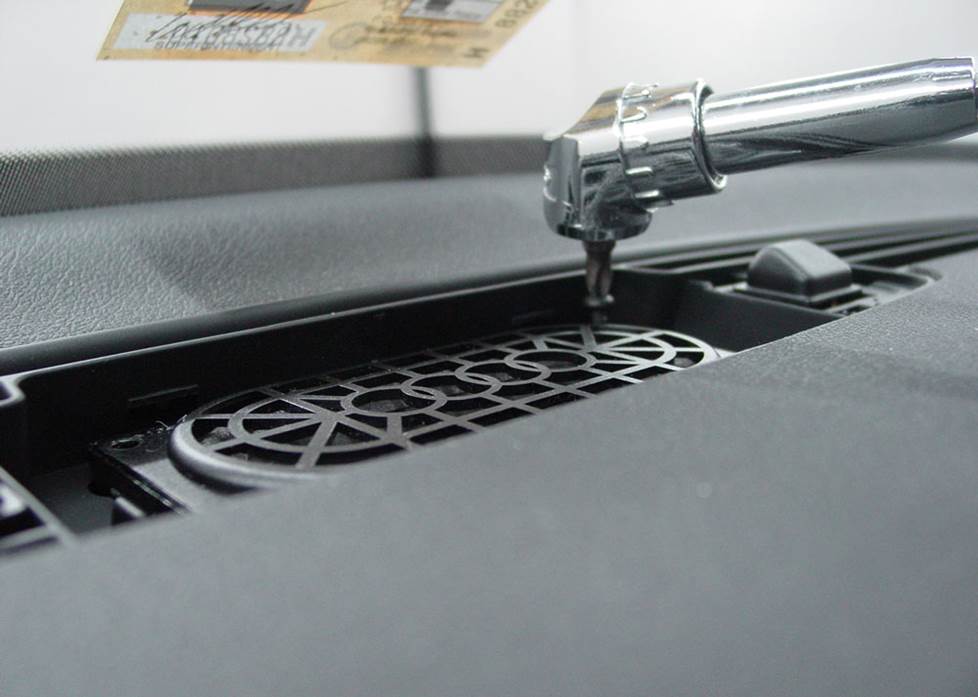
You can replace this sausage-shaped center dash speaker, but you'll need to fabricate a mounting bracket to do it. (Crutchfield Research Photo)
Removing the center dash speaker
The factory center dash speaker measures 2" x 4-1/2", and while there are replacements available, the rather odd shape means that none of the aftermarket options will fit right in. You'll need to fabricate a mounting bracket or spacer, or you can use our universal backstraps to secure the new speaker. We can help you find something that will work, so give us a call and talk to one of our expert Crutchfield Advisors
There’s no wiring harness adapter for this location, so you’ll need to splice, solder, or use Posi-Products speaker connectors to connect the new speaker to the car’s wiring.
The stock speaker is easy to remove, though, so there’s that. Use a panel tool to pry up the speaker grille, then remove it and remove the four Phillips screws securing the speaker. Pull it out, disconnect it, and remove it.
Tools needed: panel tool, Phillips screwdriver
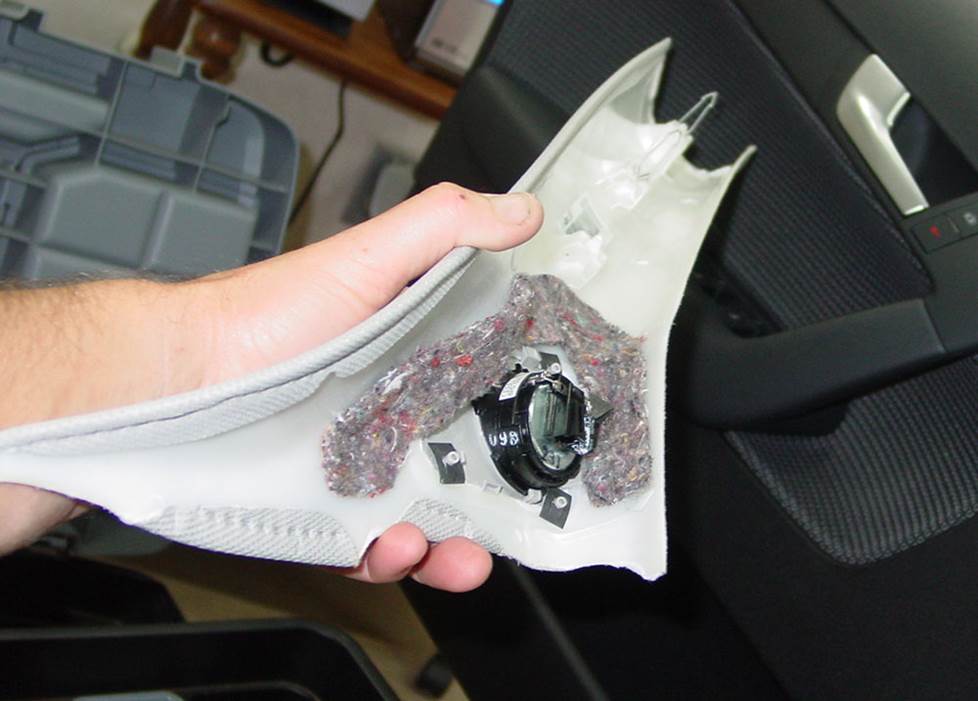
Give the pillar tweeters a gentle twist to remove them from the trim panel (Crutchfield Research Photo)
Removing the front pillar tweeters
The factory tweeters are mounted to the back of the windshield pillar trim panels. These speakers have a 1-1/2" diameter, and they’re mostly easy to deal with.
Use your panel tool to pry out the top of the pillar trim panel to release clips. Pull the trim panel upward, then disconnect the speaker wiring and remove it. Gently twist the tweeter to remove it from the mount.
Replacement tweeters will fit, but you'll need to use hot glue, silicone, or our universal backstraps to secure them. There’s no wiring harness adapter for this location either, so you’ll need to splice, solder, or use Posi-Products speaker connectors here.
Be sure to test the new speakers before you replace the pillar trim panel.
Tools needed: panel tool
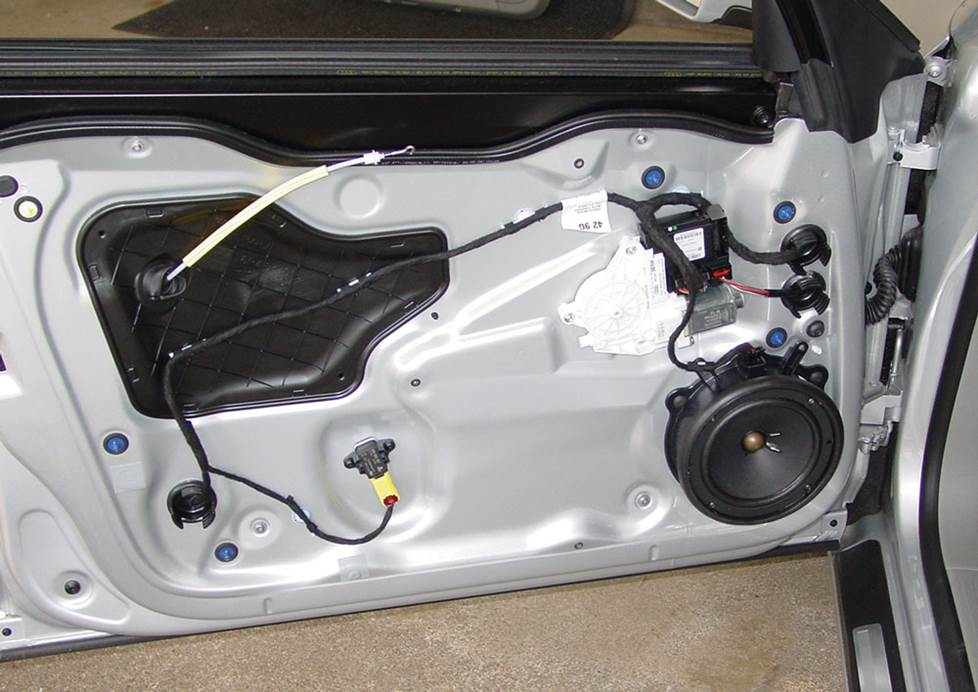
You have plenty of options when it comes to replacing the front door speakers (Crutchfield Research Photo)
Removing the front door speakers
The 6-3/4" factory front door speakers can be replaced with a variety of same-size, 6-1/2", or 5-1/4" aftermarket models. You’ll need mounting brackets for the smaller models, and we’ll include them with your Crutchfield speaker purchase. The process is essentially the same for both stock systems, but there are a few key differences that we’ll note below.
To get to the old ones, start by using your panel tool to pry off the door lock switch trim, then remove the Torx T25 screw underneath it. Remove one Torx T25 screw at the top edge of the door pocket, then remove two Torx T25 screws (or one in Bose-equipped cars) from the bottom edge of door panel.
Pry around the sides and bottom of the door panel to release the retaining clips, then lift the panel and hold it out enough to disconnect the door release cable and wiring harnesses. Remove the panel and store it somewhere safe and dry.
To remove the Concert speakers, you’ll need to remove the three Torx T25 screws securing the speaker/bracket assembly before disconnecting and removing it.
For the Bose Symphony speakers, you’ll remove the four Torx T20 screws securing the speaker before disconnecting and removing it.
If you’re dealing with the Concert system, there’s no speaker wiring adapter available at this time for these speaker locations. You’ll need to splice, solder, or use Posi-Products connectors here, too.
Be sure to test the new speakers before you put the doors back together. Make sure the wires aren’t interfering with proper window operation and also check the door lock and release operation.
Tools needed: panel tool, Torx T25 or Torx T20 driver
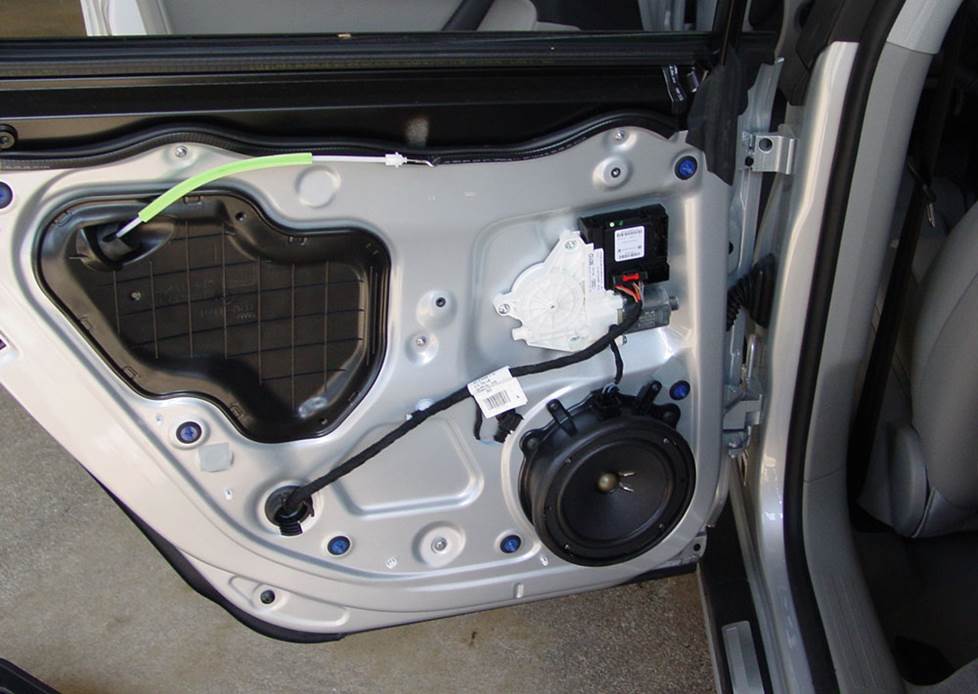
The rear doors feature woofers down below and tweeters mounted to the door panels (Crutchfield Research Photo)
Removing the rear door speakers
In the rear doors, both systems include 6-3/4" woofers and 1-1/2" tweeters. The removal/replacement process back here is pretty straightforward, too.
Pry off the tweeter grille panel and remove the Torx T25 screw beneath it. Pry up and remove the power options switch trim and remove one exposed Torx T25 screw. Next, pry around the sides and bottom of the door panel to release the retaining clips, then lift the panel and hold it out enough to disconnect the door release cable and wire harnesses. Remove the panel and store it safely while you keep working.
To remove the tweeter, you just need to pry it away from the back of the door panel. You’ll need to either fabricate your own speaker mounting bracket or use our universal backstraps to secure the new tweeter.
For the standard (Concert) woofers, remove three Torx T25 screws securing the speaker/bracket assembly. Pull out the speaker, disconnect it, and remove it.
For the Bose Symphony speakers, you’ll remove the four Torx T20 screws securing the speaker before disconnecting and removing it. Test door lock and release operation.
As with the front doors, there’s no speaker wiring adapter available at this time if you’re replacing the Concert series speakers. You’ll need to splice, solder, or use Posi-Products connector.
Be sure to test the new speakers before you put the doors back together. Make sure the wires aren’t interfering with proper window operation and also check the door lock and release operation.
Tools needed: panel tool, Torx T25 or Torx T20 driver
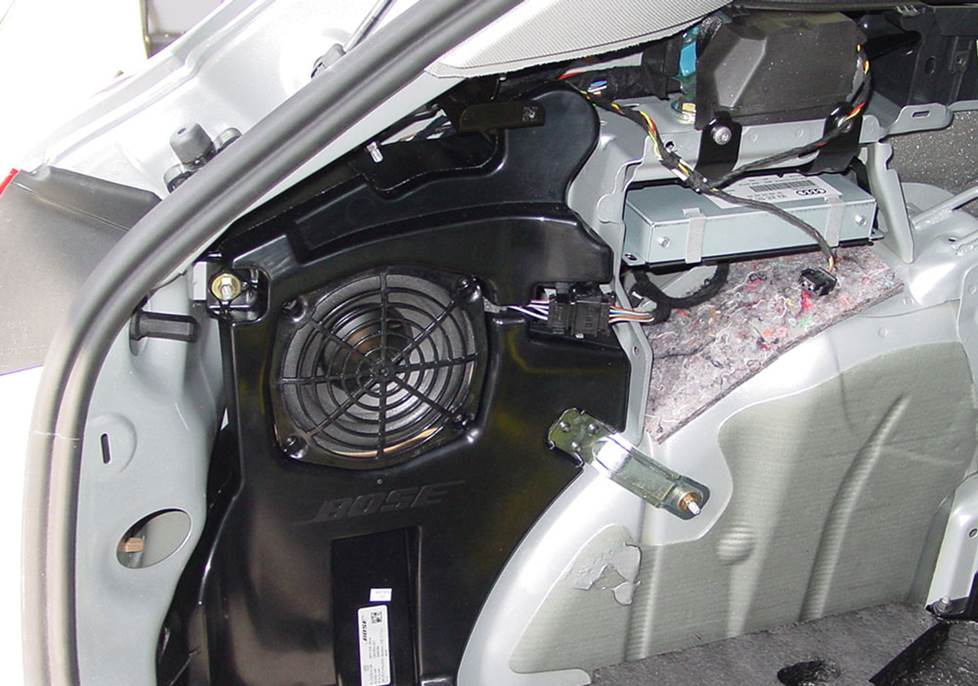
It takes a little work to get to the factory subwoofer, but the bas improvement will be worth it (Crutchfield Research Photo)
Removing the rear side subwoofer
Both A3 audio systems feature a dual voice coil subwoofer located in an enclosure on the left side of the cargo area. The standard sub is a 6" model, while the Bose sub is a slightly oblong 6-3/4" model. Both are hardwired to the amplifier, which is on the other side of the cargo area.
To install an aftermarket subwoofer, you’ll need to fabricate a mounting bracket and secure the new sub to the bracket. In some cases, you might need to drill new mounting screw holes. That’s not hard to do, but you are drilling into your very own car. Work carefully, pay attention to where you’re drilling, and wear eye protection.
But before you do anything, give us a call and talk to a Crutchfield Advisor. We'll work with you to find a sub that'll fit back here.
Tools needed: panel tool, Torx T-25 driver, Torx T-20 driver, small flat-blade screwdriver
Read our Car Speakers Buying Guide for more information.
Shop for speakers that fit your Audi A3
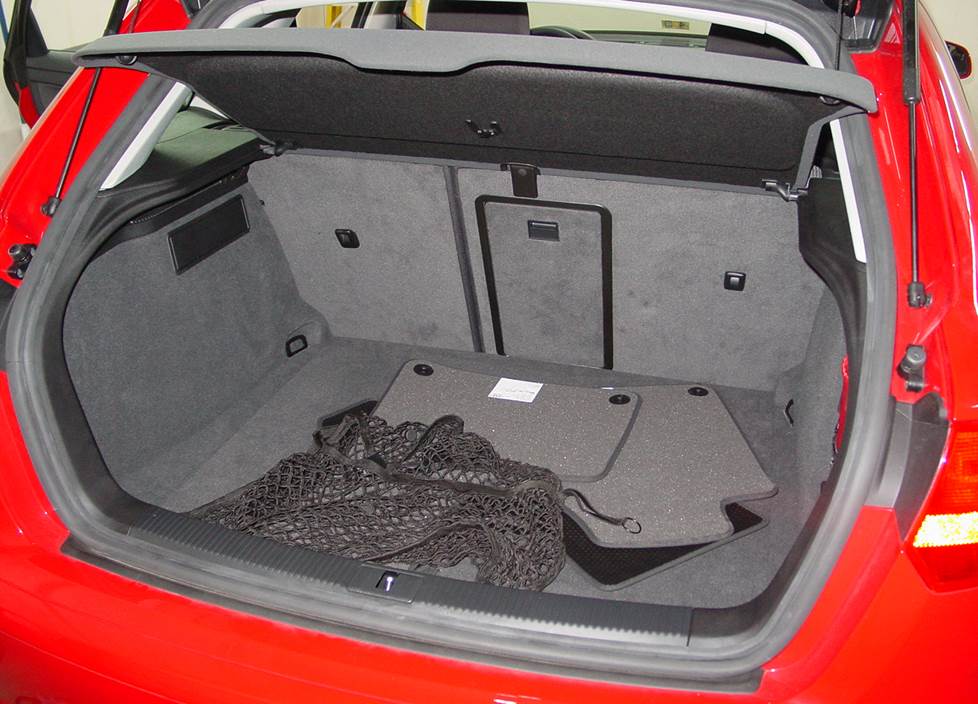
There's not a ton of room for a sub box back here, but you can make it work if you want to (Crutchfield Research Photo)
More bass in your A3 Sportback
There's obviously plenty of room for a bass system in the A3’s cargo area, but because we're us, we measured things. There's a 38" W x 17" H x 20"/29" D space to work with, so you have some options if you want to add a subwoofer box.
If you're not interested in a space-eating sub enclosure, a more compact powered subwoofer will fill out your sound nicely without taking up tons of cargo space.
Learn more about building a bass system in our Car Subwoofer Buying Guide.
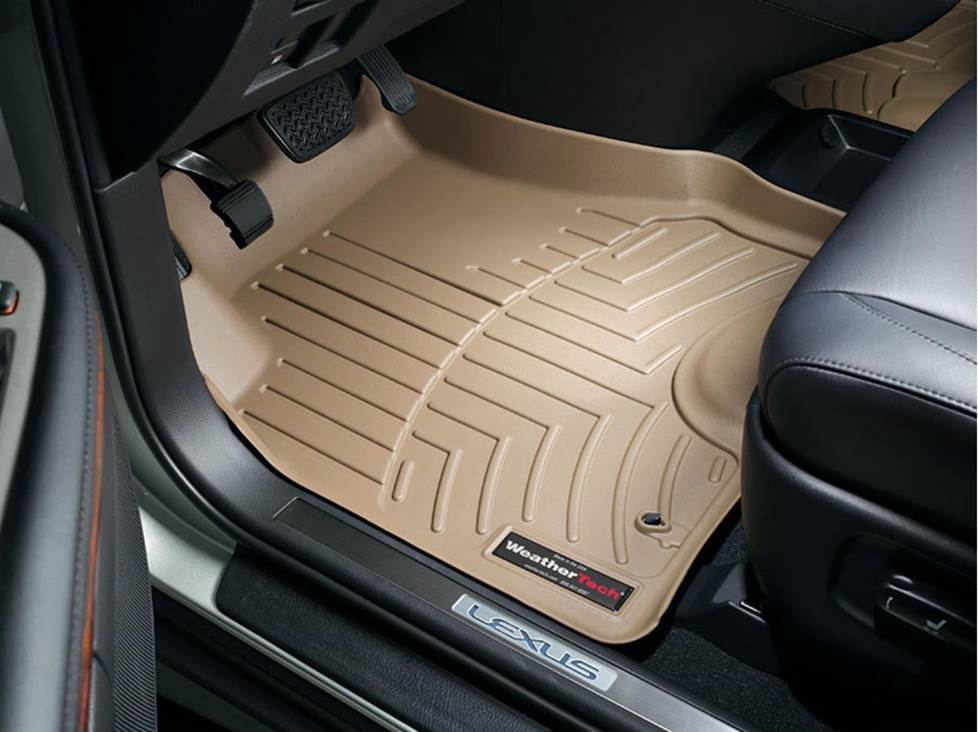
Protect your A3's carpeting with a set of custom-fit WeatherTech FloorLiners
Other options for your A3
With a car like the A3, there are lots of ways to upgrade your in-car experience. Here are some of the ways Crutchfield can help.
Floor mats to protect the interior
It's easier than you think to mess up your A3's comfy interior while you're going about your daily business. Floor mats from WeatherTech will help protect your floors from dirt and damage.
Quiet road noise with Dynamat
These are reasonably quiet, well-assembled cars, but they have a few years on them and that's when things get squeaky and loud. A Dynamat Xtreme Door Kit will really maximize the impact of your new system. This heavy-duty insulating material is easy to install, and it really makes a difference. One kit should be more than enough for your A3's front doors.
Adding car security
Installing a security system in your Audi isn't easy (security systems rarely are), but it's less complicated than it could be. Our Crutchfield Advisors can help figure out what you need to get the job done, but we usually recommend taking your car and new gear to a professional installer.
Let's get started!
Ready to shop? Use our vehicle selector to find the gear that will fit your Audi. If you have questions, give us a shout via phone or chat.





Comments (0)