2011-2017 Honda Odyssey
How to upgrade the stereo system in your Odyssey


In brief: This Crutchfield Research Garage article gives you an overview of your Odyssey's stock stereo system and your aftermarket upgrade options. We'll tell you all about:
- The factory stereo system
- Removing the factory radio
- Removing the factory speakers
- Adding more bass
- Other options for your Odyssey
Then, use our vehicle selector to find the gear that will fit your Honda.
Overview of the 2011-2017 Honda Odyssey
Minivans aren’t expected to be cool, they’re expected to be competent. The Honda Odyssey is a thoroughly competent vehicle and then some, but the nice folks at Honda also sprinkled in as much cool as they could.
The exterior is about as stylish as a minivan can get, the interior has all sorts of nifty “How’d I ever live without that?” features, and while it’s not quite up for autocrossing, the Odyssey’s handling is at least safe and secure. If your pulse is racing while you’re at the wheel of your Odyssey, it probably has more to do with what Kid #1 just did to Kid #2 in the back seat than the thrill of the drive, but that’s how it’s supposed to be.
Like most Hondas, a properly maintained Odyssey will run forever (or until the kids have their own cars and you can get a Miata again), so you might as well enjoy the drive. An upgraded stereo system will make all those trips to school and soccer practice a lot more fun, and you’ll be way cooler than the other parents. You probably are already, of course, but a good stereo will totally seal the deal.

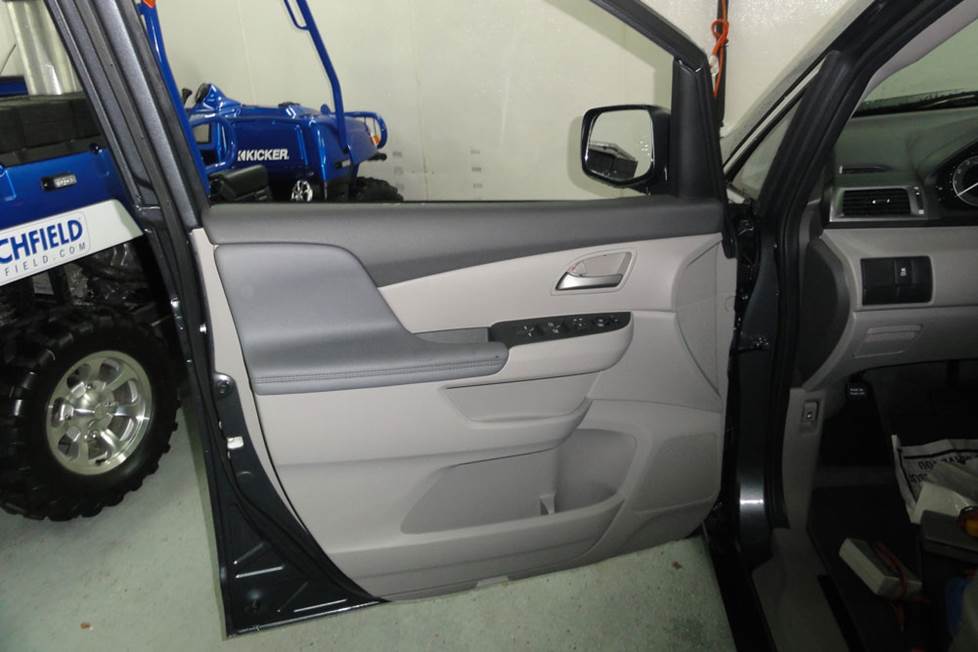
The base radio looks hard to replace, but it really isn't. You'll save money on the dash kit and wiring adapter, too. (Crutchfield Research Photo)
The factory stereo system
Initially, the Odyssey’s factory stereo systems came in three tiers, starting with the base 5-speaker system, progressing to a 7-speaker system, and ultimately a pretty nifty 12-speaker Premium Sound system.
In 2014, Honda added a new stereo with a touchscreen in the lower part of the center dash. This particular stereo is found only in higher-end Odyssey models (EX and higher), and it cannot be replaced. Thus, the following notes apply only to the base models. If you can't replace the stereo in your Odyssey, you can still upgrade your sound with new speakers.
The base stereos, however, aren't terribly hard to remove and replace. Depending on what you’re starting with, you’ll lose the factory AUX input, the factory satellite radio capability, the factory Video Entertainment feature, and the factory clock. Some, if not all, of these features can be regained with the right single-DIN (2” tall) or double-DIN (4” tall) aftermarket stereo.
When you enter your vehicle information, you’ll see the radios that will work in your Odyssey, plus the (discounted!) dash kit and wiring harness you’ll need for your installation.
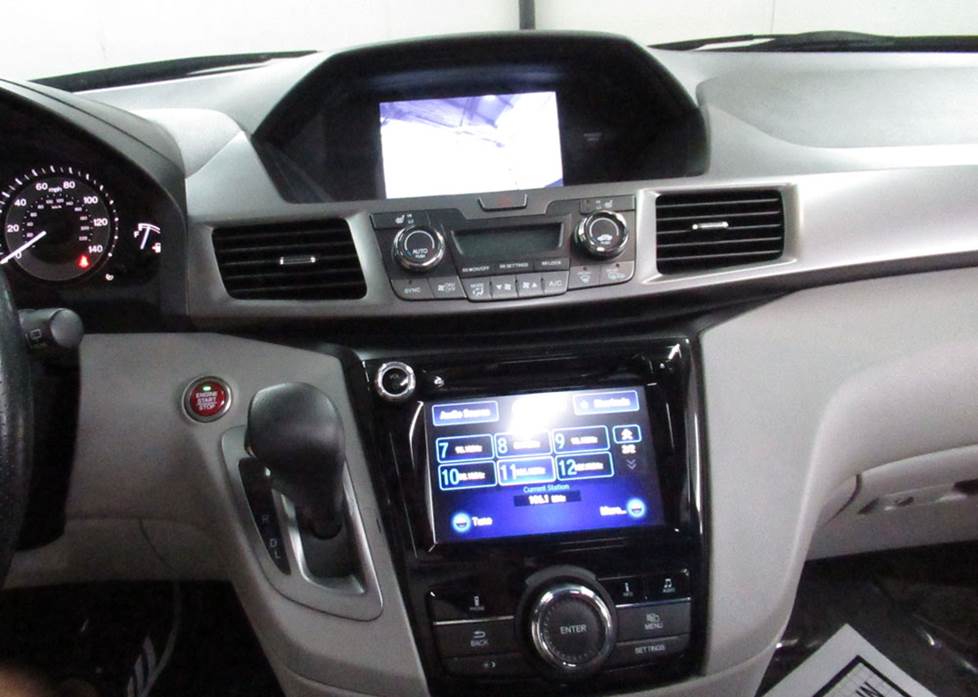
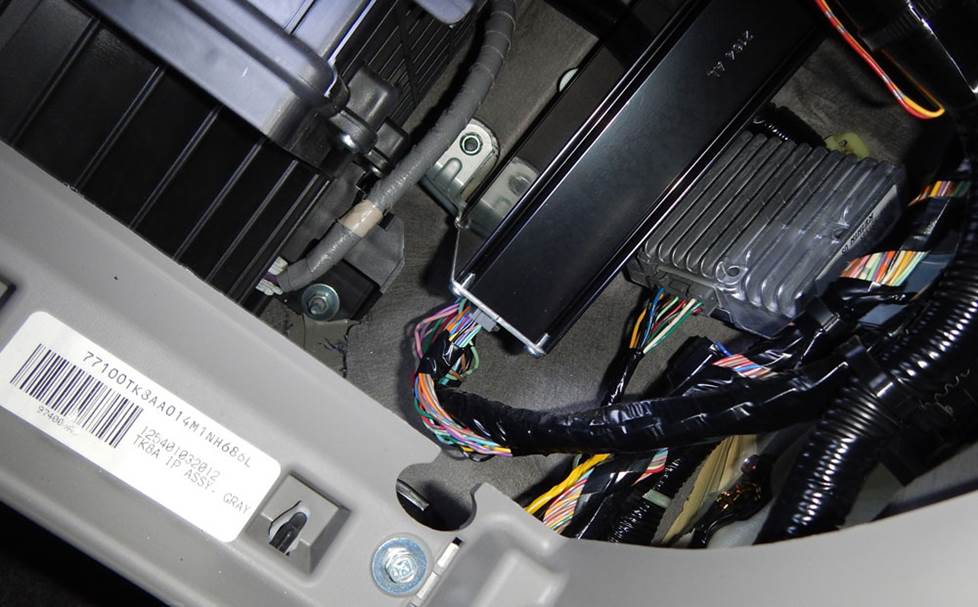
Here's a look at the navigation receiver, which cannot be replaced. Radio replacement is only recommended for Odyssey LX models and 2011-2013 EX and EX-L models without factory navigation. (Crutchfield Research Photo)
Factory amplifier
When you bypass the stock amplifier, we recommend replacing the low-impedance factory speakers with standard 4-ohm aftermarket speakers to prevent overheating and other damage to your new radio. Or, you can add an aftermarket amp for the new speakers, which will also give them the power they need to sound their best.
If you replace the factory radio, you'll defintely need to install an aftermarket amplifier to power the factory subwoofer.

This looks pretty drastic, but it's really not that bad (Crutchfield Research Photo)
Removing the Odyssey's factory radio
The process of removing the base stereo begins with a couple of safety things. Namely, you’ll need to set the parking brake and disconnect the negative battery cable to prevent any electrical short. With that important stuff taken care of, you’ll be ready to begin.
Remove the dash panels to expose the radio
Using the shift lock release, place the gear shift in the lowest position, then use a panel tool to pry up the gear shift trim to release six retaining clips before removing the panel. Next, open the glove box door, then pry out the rear edge of the dash end cap – but don’t remove it. Pry out the glove box’s upper trim panel to release twelve clips, then remove that trim panel.
Remove the four 8mm screws securing the factory radio assembly, then pry out the climate control/vent trim panel to release sixteen clips. Disconnect the wiring harnesses and remove the panel. Keep those screws handy, by the way. You’ll need them to secure your new radio.
Detailed stereo and speaker removal instructions

Next, remove four Phillips screws from the lower console trim panel, then pull out the top edge of the lower console trim panel just enough to release the two clips on the bottom edge of the factory radio assembly. Tilt the top of the assembly toward the rear of the vehicle to clear the clips. Pull the radio upward, disconnect it, and set it aside.
Install your new stereo
Your dash kit and wiring harness adapter will include their own connection instructions. Follow those, secure the new receiver, then test it to make sure it’s working. If it is, start putting the dash back together.
If you have questions about your installation, or even related issues like installing a Bluetooth® mic or connecting a rear view camera, we have some informative articles on things like that. Your Crutchfield purchase also includes free tech support for the life of your gear. Our Virginia-based experts are here seven days a week, and they’ll be happy to help you get the job done.
Tools needed: Panel tool, 8mm socket, ratchet and extension, Phillips screwdriver
Read our Car Stereo Buying Guide for shopping tips and advice.
Shop for car stereos that fit your Honda Odyssey
Steering wheel audio controls
In most cases, it's reasonably easy to retain your Honda's steering wheel audio controls when you install a new stereo. When you enter your vehicle information, our database will choose the adapter you need to make your factory steering wheel controls work with a compatible aftermarket receiver.
Replacing the factory speaker will enhance the audio in any Odyssey (Crutchfield Research Photo)
Removing the Odyssey's factory speakers
The number of speakers in the Odyssey runs from 5 to 12, but the speaker removal process isn't massively difficult. Speaker replacement is a thoroughly do-able project for the average car audio DIY-er.
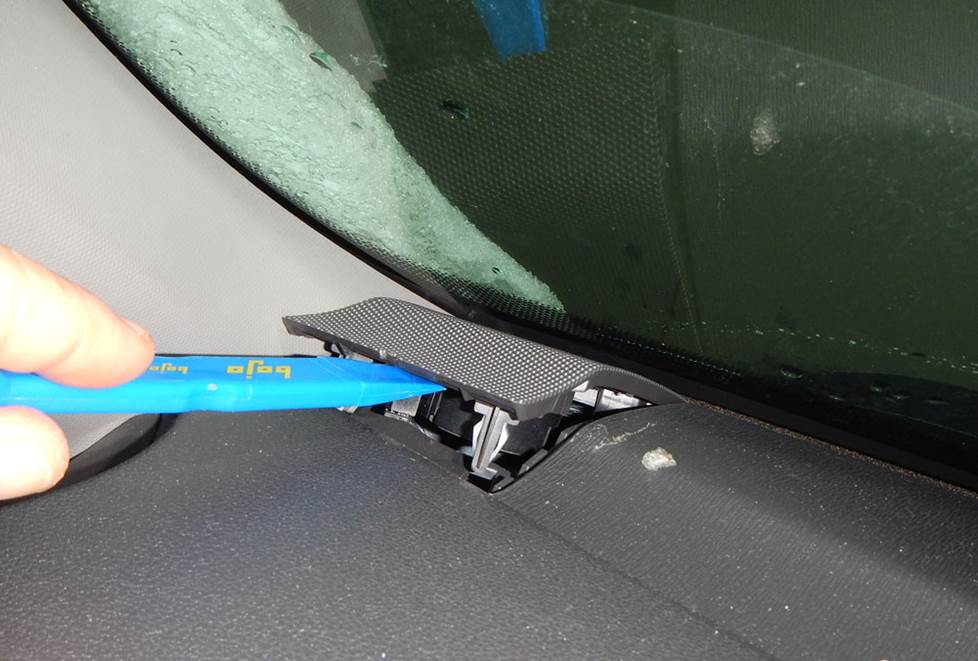
The center dash speaker is pretty easy to reach and replace (Crutchfield Research Photo)
Removing the center dash speaker
The 3-1/2” center dash speaker, found in the 12-speaker system, is pretty easy to deal with. Pry up the grille, disconnect the wiring harness, and remove the grille. Remove the two Phillips screws securing the speaker, then lift it out and remove it.
An aftermarket speaker will fit into this cavity, but there’s no wiring harness adapter available, so you’ll either need to splice or solder the wiring connections or use a set of Posi-Products speaker connectors. We recommend the latter, since the Posi-Prods are easier to deal with and they make a very strong connection.
Tools needed: Panel tool, Phillips screwdriver
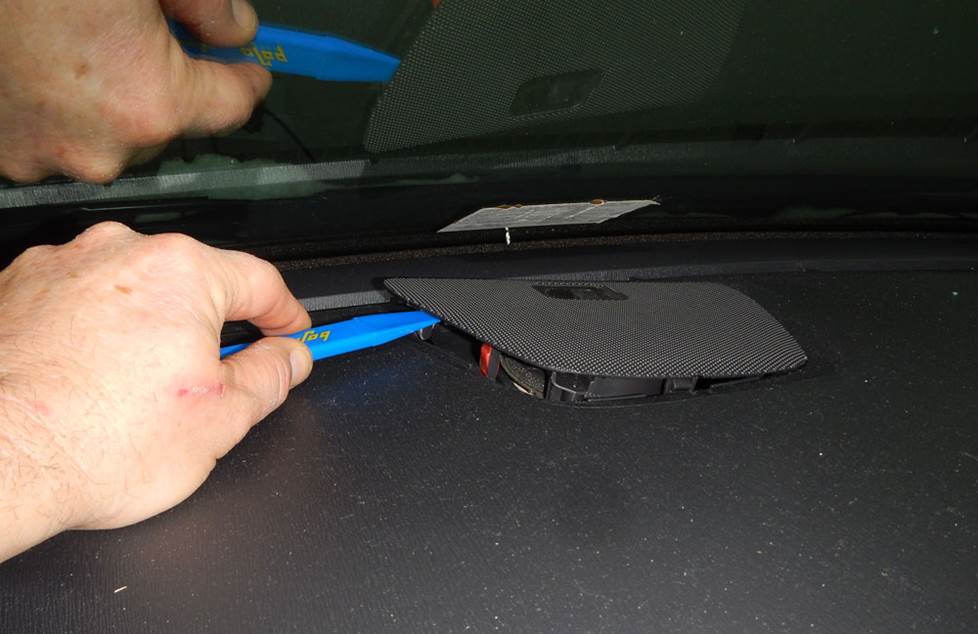
The corner dash speakers are attached to the grilles, but they're still pretty easy to replace (Crutchfield Research Photo)
Removing the corner dash speakers
The corner dash speakers, found in all but the base system, are roughly 1-1/2” in diameter (1.581, to be exact) and they’re attached to the grilles. To remove them, pry up the corner dash grille to release two clips, then disconnect the wiring harness and remove the grille. Pry out the retaining clips, then remove the tweeter from the grille.
Realistically, you're only going to install component tweeters here. There’s no wiring harness for these speakers, so you’ll need more Posi-Products speaker connectors here, too. There’s also no mounting bracket available, so you’ll need to use silicone, hot glue, or our universal backstraps to secure them in the cavity.
Remember that replacing these (or any other) low-impedance factory speakers with a 4-ohm aftermarket speaker will result in lower volume levels. Shop accordingly, or plan to add an aftermarket amplifier to your system.
Tools needed: Panel tool, small flat blade screwdriver
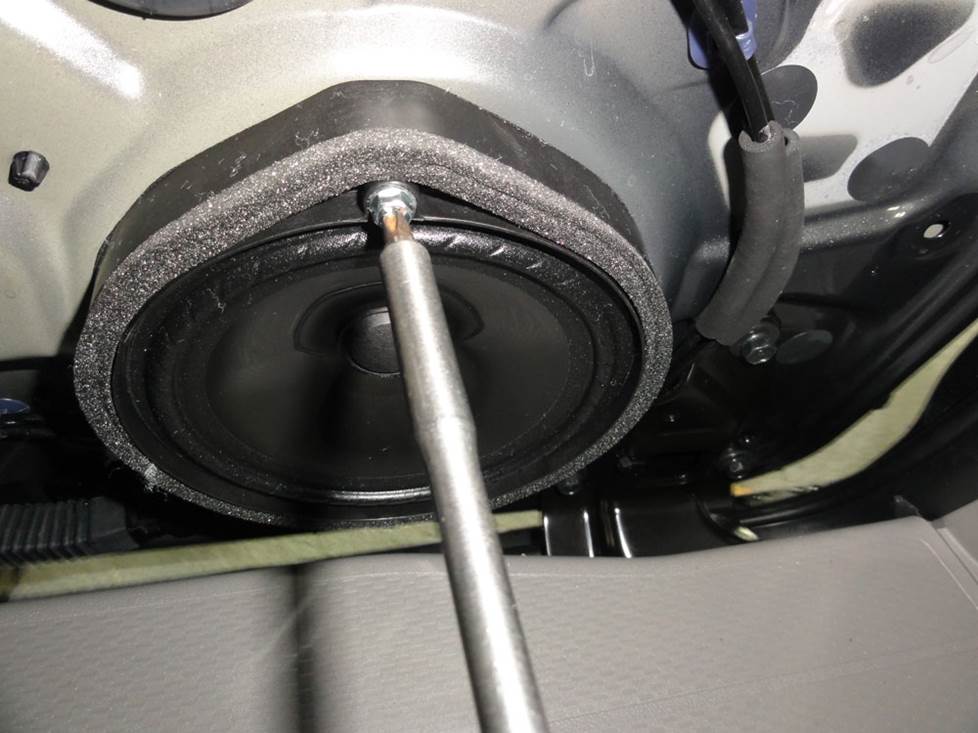
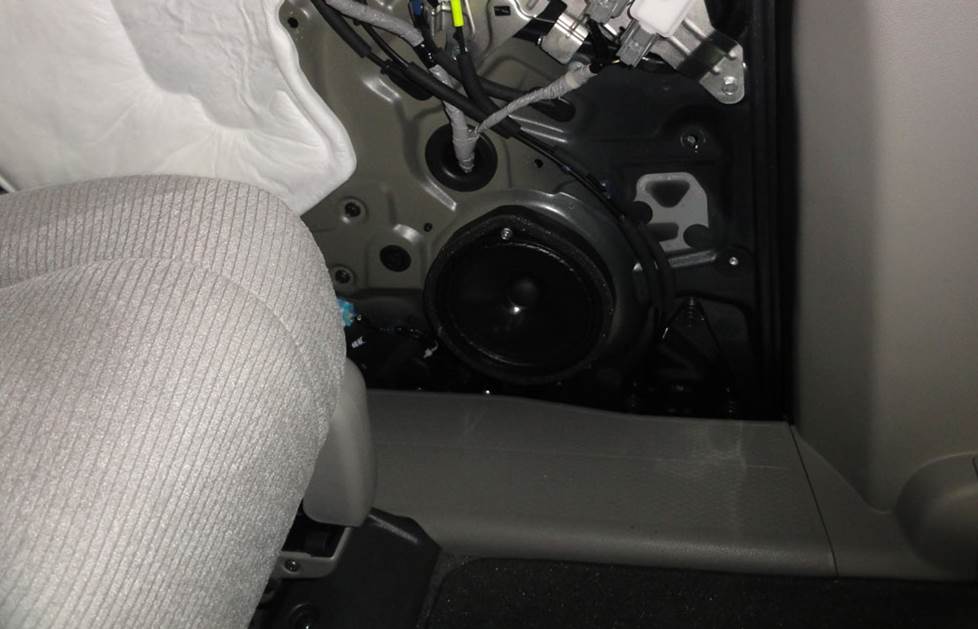
You can replace the stock front door speakers with a variety of aftermarket models (Crutchfield Research Photo)
Removing the front door speakers
The Odyssey’s stock front door speakers are 6-3/4” models that can be replaced by a variety of 6-1/2” or 6-3/4” aftermarket speakers. You’ll need mounting brackets to install the new ones, and we’ll include them with your Crutchfield speaker purchase.
The speaker removal process isn’t that hard. You’ll need to remove the door panels to get to the old ones, of course, but that’s a totally do-able project for the average DIY-er.
Once the new speaker is secured to its mounting bracket, you can connect the included wiring harness adapter and secure it. Be sure to test the speaker(s) to make sure everything’s working before you put the doors back together. Also, be sure that the doors and windows are working before you button things up.
Tools needed: Panel tool, small flat blade screwdriver, Phillips screwdriver
You'll need to remove the door panels to replace the Odyssey's rear speakers (Crutchfield Research Photo)
Removing the rear door speakers
Removing and replacing the 6-3/4” rear door speakers is pretty simple, too. Starting at the top corner, pry off the sail panel to release two clips, then remove it. Next, use a clean shop rag in a downward shoeshine motion (Sounds like a yoga pose, doesn’t it?) to release the C-clip from the door release handle, then remove the handle.
Pry around the side of the door panel to release 14 retaining clips, then remove the panel and set it aside in a clean, safe place. Remove the Phillips screw securing the top of the speaker, then disconnect it and remove it. Once the new speaker is secured to its adapter bracket, you can connect it and secure it.
Be sure to test the speaker to make sure everything’s working before you put the doors back together. Also, be sure that these doors and windows are working before you button things up. All the details can be found in the Crutchfield MasterSheet included free with your speaker purchase.
Tools needed: Panel tool, shop rag, Phillips screwdriver
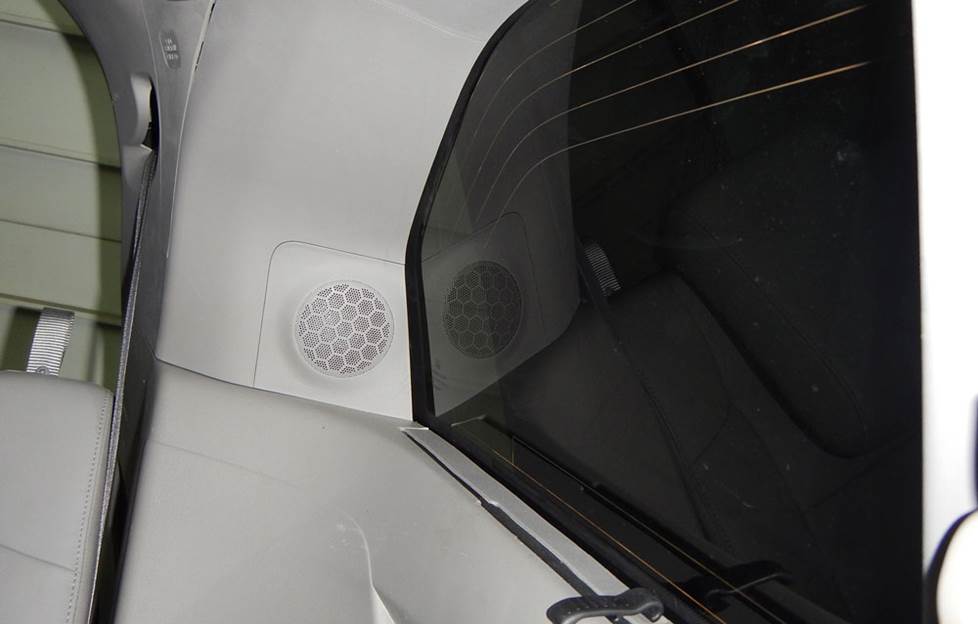
You'll have to remove a few panels to get to the rear pillar speakers. It's not hard, but it can take some time. (Crutchfield Research Photo)
Removing the rear pillar speakers
Removing and replacing the 3” rear pillar speakers (if present) isn’t hard. There are a few steps to the process, so it’s important to follow the instructions in your MasterSheet and work carefully. The pillar trim panel doesn’t have to come off completely, but you will have to gently move it out of the way enough to remove the speaker.
There’s no wiring harness for the rear pillar speakers, so you’ll need more Posi-Products speaker connectors here, too. There’s also no mounting bracket available, so you’ll need to use silicone, hot glue, or universal backstraps to secure them. Hang onto the screws you remove from the factory speaker, because you’ll need them for the new one.
Tools needed: Panel tool, Phillips screwdriver, right-angle Phillips screwdriver, 10mm socket, ratchet and extension
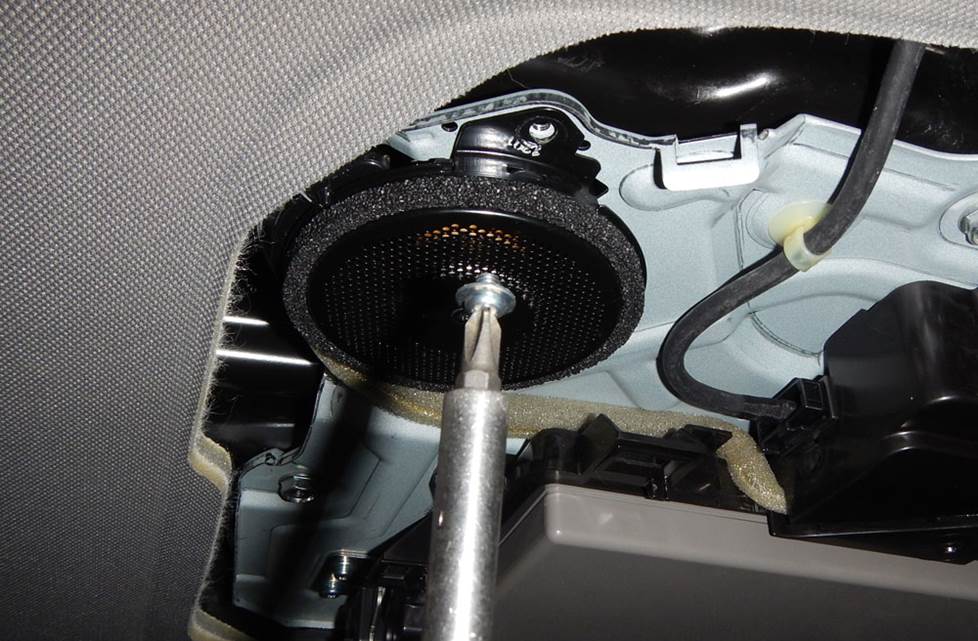
These 3" roof speakers are very easy to deal with (Crutchfield Research Photo)
Removing the roof speakers
If your Odyssey has 3” roof speakers on either side of the rear seat DVD screen, you’ll find that they’re reasonably easy to remove and replace. You’ll need to pry off the DVD screen trim to get to them, and that’s pretty much the entire disassembly process.
When you install your new 3” aftermarket speakers, you’ll need some more Posi-Products connectors and universal backstraps to secure the new speakers. All the details can be found in your MasterSheet, of course.
Tools needed: Panel tool, Phillips screwdriver
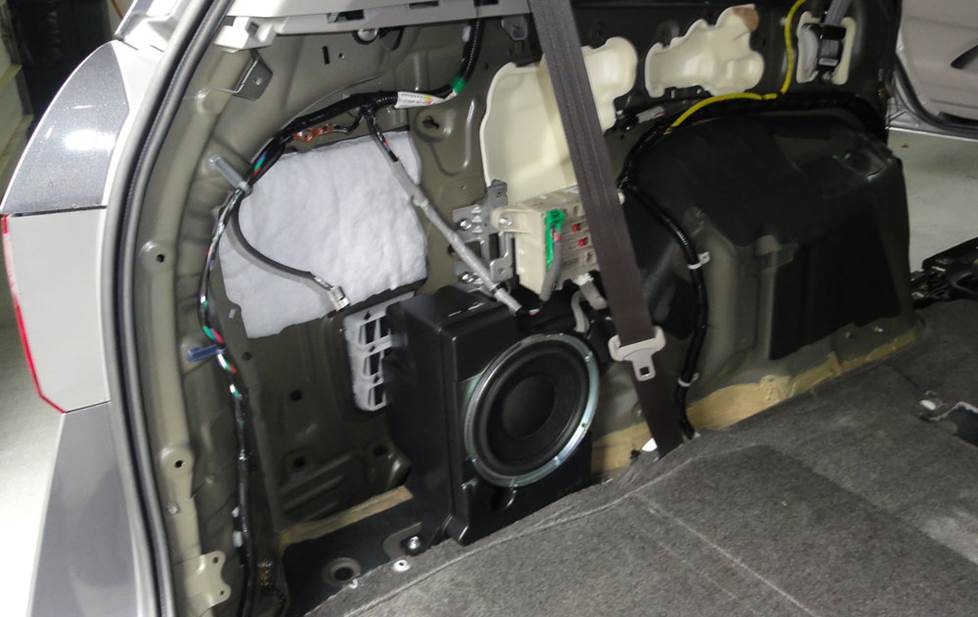
Getting to the rear sub is a bit challenging, but it's nothing the average DIY-er can't handle (Crutchfield Research Photo)
Removing the rear side subwoofer
The Odyssey’s 8” subwoofer, included with all three systems, is a single voice coil, 2-ohm model with a 50-watt rating. Most aftermarket subwoofers need quite a bit more power than the factory amp is supplying. If you replace it with an 8” aftermarket sub, we recommend adding an amplifier to give your new sub the oomph it needs for maximum performance.
The removal and replacement process isn’t difficult, really, but there are several steps to it and you’ll want to be patient and stay organized.
Installing your new subwoofer
With the factory subwoofer out of the way, you’ll need to place the new subwoofer into the enclosure and mark your new mounting holes. Remove the speaker and drill the new holes with a 1/8” bit.
This isn’t hard, but you are drilling into your vehicle, so you’ll want to be patient and careful here. Pay attention to things like wiring, fuel lines, and safety devices. Check the depth to make sure you’re not drilling straight into anything important. And lastly, always wear eye protection when you’re doing something like this.
Once the holes are drilled, you’re ready to connect the wiring to the new sub and secure it in place. Be sure to make sure it’s working before you put everything back together.
Tools needed: Panel tool, shop rag, pliers, Torx T-20 driver, drill with 1/8" bit
Read our Car Speakers Buying Guide for more information.
Shop for speakers that fit your Honda Odyssey
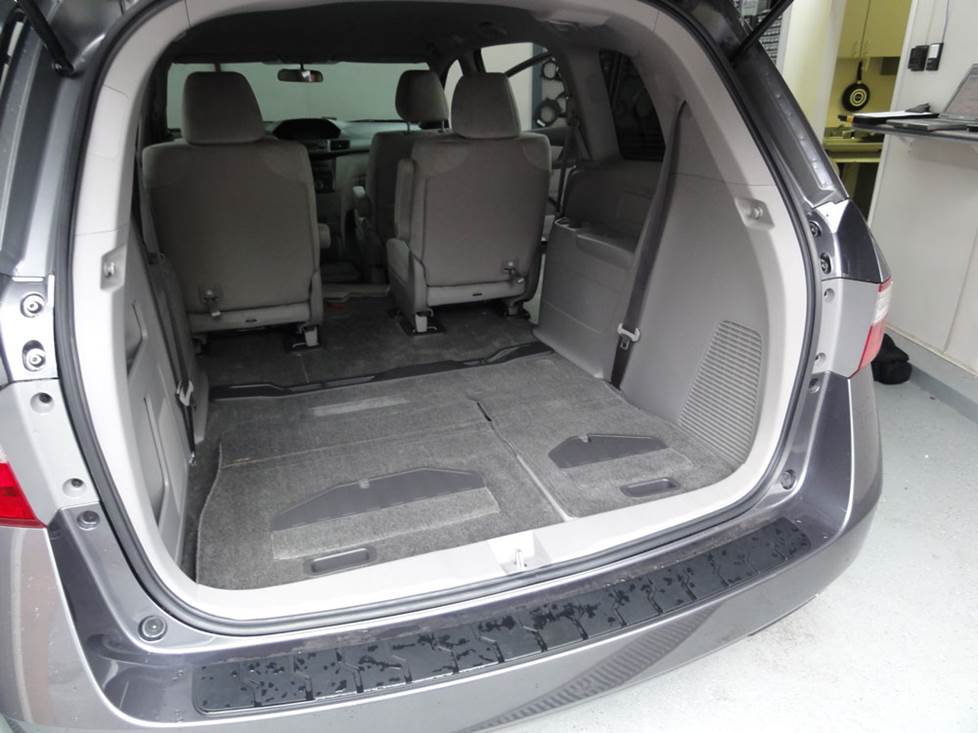
Thinking about adding a big subwoofer box? There's plenty of space available in the Odyssey. (Crutchfield Research Photo)
Adding more bass to your Odyssey
At the risk of overstating the obvious, the Odyssey’s cargo area offers a fair amount of space for all sorts of things, including subwoofer boxes. We measured a 37” H x 44”W x 22”/16” D space, which is enough for a pretty stout sub box. You can add even more if you like, but that’s going to eat into your cargo room.
If cargo room is more important to your day-to-day routine than big, booming bass, you can still improve your Odyssey’s bottom-end sound with a powered subwoofer.
Learn more about building a bass system in our Car Subwoofer Buying Guide.
You'll need to replace the factory amplifier when you replace the stock speakers and subwoofer (Crutchfield Research Photo)
Other options for your Odyssey
There are plenty of other ways to improve your Honda Odyssey minivan. Here are some of the ways Crutchfield can help.
Add an amplifier to improve your sound
In most cases, you'll need to add an amplifier when you replace the stock speakers. Definitely so when you replace the stock subwoofer. The factory amp doesn't have the juice to deal with aftermarket speakers and subs. If you have questions (and lots of people do when it comes to amps), give us a call. You can also check out our amplifier buying guide.
Upgrade the interior with new floor mats
If you’ve ever owned a minivan of any kind, you don’t need us to remind you of what can happen when you hit the road carrying any combination of adults, kids, pets, and food. WeatherTech floor liners will help protect your floors from dirt, damage and discarded juice boxes.
Remote start and security systems
Adding remote start capability to your vehicle lets you warm it up in the winter or cool it down in the summer. The iDatastart system is incredibly convenient and makes it easier than ever to install a remote start system, so we highly recommend it. The module requires a vehicle-specific T-harness (sold separately) to connect with your vehicle's computer, security, and ignition systems, so we ask that you call to order so that we can make sure you get the right harness for your ride.
You can also talk to your Crutchfield Advisor about a security system. They’re not as easy to install (we usually suggest letting a professional do the job), but we can help you choose a system that’ll work in your vehicle.
Let's get started!
Ready to shop? Use our vehicle selector to find the gear that will fit your car or truck. If you have questions, give us a shout via phone, chat, or email


Beth
Posted on 5/28/2023
What about removing the ANC? I can't find where the unit is located in my 2013 Odyssey