2015-2019 Ford Transit
How to upgrade the stereo system in your Transit


In brief: This Crutchfield Research Garage article gives you an overview of your van's stock stereo system and your aftermarket upgrade options. We'll tell you all about:
- The factory stereo system
- Removing the factory radio
- Removing the factory speakers
- Adding more bass
- Other options for your Transit
Then, use our vehicle selector to find the gear that will fit your Ford.
Overview of the Ford Transit van
The Ford Transit is, first and foremost, a van. After that, it can be pretty much whatever you want it to be. Whether you want to haul gear or people, there’s probably a Transit combo that’ll do the job. You can choose the wheelbase and interior height that’s right for you, pick the motor that has the power you need, and pick the options you want.
And that’s just the start. Once your van arrives, you can improve and enhance its capabilities to create something that’s uniquely yours. It’s a big, blank slate just waiting for your ideas. No wonder the Transit is to vans what the Ford F-150 is to trucks — a best-seller.
The Transit’s various stereo systems range from blah to boring, and while that can be okay for commercial use, it’s not going to be good enough for anyone who’s interested in quality sound. Replacing the stereo and speakers is generally do-able for the DIY-er, and it’s a great way to add yet another custom touch to your Transit.
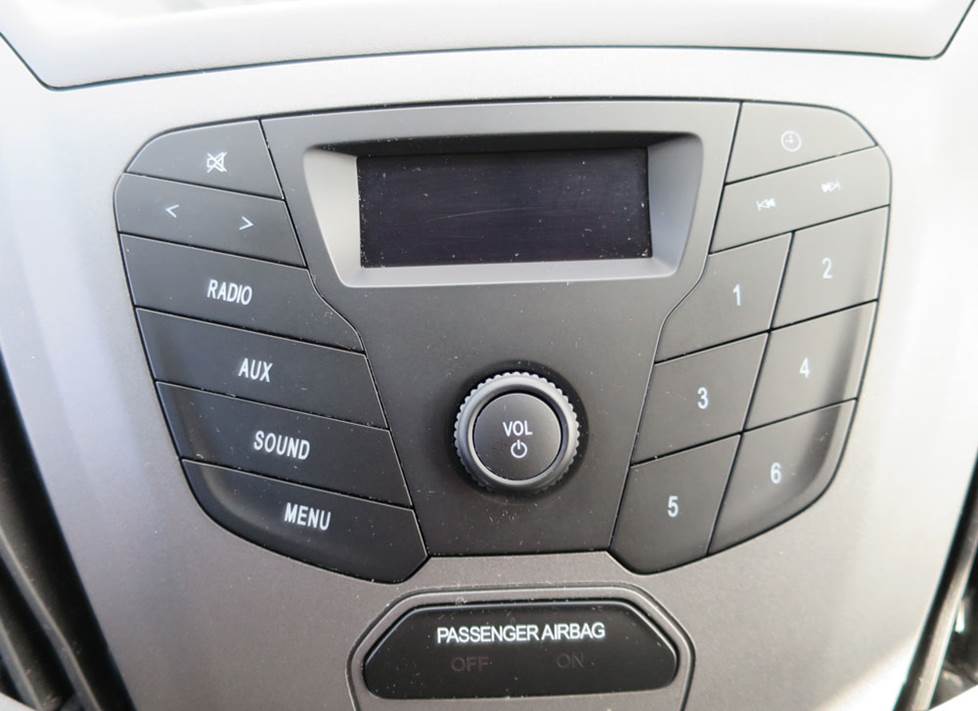
The Transit's base radio is pretty basic. But at least you can play both kinds of radio — AM and FM. (Crutchfield Research Photo)
The factory stereo system
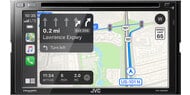
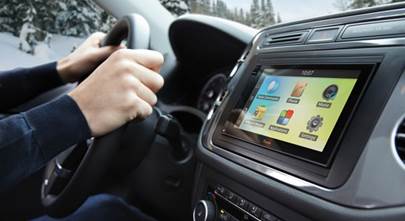
The Transit’s stock stereo offerings consist of a base AM/FM model, an optional CD receiver with 4" LCD above it, and a 7" LCD with navigation and Sync. Speaker-wise, the cargo van offers 2-speaker, 4-speaker, and 6-speaker systems, while the passenger van has 6- and 8-speaker systems. There’s also a radio-delete option, which has not only deletes the radio, but also the speakers, grilles, wiring and antenna. That one’s a little more challenging to deal with.
When you’re just looking at it, the 2-speaker system in the Cargo Van (or Chassis Cab) can sometimes be mistaken for a 4-speaker system. The key differentiator is that the 2-speaker systems don’t have the 4" LCD screen above the radio, just a tray on top of the dash. You’ll need a different wiring harness adapter for this system, and we’ll make sure you get the right one when you enter your vehicle info.
Detailed stereo and speaker removal instructions

For upper-level vans, you’ll lose the factory satellite radio, voice prompts and navigation (if equipped) when you replace the stock radio. All of that functionality can be regained or improved with a new aftermarket receiver. When you replace the 4" CD receiver, you’ll lose the display, but you can still keep your factory rear-view camera (if present) and connect it to a new camera-ready receiver.
Before you start replacing your radio, be sure to set the parking brake and disconnect the negative battery cable. Doing so will keep your van in place and prevent any electrical short.
Removing the factory radio
These instructions will deal with the base radio and the 4.2" LCD radio. We have not yet had an opportunity to research the 7" LCD receiver. If you have, please share your experiences in the comments section below. All speaker info applies to Transits with that receiver, however.
Removing the base radio is a pretty simple process, so it's a good DIY project (Crutchfield Research Photo)
Base AM/FM radio
Removing the base AM/FM radio is quite simple, really. Use a panel tool to pry up the top dash panel to release twelve clips and remove the panel, then remove the two exposed 7mm screws. Next, pry out the receiver panel to release eight retaining clips, then disconnect harnesses and remove the panel.
Installing a new one isn’t hard, either, but you will need to remove a portion of the sub-dash to create space for the new unit. Instructions can be found with the dash kit that’s included at a very nice discount with your Crutchfield stereo purchase. BTW, we'll also give you a break on the harness adapter you’ll need to connect your new receiver to the van’s wiring.
Tools needed: Panel tool, 7mm socket, ratchet and extension

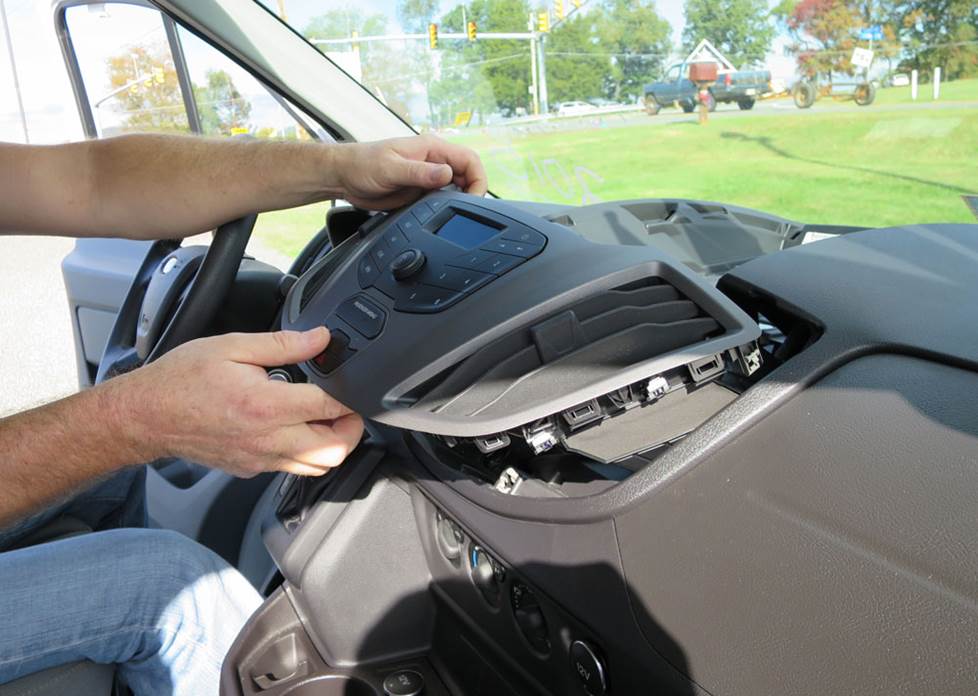
Removing the stock CD radio is a bit more challenging, but not very (Crutchfield Research Photo)
Receiver with 4.2" LCD
For vans equipped with the AM/FM/CD receiver with the 4.2" LCD above it, the procedure is a bit more complicated — but not much more. You’ll need to remove a portion of the sub-dash to create space for the new unit here, too, and the dash kit will include instructions.
Starting at the rear edge, pry up the display trim panel to release five clips, then remove the panel and remove the two exposed 7mm screws. Pry up the display assembly to release two clips, then disconnect the harness, remove the assembly, and remove two more exposed 7mm screws.
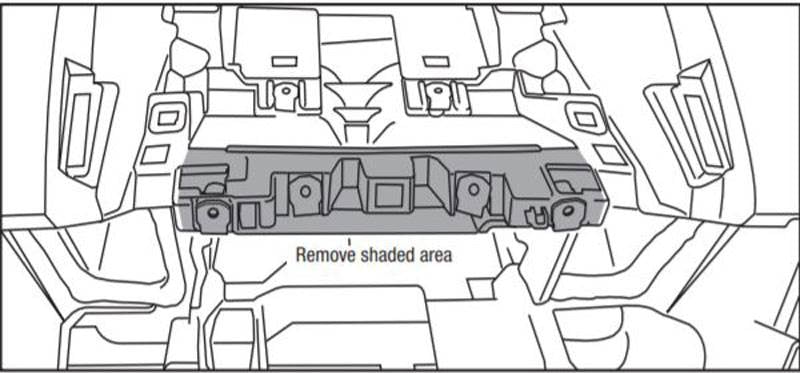
You'll need to cut out this part of the sub-dash to install a new receiver in your Transit (Image courtesy of Metra)
Next, pry up the dash-top trim panel to release twelve clips, remove the panel, then remove the two 7mm screws securing the top of the receiver control panel. Pry out the panel to release eight clips, then disconnect the harnesses and remove the control panel.
With that, you’ll remove a final pair of 7mm screws that secure the receiver chassis to the dash, then disconnect the harnesses and remove the receiver chassis.
Tools needed: Panel tool, 7mm socket, ratchet and extension
Read our Car Stereo Buying Guide for shopping tips and advice.
Shop for car stereos that fit your Ford Transit Cargo
Steering wheel audio controls
In most cases, it's reasonably easy to retain your van's steering wheel audio controls when you install a new stereo. When you enter your vehicle information, our database will choose the adapter you need to make your factory steering wheel controls work with a compatible aftermarket receiver.
You can replace the front door speakers with a variety of 6-1/2" or 6-3/4" aftermarket models (Crutchfield Research Photo)
Replacing the factory speakers
As noted above, the Transit comes in bare-bones 2-speaker models and can be optioned up to 8 speakers in the Passenger Van configuration. If you’re planning (or reworking) a custom or RV conversion, you might have some other concerns, so give us a call and talk to one of our advisors. If you can dream it up, we can help you build it.

Upgrading the pillar speakers will really improve your van's sound staging (Crutchfield Research Photo)
Removing the front pillar tweeters (6- or 8-speaker systems)
The 6- and 8-speaker models include front pillar tweeters that are just a smidge over 1-1/2" (1.605")in diameter. They’re wired in parallel with the front door woofers, and both locations receive a full range signal.
You’ll need a set of our universal backstraps to install your new tweeters, and you’ll also need a set of Posi-Products speaker connectors to connect them to the factory wiring. Splicing or soldering will work, too.
Other than that, the job’s not that hard, really, and all the details can be found in the Crutchfield MasterSheet that’s included free with your order.
Tools needed: Panel tool, small flat blade screwdriver, 10mm socket, ratchet and extension

You need to remove the door panels to get to the front door speakers (Crutchfield Research Photo)
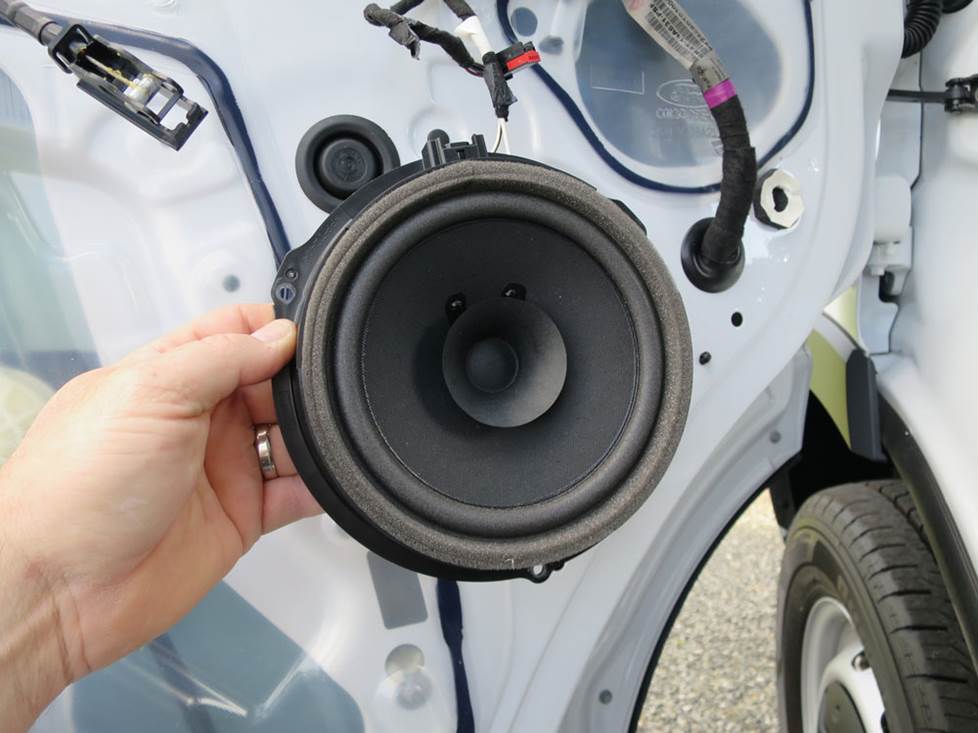
Removing the front door speakers
Unless your Transit was ordered as a radio-delete model, there’s a pair of 6-3/4" speakers in those tall front doors. You can replace them with a healthy variety of 6-1/2" or 6-3/4" speakers, and the speaker mounting brackets you’ll need in some (okay, most) cases are included with your Crutchfield speaker purchase.
You’ll start by prying off the screw cover at the upper front corner of the door panel and removing one exposed 7mm screw. You’ll then do the same thing in the upper rear corner.
Next, pry out the screw cover behind the door release handle and remove one exposed Torx T-25 screw. Pry out the screw cover inside the door pull cup and remove one exposed 7mm screw, then move down the door and remove two 7mm screws along the bottom edge of the door panel.
Grab your panel tool again and pry off the screw cover in the lower map pocket. Remove one exposed Torx T-20 screw, then pry off the reflector lens and remove one exposed 7mm screw.
You’ll then pry out the sides and bottom of the door panel to release six clips. Disconnect the harnesses and the door release cable, then remove the door panel. Place the panel in a safe place, then remove the three 7mm screws securing the speaker to the door steel. Disconnect the harness, remove the old speaker, then get ready to install the cool new stuff.
Once the new speakers are connected and secured, test to make sure they’re working, then make sure the doors and locks are working properly. If everything’s good, finish putting the door back together.
Tools needed: Panel tool, Torx T-20 and T-25 drivers, 7mm socket, ratchet and extension
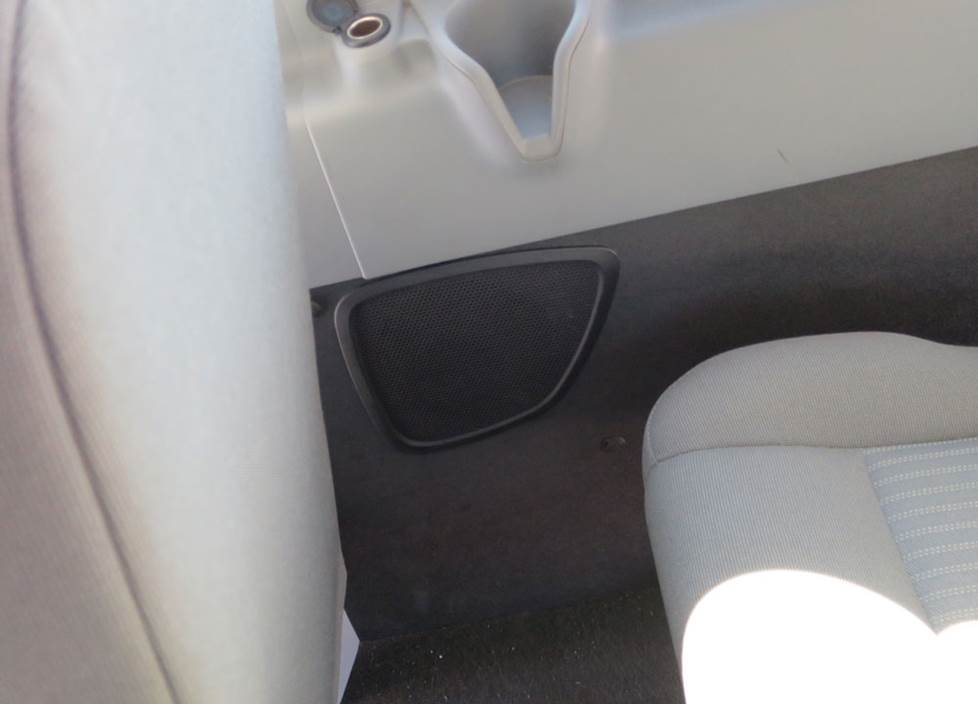
Removing and replacing the middle speakers takes a while, but the effort is worth it (Crutchfield Research Photo)
Removing the mid-rear side panel speakers (8-speaker system)
Passengers in the Transit Passenger Van get to enjoy of a pair of 6-3/4" stock speakers in the mid-rear side panels. DIY audio enthusiasts get to enjoy (we hope) a somewhat lengthy panel removal process to get to those speakers and replace them with aftermarket models that the passengers will probably enjoy more.
Nothing about the task is especially hard, but there’s a fair amount of stuff to do. As long as you work carefully and stay organized, you’ll be fine. All the instructions you’ll need can be found in the Crutchfield MasterSheet included with your speaker or receiver purchase.
We will also include the speaker brackets you’ll need to install many aftermarket 6-1/2" or 6-3/4" speakers. You also get free tech support for the life of your gear, so if you run into trouble here or anywhere else, give us a call. Our Virginia-based experts are here seven days a week and they can help you through any rough patches you might run into.
Tools needed: Panel tool, small flat blade screwdriver, Torx T-25 driver, 10mm socket, ratchet and extension
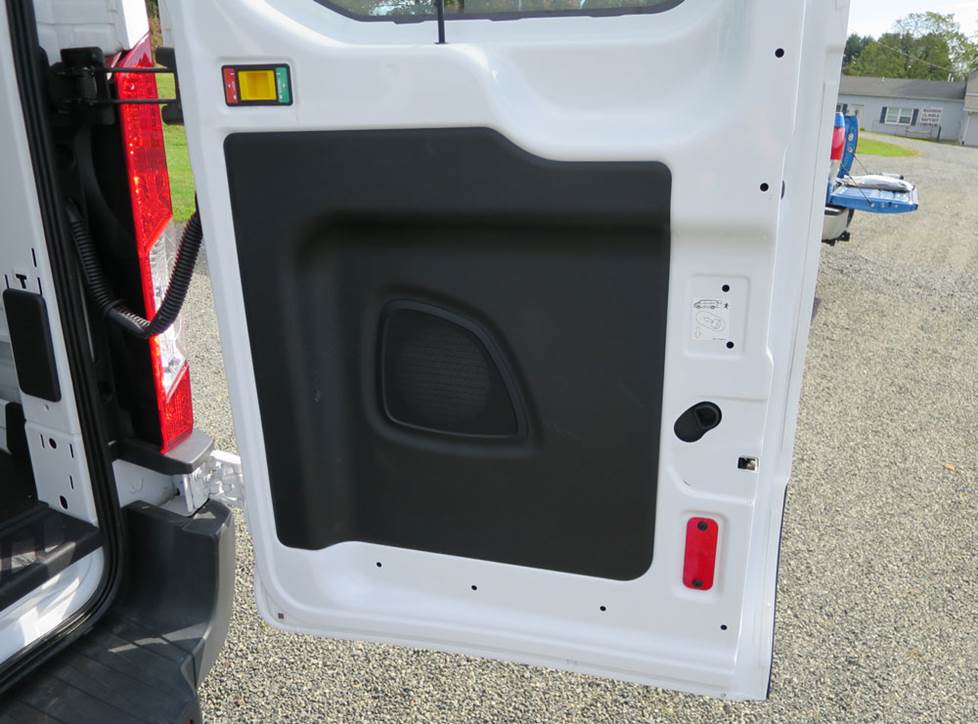
The Cargo Van's rear doors are a bit more spartan than the Passenger Van's, but the removal process is basically the same for both (Crutchfield Research Photo)
Removing the rear door speakers (4-, 6-, and 8-speaker systems)
The rear door speakers, found in all Transit Cargo or Passenger vans with more than two wimpy front door speakers, are much easier to deal with. There are a few minor variations between the two doors, but there’s nothing complicated about the job and we’ll give you the step-by-step illustrated directions you need to do it.
You can replace the stock speakers with a wide variety of 6-1/2" or 6-3/4" aftermarket models, and we’ll include brackets if you need ‘em.
Tools needed: Panel tool, small flat blade screwdriver, needle-nose pliers, Torx T-25 driver, 7mm socket, ratchet and extension
Read our Car Speakers Buying Guide for more information.
Shop for speakers that fit your Ford Transit Cargo
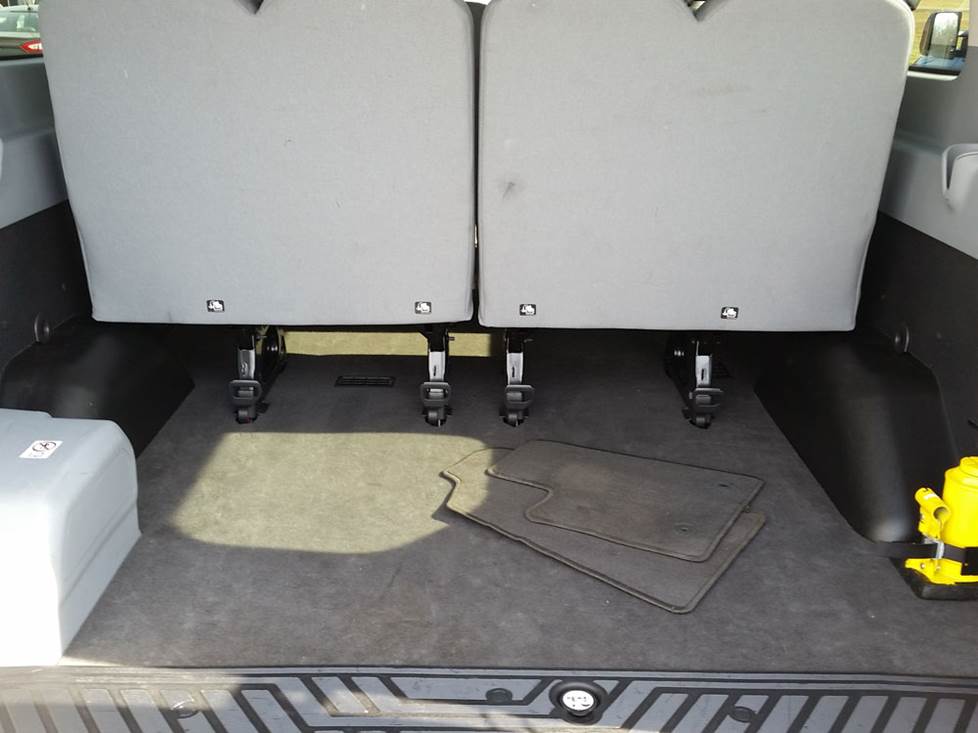
You can add a big sub box to the passenger van, but if you use this space for luggage and gear, a compact powered sub will fit neaty under the rear-most seat (Crutchfield Research Photo)
Bass in your Ford Transit
If you want to add more bass to your system, the Transit Passenger Van offers a 22" H x 47" W x 9"/6" D space for a subwoofer box behind the fourth-row seats. Our measurements were taken with the seats in place, between the wheel wells and below the window line.
If this space is frequently filled with luggage or sports gear, you might want to go with something smaller, in which case a powered subwoofer underneath a seat might be a better solution.
Learn more about building a bass system in our Car Subwoofer Buying Guide.
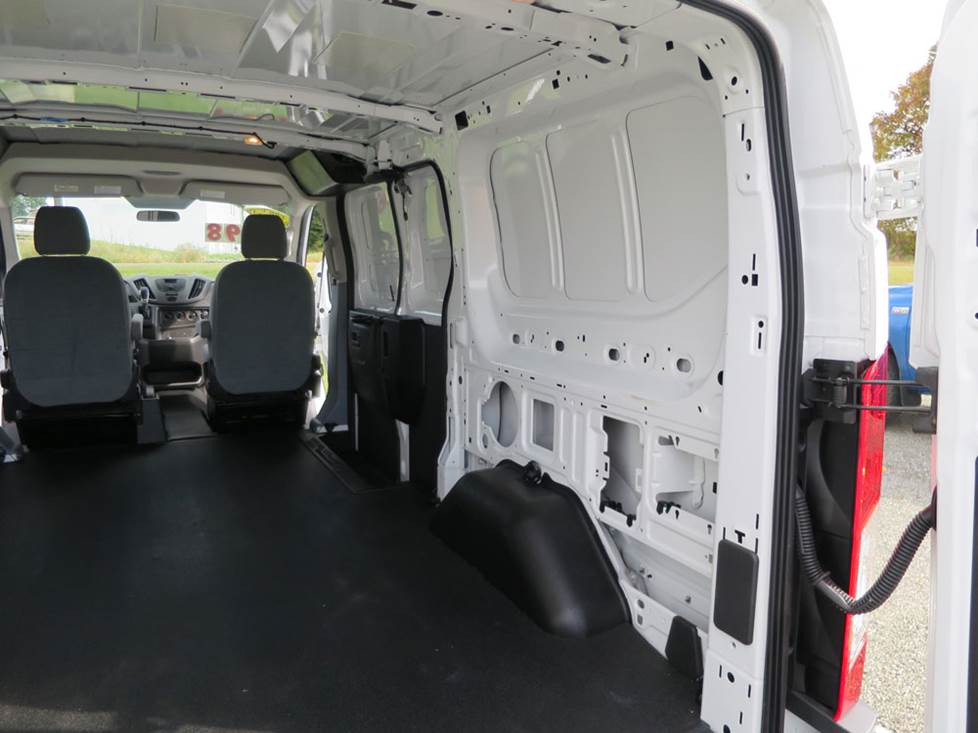
You can add a very large subwoofer box to the Transit Cargo Van. And/or create a small living/dining/sleeping space. (Crutchfield Research Photo)
The Cargo Van, on the other hand, of has gobs of space for subwoofer boxes, furniture, and pretty much anything else you can think of. Heck, there might be enough room for a White Stripes reunion, but we’ll never know for sure, so it’s best to move on with our lives. We do know that if you like bass, the Transit has all the space you could want.

Installing Dynamat in the front doors can help reduce road roar in your Transit
Other options for your Ford Transit
Here are some other upgrade ideas for your Transit. Granted, this is a van, so depending on what you're starting with and what you're trying to do, we could be talking about, well, almost anything. We'll stick to things you can actually buy at Crutchfield!
Add an amplifier for better sound
Replacing the factory radio will make a big difference in your van. But to further improve the sound quality, consider installing a 4-channel amplifier for your speakers. And if you install a new subwoofer, you'll also need to install an amplifier to power that sub, as well. You can learn more about adding amps to your system in our Car Amplifier Buying Guide.
Noise damping
The Transit is about as big a box as you can drive without a CDL license, and filling that box with sound can be challenging. Installing Dynamat in the doors when you're replacing the speakers will help seal out noise and seal in sound.
You can also install a set of foam speaker baffles behind your new speakers. In addition to helping with performance, they'll also provide extra protection against moisture and dust.
Add some floor liners
Driving a van eventually leads to doing the sorts of things that can take a toll on the cockpit carpeting. WeatherTech floor mats and liners will help protect your floors from dirt and damage.
Rear-view cameras
When you're driving a vehicle this big, maneuvering in a crowded parking lot can be an adventure. A factory rear-view camera was available as an option on the Transit, but if your van doesn't have one, we offer rear-view cameras from Kenwood, Alpine, Sony, Pioneer, and more. Some are designed to work with same-brand DVD/nav receivers only, but others come with a composite video connector and will work with almost any video receiver.
Security
Installing a security system in your Transit isn't easy (security systems rarely are), but it's less complicated than it could be. Our Crutchfield Advisors can help figure out what you need to get the job done, but we usually recommend taking your car and new gear to a professional installer when it comes to security systems.
Let's get started!
Ready to shop? Use our vehicle selector to find the gear that will fit your car or truck. If you have questions, give us a shout via phone, chat, or email


Bill correira from Dighton
Posted on 3/25/2022
The 2015 can have a chime interface that works with the radio. If that's the case, what would I need to fix that?
Jon Paul from Crutchfield
on 3/28/2022
Dennis J from CHARLOTTE AMALIE
Posted on 3/16/2021
I just bought one of these vans to do taxi service in it and I must say that it's a priority to change the entire stereo system. It's utter trash. I was hoping to just change the speakers but will change everything and add a powered sub under the seat. Any recommendations on subs that fit under the seats?
Jon Paul from Crutchfield
on 3/17/2021
Chris Kautz from Lexington, oh
Posted on 2/24/2021
I have a 2019 cargo with am fm no lcd no cd. I came with 2 tweeters and the 2 front door speakers. There are no speakers in the rear doors, but might i find wiring for them already in the doors?
Jon Paul from Crutchfield
on 2/24/2021
Larry D from Midland
Posted on 11/22/2020
Just got the Transit van and now I want better sound inside. This is a great overview of what is ahead of me. Thanks!
Jon Paul from Crutchfield
on 11/23/2020