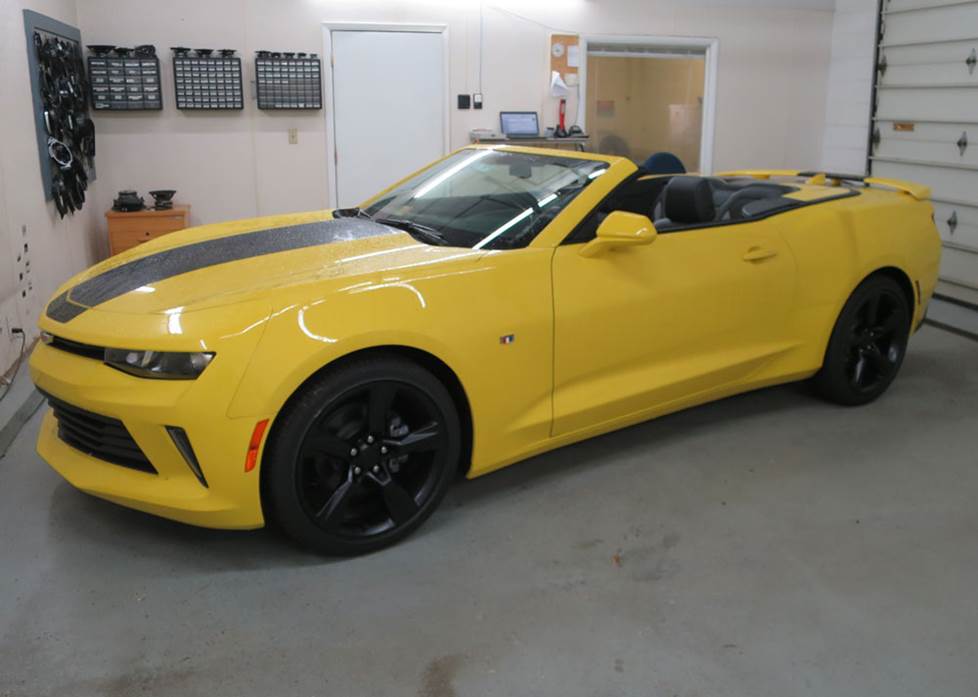
2016-up Chevrolet Camaro
How to upgrade your Camaro's stereo system

In brief: This Crutchfield Research Garage article gives you an overview of your Camaro's stock stereo system and your aftermarket upgrade options. We'll tell you all about:
- The factory stereo system
- Removing the factory radio
- Removing the factory speakers
- Adding more bass
- Other options for your Camaro
Then, use our vehicle selector to find the gear that will fit your Camaro.
Overview of the 2016-up Chevy Camaro
They don't make performance cars like they used to. They make them better, actually. For example, the hottest Camaro on the lot back in 1996 was a Z28 SS powered by a 305-horsepower V8. Fast forward 20 years and you'll find that the base Camaro squeezes 275 horsepower out of a turbocharged 4-cylinder. Heck, even the V6 is cranking out 335 ponies. As for today's V8s, well, let's start with almost double that and go from there. Yowsa.
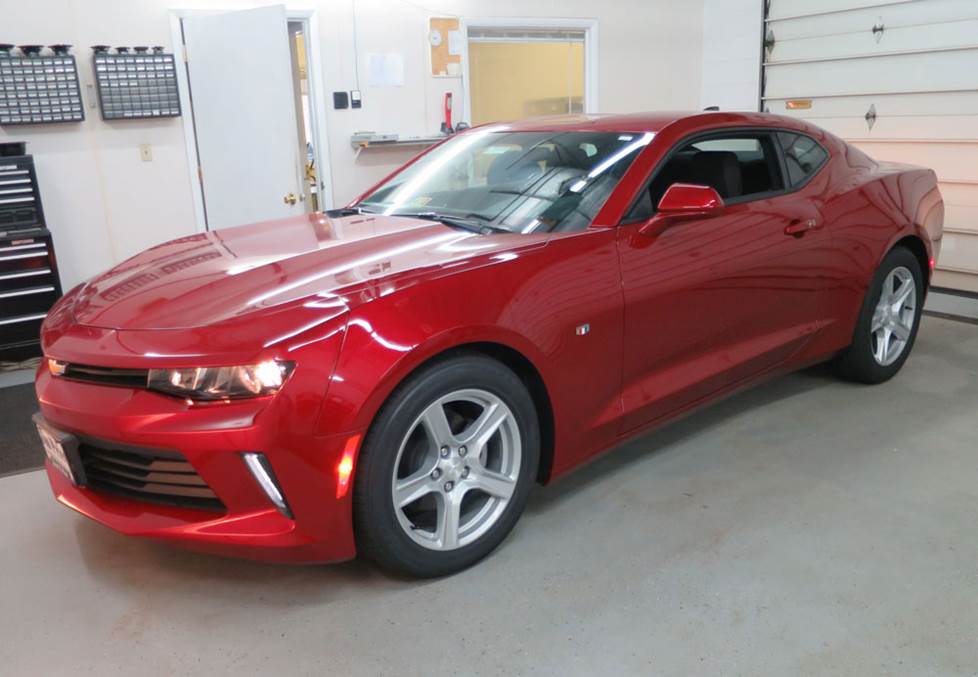
And they look cool, too. The leaner, meaner 2016-up Chevy Camaro retains and refines the "retro" styling that muscle car fans loved when the long-awaited fifth-gen car arrived in 2010. Shorter, skinnier, and sleeker than its predecessor, this Camaro is a ponycar for the present, not the past. It's hard to say what the future holds for cars like these, but if traditional ponycars like the Camaro ever go away, at least they're going out in style. And/or a haze of tire smoke.
The sixth-generation Camaro's stock stereo systems are a lot better than the 1996 options, too, but you can do even better than that. Here’s a look at how you do it.

Radio replacement in this Camaro is...not gonna happen... (Crutchfield Research Photo)
The factory stereo system
The Camaro’s base system is an AM/FM/SiriusXM receiver with six speakers. The optional Bose system has an AM/FM/SiriusXM receiver with seven speakers. Due to a host of physical and electrical compatibility issues, we don’t recommend replacing either of the receivers, but you can integrate a variety of aftermarket accessories with your audio system to improve your sound or functionality.
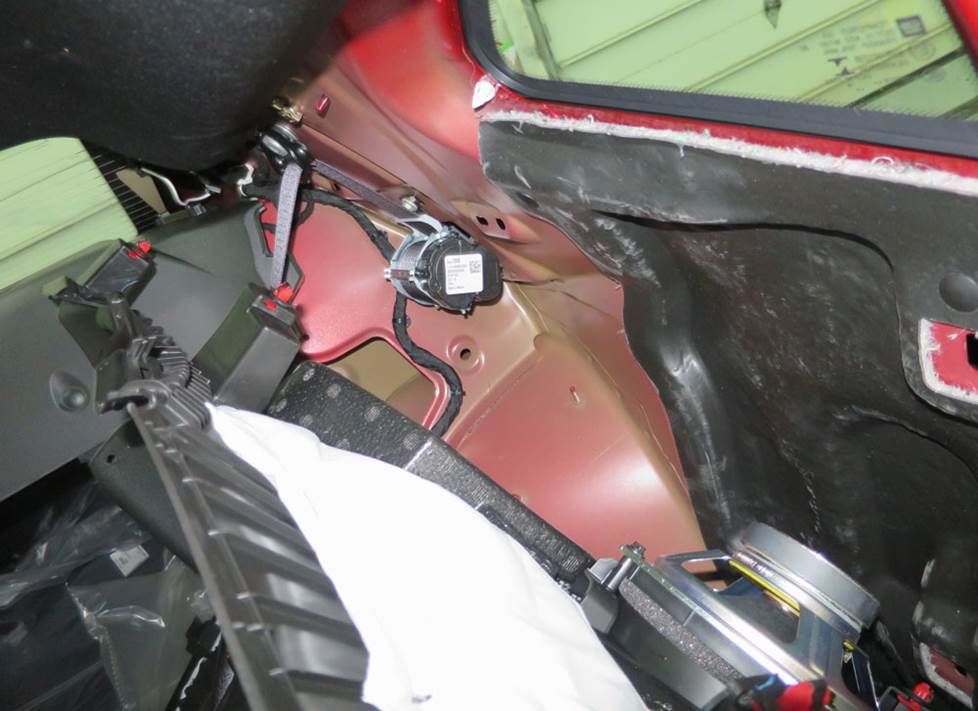
An AUX input and two USB inputs can be found in the center console storage compartment, while the amplifier is under a cargo panel in the trunk.
The stock speakers, whether Bose or base, are low-impedance models. If you replace them, look for low-impedance aftermarket models or bypass the stock amplifier and add an aftermarket amp to power your new 4-ohm speakers.
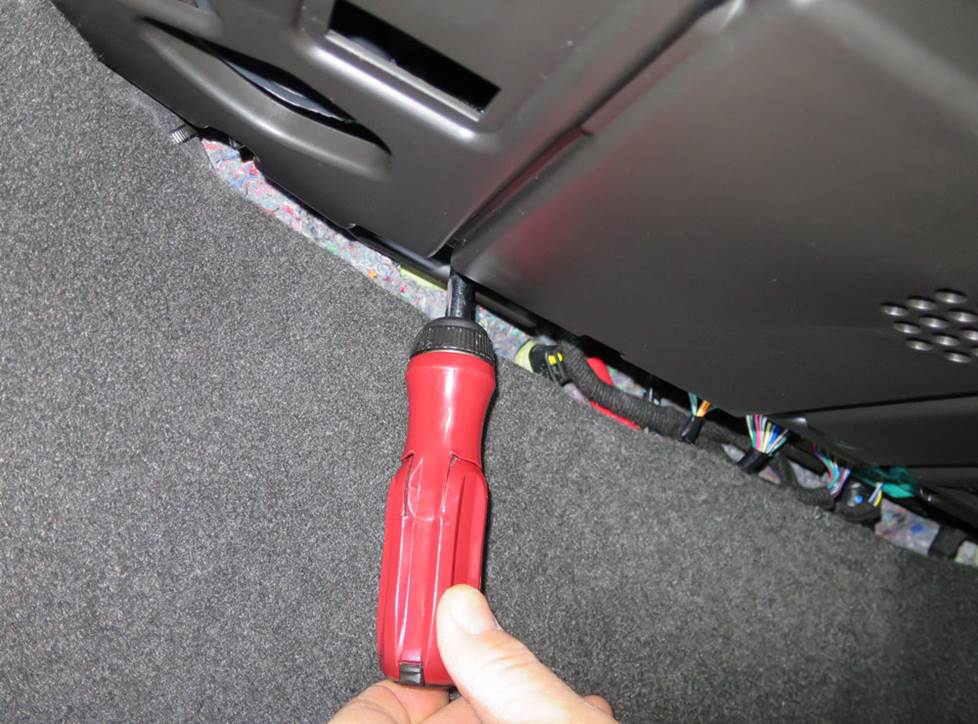
You can upgrade your sound or functionality by connecting an aftermarket device to the tuner, which is behind this panel (Crutchfield Research Photo)
(Not) Removing the factory radio
As noted above, radio replacement really isn’t a possibility in these Camaros, unless you’re willing to do (or pay for) a lot of physical and electronic customizing. The receivers aren’t just receivers, they’re kind of the center of the whole entertainment/climate control/etc. thing.
You can, however, integrate some aftermarket upgrade pieces at the tuner module, should anything like that become available. In the past, these would have been adapters for things like Bluetooth® or iPhone® integration.
If you’re going to go in that direction, you’ll start by disconnecting the negative battery cable and setting the parking brake before you do anything else. This will prevent things like electrical shorts, accidental airbag deployments, and/or the sight of your prized Camaro rolling down the driveway into someone’s truck. We'll include the relevant dash disassembly instructions with your Crutchfield stereo order.
Detailed speaker removal instructions

Tuner module access
You’ll need to get to the tuner module first, which isn’t that hard to do. Just remove the four 7mm screws securing the underdash panel on the passenger’s side, then remove the panel.
To connect the aftermarket accessory, locate the connections on the back of the tuner module and follow the accessory’s instructions to make the necessary connections. Be sure to test everything out before you button up the panels.
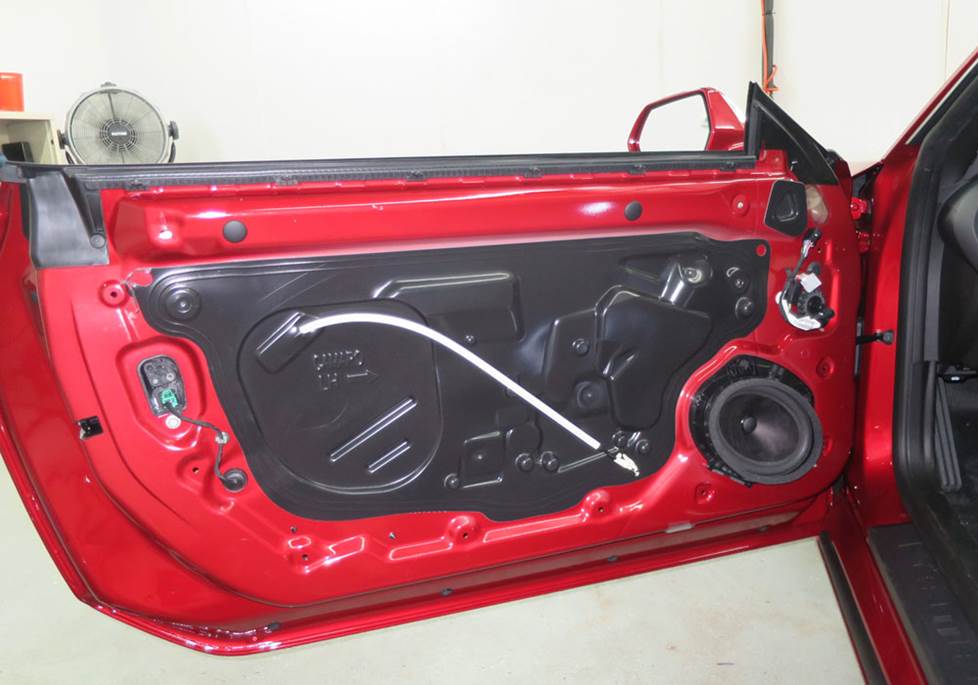
You'll need to remove the door panels to reach these speakers (Crutchfield Research Photo)
Removing the factory speakers
All Camaros have speakers in the dash, doors, and rear side panels. Bose-equipped models add a center dash speaker, plus rear deck subs for the coupe.
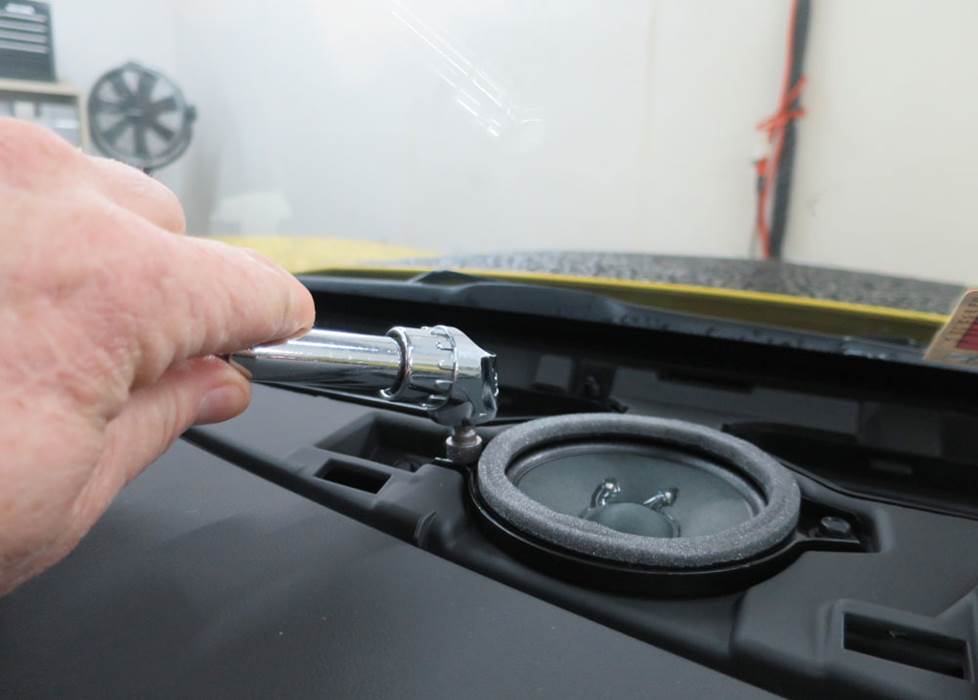
The Bose system includes this center dash speaker (Crutchfield Research Photo)
Removing and replacing the center dash speaker
The Bose system’s 2-1/2” center dash speaker is pretty easy to reach and remove, and there’s a nice selection of aftermarket replacements available. The process will seem a bit roundabout, but that’s just the way the dash and other trim panels fit together.
Starting at the top edge, use a panel tool to pry off the passenger’s side pillar trim panel to release two clips. Pull the retainer upward to release it, then lift and remove the trim panel. Remove the exposed 7mm screw, then pry up the passenger’s side grille panel to release seven retaining clips. Disconnect the wiring harness and remove the panel.
Remove the two 7mm screws securing the center speaker, then pull it out and remove it. There’s no speaker wiring adapter available for this location, so you’ll have to splice, solder, or use Posi-Products speaker connectors to connect the speaker’s wires to the car’s wiring. Secure the speakers with the screws you removed earlier, then test the speaker to make sure it’s working.
If you’re just replacing the center speaker, go ahead and put the panels back together. If you’re replacing the corner dash speakers, too, stay where you are, because some of those panels need to be removed in that process, too.
Tools needed: Panel tool, 7mm socket, ratchet and extension
A set of aftermarket component speakers will fill in these corner speaker openings (Crutchfield Research Photo)
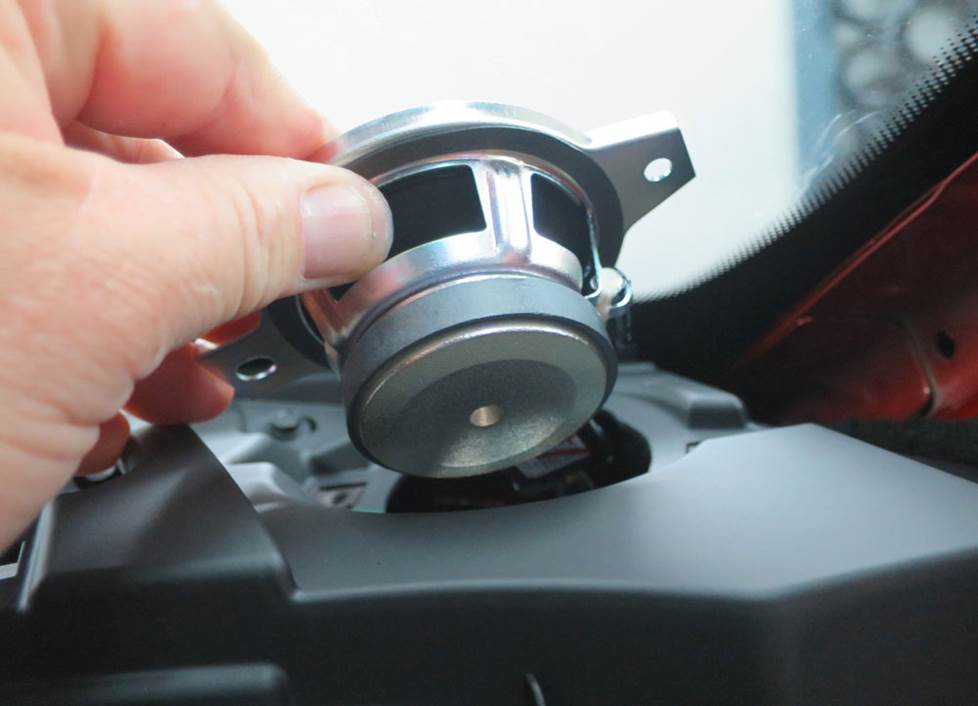
Removing and replacing the corner dash speakers
The corner dash speakers measure 2.360” (let’s call it 2-1/4”) in diameter, and you can replace them with a nice variety of aftermarket component system tweeters. Remember to pay attention to impedance when you’re ordering, and if you have questions, a Crutchfield Advisor will be happy to help you choose your speakers.
On the passenger’s side, a lot of the panel removal work is already done if you’re replacing the Bose center dash speaker. If you’re working with a base system, you’ll find those steps listed in the illustrated, step-by-step Crutchfield MasterSheet included with your speaker purchase. On the driver’s side, the process is similar, and that’s all in your MasterSheet, too.
There’s no speaker wiring adapter available for this location either, so you’ll have to splice, solder, or use Posi-Products speaker connectors to connect the speakers to the car’s wiring. You'll also need to fabricate a mounting bracket to secure the new tweeters in place. We recommend a couple of our backstrap brackets for the job.
Once your car’s new corner dash speakers are secured, be sure to test them out before you start replacing the trim panels.
Tools needed (base): Panel tool, small flat blade screwdriver, 7mm socket, ratchet and extension
Tools needed (Bose): Panel tool, 7mm socket, ratchet and extension

You'll need speaker brackets to install some new speakers, and we'll include them with your order (Crutchfield Research Photo)
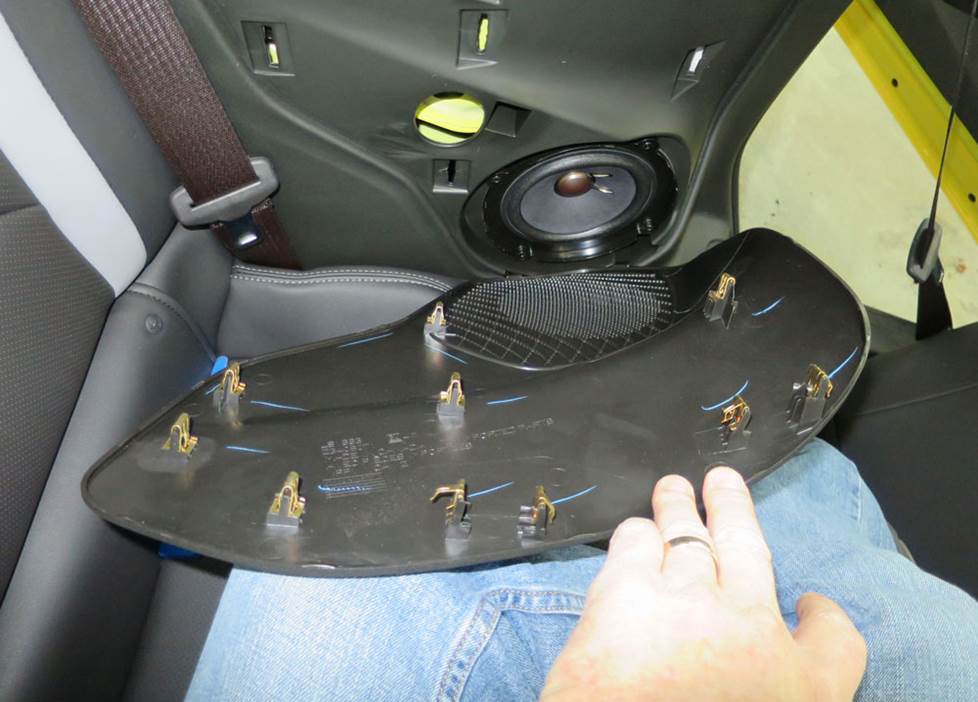
Removing and replacing the door speakers
The Camaro’s doors house a pair of 6”x9” speakers that can be replaced by your choice of same-size, 6-1/2”, or 6-3/4” aftermarket speakers. We’ll include a wiring harness adapter and (if needed) speaker mounting brackets with your speaker order.
If you’re installing component speakers in your Camaro, remember that, in addition to all the door disassembly steps noted here and detailed in your Crutchfield MasterSheet, you’ll also need to remove and replace the corner dash speakers. And you’ll also need to remember that replacing the low-impedance factory speakers with 4-ohm aftermarket speakers will result in lower volume levels.
The doors themselves aren’t that hard to deal with. You’ll start by using your panel tool to pry out the screw cover behind the door release, then removing one exposed 7mm screw. Pry off the door pull’s outer cover to release five clips, remove the cover, then remove the 7mm screw hidden under that cover. Remove the 7mm screw under the armrest panel, then grab your panel tool and get ready to remove the door panel.
Pry out all sides of the door panel to release sixteen retaining clips, then disconnect the door release cable and wiring harnesses before removing the panel. Be sure to store it someplace safe and dry until it’s time to reinstall it.
Remove the two 7mm screws securing the speaker, then pry out the top of the speaker to release one retaining clip. From here, just pull the speaker out, disconnect it, and set it aside.
Once you’ve attached the new speaker to its adapter bracket and connected the speaker’s wiring adapter, you’re ready to reinstall it and test it out. Before you start putting the door back together, test the speaker to make sure it’s working and make sure the windows and locks are all working as they should.
Tools needed: Panel tool, small flat blade screwdriver, 7mm socket, ratchet and extension, drill with 1/8" bit
Getting to the coupe's rear side speakers is kind of challenging (Crutchfield Research Photo)
Removing and replacing the rear side speakers (coupe)
The coupe’s stock rear side speakers, whether base or Bose, are 6-3/4” GM models that can be replaced by 5-1/4”or 6-1/2” models. We’ll include the necessary mounting brackets and wiring adapters with your Crutchfield speaker purchase.
You’ll need to remove the rear seat side panels to get to these speakers, which are bottom-mounted on the panels. Your new speaker will be top-mounted to the bracket that’s included with your order.
Getting to the speakers is a bit of a challenge, because there’s a fair amount of panel and cushion removal involved in the process. Can the average car audio DIY-er handles this? Probably, but it might be good to have some help while you’re doing it. You’ll also need to work carefully and stay patient, because while none of this is really hard, it will take some time. Forewarned is forearmed.
Complete, step-by-step instructions can be found in your MasterSheet of course, and if you run into trouble here (or at any other point), you'll be happy to know that your Crutchfield purchase includes free tech support for the life of your gear. And yes, that includes installation, so give us a call if you need us. Our Virginia-based techs are here to help, seven days a week.
Tools needed: Panel tool, small flat blade screwdriver, 7mm socket, ratchet and extension
The ragtop's rear speakers are much easier to reach and replace (Crutchfield Research Photo)
Removing and replacing the rear side speakers (convertible)
In the drop-top Camaro, the rear side speakers are 6-3/4” models that are a ton easier to reach and replace than the ones in the coupe. You can replace them with 5-1/4” or 6-1/2” aftermarket speakers, and we’ll include the necessary mounting brackets (and wiring adapters) with your Crutchfield speaker purchase.
To remove them, start at the top edge and use your panel tool to pry off the speaker grille and release ten clips. Remove the grille, then remove the four 7mm screws securing the speaker. Pull the speaker out, disconnect the wiring, and remove it.
Secure the new speaker to the adapter bracket, connect the new speaker’s wiring adapter to the car’s speaker harness, then secure the new speaker bracket/assembly in place and test to make sure it’s working. If it is, reinstall the grille.
Tools needed: Panel tool, 7mm socket, ratchet and extension
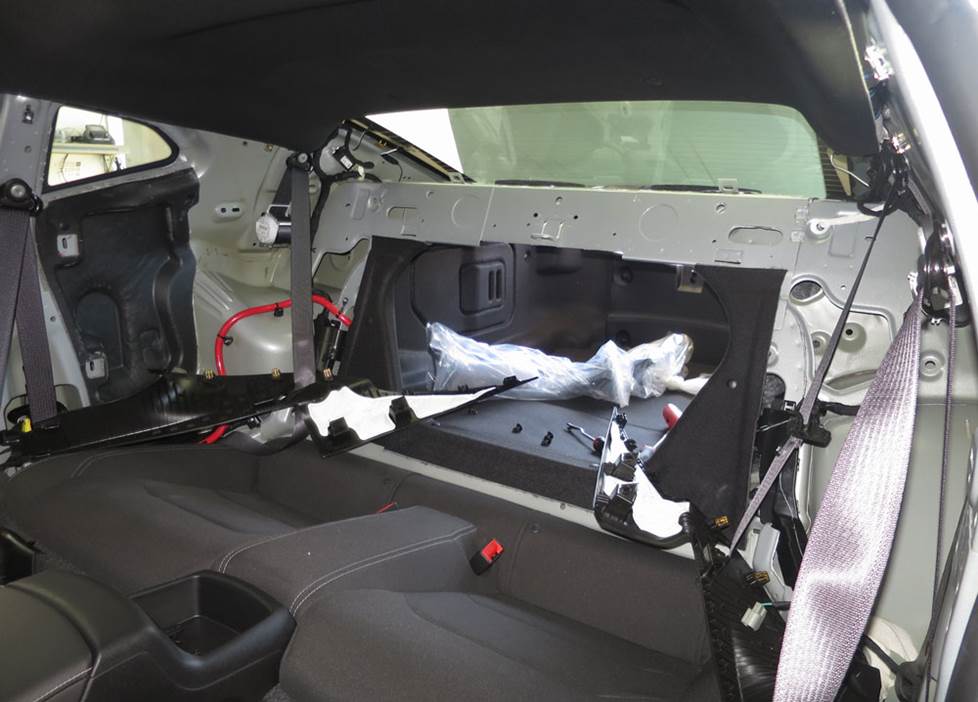
For reasons that should be obvious, we suggest replacing the Bose rear side speakers and rear deck subs at the same time. (Crutchfield Research Photo)
Removing and replacing the rear deck subs (coupe w/ Bose Audio)
Bose-equipped Camaro coupes have a pair of 6”x9” subwoofers in the rear deck. Getting to these involves doing all the things you need to do to remove the rear side speakers, plus the removal of the rear deck panel and the subs themselves. If at all possible, we suggest replacing all of them at the same time, because hey, as long as you’re in there, right? All the disassembly details can be found in your Crutchfield MasterSheet, and while this is a character-building job, you can do it and you’ll be glad you did.
You can replace the stock subs with same-size, 6-1/2”, or 6-3/4” speakers, but anything you put back here will only receive bass frequencies from the stock amplifier. The stock subs also have a low impedance to pull more power out of the small factory amplifier. So your new speakers should be low-impedance models or you should install a new amp to give them more power. Mounting brackets and wiring adapters will be included with your speaker purchase.
When you’re done with this job (and/or the rear side speakers), make sure the seatbelts are secured to stock specifications and working properly. We know you’re too good a person to subject normal-sized adults to long rides back here, but just in case….
And definitely test the speakers before you put everything back together. Trust us, you’ll be glad you did.
Tools needed: Panel tool, small flat blade screwdriver, 7mm socket, ratchet and extension
Read our Car Speakers Buying Guide for more information.
Shop for speakers that fit your Chevrolet Camaro
Adding bass in your Camaro
No one buys a Camaro to brag about the trunk space (we hope), but there is room for a subwoofer box if you can wedge it in there. We recommend installing the box through the rear-seat pass-through, because the trunk opening is very narrow and this method is a bit easier.
In the coupe, the available space measures 15" H x 27” W x 15”/13” D. Not much, but it’s something. In the convertible, there’s less, because the top has to live somewhere when it’s down and guess where that is? The available space measures 16"H x 30” W x 11”/11” D, taken with the convertible top barrier up.
Learn more about building a bass system in our Car Subwoofer Buying Guide.
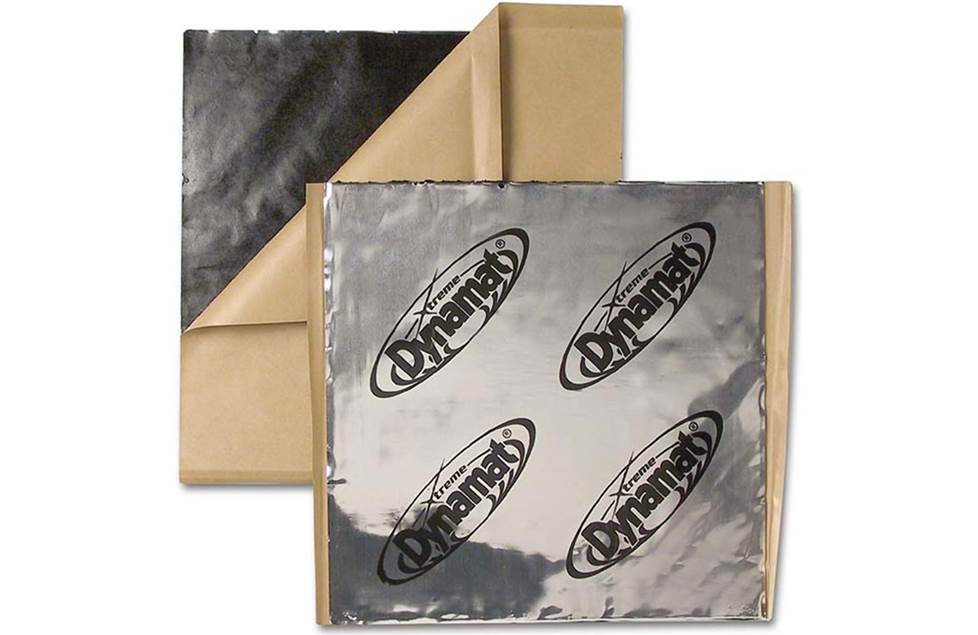
Adding Dynamat to your Camaro's doors can really help quiet road noise
Other options for your Camaro
There are plenty of other ways to improve your Camaro. Here are some of the ways Crutchfield can help.
Quiet road roar with Dynamat
If you're going to the trouble of replacing the speakers in your Camaro, you're obviously serious about sound. If you want to get the maximum out of your new stereo, consider a Dynamat 10435 Xtreme Door Kit. This heavy-duty noise damping material really makes a difference. One kit should take care of the Camaro's doors. If you're planning on an all-around stereo replacement involving the rear speakers and a sub, you might want to talk to your installer about lining the floorpan and the trunk lid as well. Might as well do it while you're tearing out the interior anyway, right?
Security systems and remote start
Installing a security system in your Camaro won't be easy (security systems rarely are), but it's definitely a good idea in a car like this. Our Crutchfield Advisors can help figure out what you need to get the job done, but we usually recommend taking your car to a professional installer.
Adding remote start capability to your Camaro lets you warm it up in the winter or cool it down in the summer. Installation is usually easier with these systems, but we still ask that you call to order so that we can make sure you get the right harness for your ride.
Let's get started!
Ready to shop? Use our vehicle selector to find the gear that will fit your car or truck. If you have questions of your own, give us a shout via phone, chat, or email


Christopher Skalski
Posted on 5/12/2023
I love Camaros. It stands to reason that more people than me have been searching for Bass, and there is very little info on what size and kind of speakers live in the rear deck. How much power should I run to them? Can I do a 4 channel amp to run the R. deck speakers and the R. side speakers. Turns out the deck is reserved for bose 6x9 subs. I have a sub in the trunk. I need help with good clean power to the 6x9 3 way speakers I plan on installing, and an amp to power them. So...why doesn't Crutchfield offer a solution to bass and more powerful warm and clean full range 2 or 3 way ?? 6x9 speakers and is there already an amp in the trunk? It looks like there is under the floor panel.
Crutchfield Writing Team from Crutchfield
on 5/12/2023
Waseem from Ras Al Khaimah, UAE.
Posted on 2/13/2022
Loved the description and found it incredibly helpful.