2013-2020 Ford Fusion
How to upgrade the stereo system in your Fusion

In brief: This Crutchfield Research Garage article gives you an overview of your Fusion's stock stereo system and your aftermarket upgrade options. We'll tell you all about:
- The factory stereo system
- Removing the factory radio
- Removing the factory speakers
- Adding more bass
- Other options for your Fusion
Then, use our vehicle selector to find the gear that will fit your Fusion.
Overview of the Ford Fusion
The Fusion might be the last Ford sedan we see for a while. Ford’s decision to focus on trucks, SUVs, and Mustangs going forward means that fans of traditional four-door family cars will have to look elsewhere, and that’s a shame. It’s hard to find fault with Ford for deciding to make more of what sells more, but literally generations of us grew up with Ford sedans in the family, so a world without them is going to be weird.
But if this is the end of the line for Ford sedans, the Fusion is one heck of a way to go out. For one thing, it’s arguably the best-looking four-door Ford since the original Taurus. The styling is sleek and crisp, with just the right mixture of curves and creases and just a hint (okay, more than a hint) of Aston Martin in the grille. Inside the Fusion, there’s plenty of space for people and things, plus all the tech anybody would expect in a modern motorcar.
The stock stereos are okay, as such things go, but if you’re planning to enjoy your Fusion until the world changes and sedans are cool again, you’ll want to upgrade the audio gear. It’s not as hard as you think, and the reward will be worth the effort. Read on to learn more about what you can do and how you’ll do it.
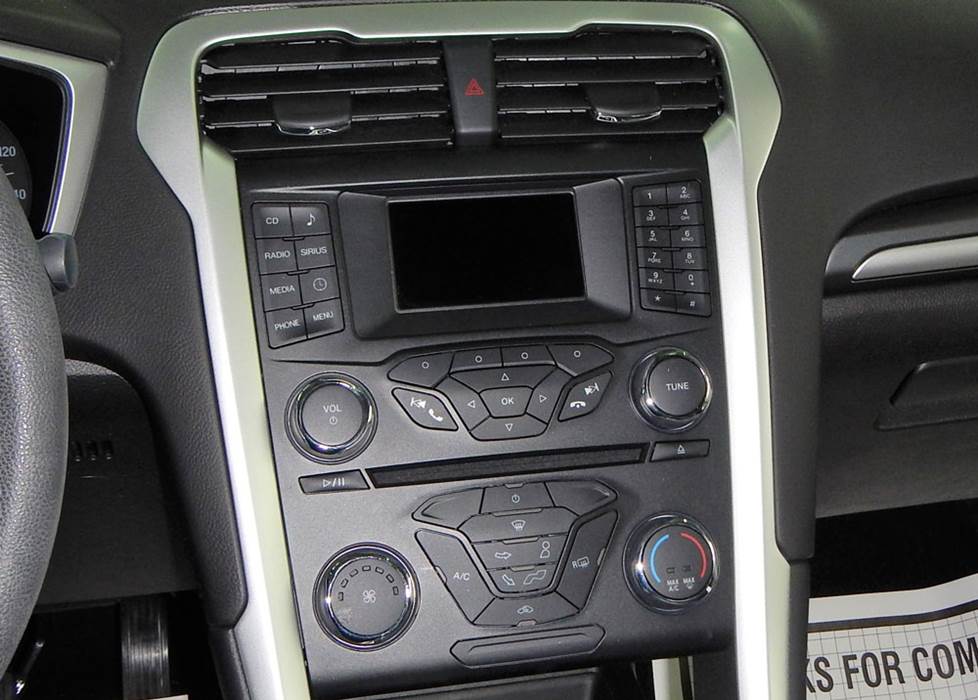
This is the Fusion's base radio. Removal and replacement is the same for this and the 8" LCD. (Crutchfield Research Photo)
The factory stereo system
The Fusion was available with a variety of stereo and speaker combinations. The base radio could be accompanied by 4- or 6-speaker systems, and the optional 8" LCD radio could be had with or without the top-line Sony surround sound system.
If you have a 2017-2020 Fusion that has the 8" receiver and the Sony system, radio replacement is not recommended at this time. Other years and systems are fine. Also, we don’t recommend replacing the radio in select Fusion Hybrid models.
Despite their obvious physical differences, removal and replacement is pretty much the same for the other stock radio packages. Depending on how your car was equipped, you’ll lose things like the AUX and USB inputs, the SYNC system, and factory satellite radio functionality, but most of that can be replaced with the right aftermarket stereo and installation gear.
In many cases, you’ll need to modify your vehicle’s dash to install a new receiver. But now there’s another option. Direct Replacement packages fit right in without cutting or modification. You’ll get great performance and a clean factory look.
A Direct Replacement solution replaces your factory screen with a better-performing upgrade that either mounts an 8" replacement screen in the same spot or replaces it with a 10.1" floating screen. You also get greater functionality, better sound, and improved expandability.
When you replace the non-Sony 8" LCD, we’ll recommend a specific iDatalink ADS-MRR module to connect the new radio to the factory wiring. You’ll also need an iDatalink-ready receiver for that, and we’ll show you those when you enter your vehicle info and you start shopping for your new gear.
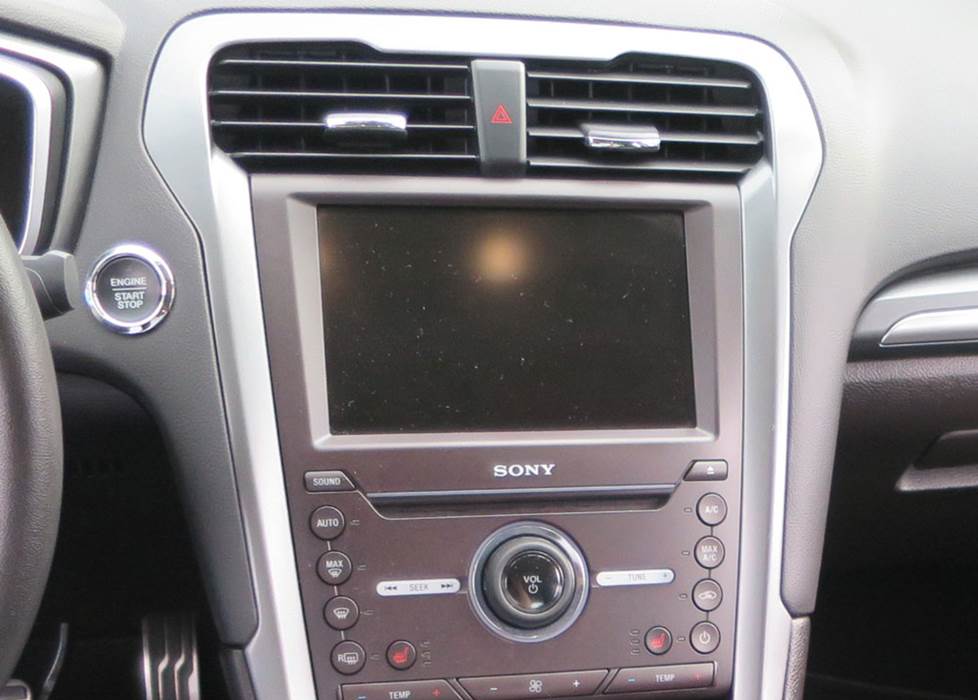
The optional 8" LCD was available with or without the Sony speaker system. The non-Sony version can be ugraded, but we don't recommend replacing the Sony model. (Crutchfield Research Photo)
In some cases, we’ll recommend replacing the factory speakers with standard 4-ohm aftermarket speakers to prevent overheating and other damage to your new radio. Your other option is to install an aftermarket amp, which will allow you to install pretty much whatever you want. The stock amp is located behind the passenger's side trunk trim panel, and it’s pretty easy to get to.
Important: Before you start your Fusion’s audio upgrade project, remember to set the parking brake and disconnect the negative battery cable to prevent electrical shorts.
Steering wheel audio controls
In most cases, it's reasonably easy to retain your car's steering wheel audio controls when you install a new stereo. When you enter your vehicle information, our database will choose the adapter you need to make your factory steering wheel controls work with a compatible aftermarket receiver.
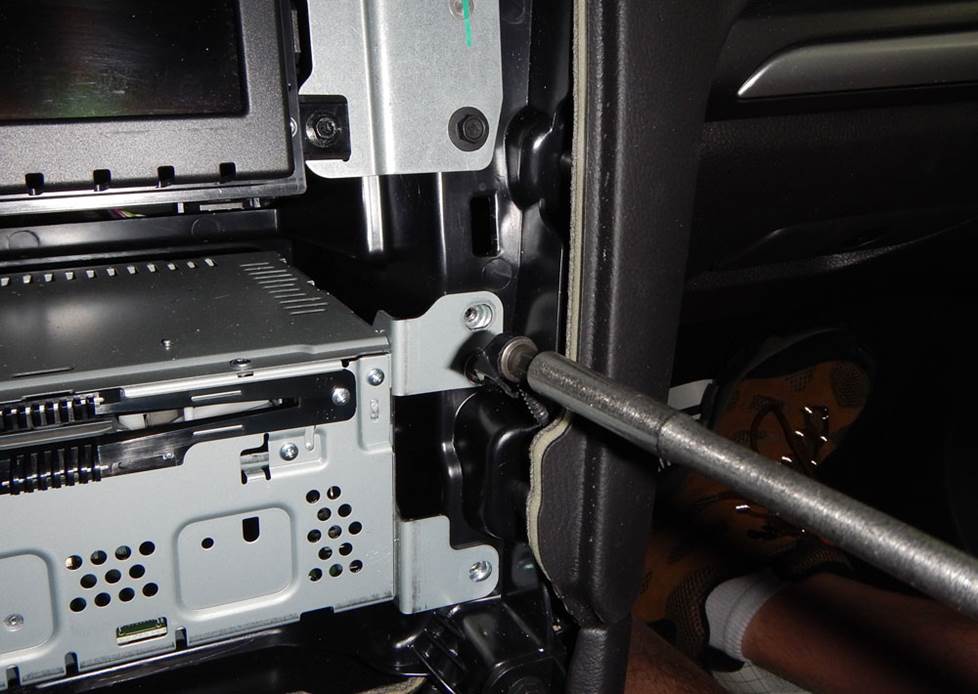
Removing and replacing the stock radio is a very do-able job for the DIY-er (Crutchfield Research Photo)
Removing the factory radio
As noted above, the radio removal and replacement process is the same for both radio models. Starting at the rear edge of the gear shift trim, use a panel tool to pry it up to release four clips, then remove the trim. Next, pry up the console trim strip to release three clips and remove that strip.
Starting at the lower edges, pry up the receiver/climate control trim strip to release twelve clips and remove that trim strip. When you remove that piece of trim, you’ll see two 7mm screws that you’ll need to remove next.
Pry out the receiver/climate control panel to release four clips, then disconnect the harnesses and remove the control panel. Remove the four 7mm screws securing the display screen, then remove the screen.
With that done, you can remove the two 7mm screws securing the receiver chassis to the dash. Pull out the radio, disconnect the harnesses, and remove the radio chassis.
Tools Required: Panel tool, 7mm socket, ratchet and extension
Read our Car Stereo Buying Guide for shopping tips and advice.
Shop for car stereos that fit your Ford Fusion
Removing the factory amp
Getting to the Fusion's factory amp is pretty simple. Unscrew the two cargo net hooks on the lower passenger’s side trunk trim panel, then pry out one clip at the top of the passenger’s side trunk trim panel. Pry up on the trunk scuff plate to release six clips, then remove the scuff plate. Then, pull the passenger’s side trunk trim panel towards the center of the vehicle to access the amp.
Tools needed: Panel tool
Hybrid note
A hybrid's gas-electric hybrid powertrain makes replacing the stereo a little more complicated. As you might expect, your hybrid Fusion contains some very sensitive electronics, so here are a couple of things to keep in mind:
- Be sure to only use a multimeter when testing wires, and NEVER use a test light to test wires in this vehicle. Doing so could cause some serious (by which we mean dangerous and expensive) damage.
- A hybrid is not the car to choose if you want to build a massively powerful audio system. The thirsty current draw of a high-powered stereo is not a good thing for the hybrid system, so don't exceed a 30-amp current draw or 350-watt RMS power rating.
Removing the factory speakers
The Fusion’s speakers are generally pretty easy to work with, and replacing them will be a real upgrade, whether you’re keeping the stock receiver or upgrading everything.
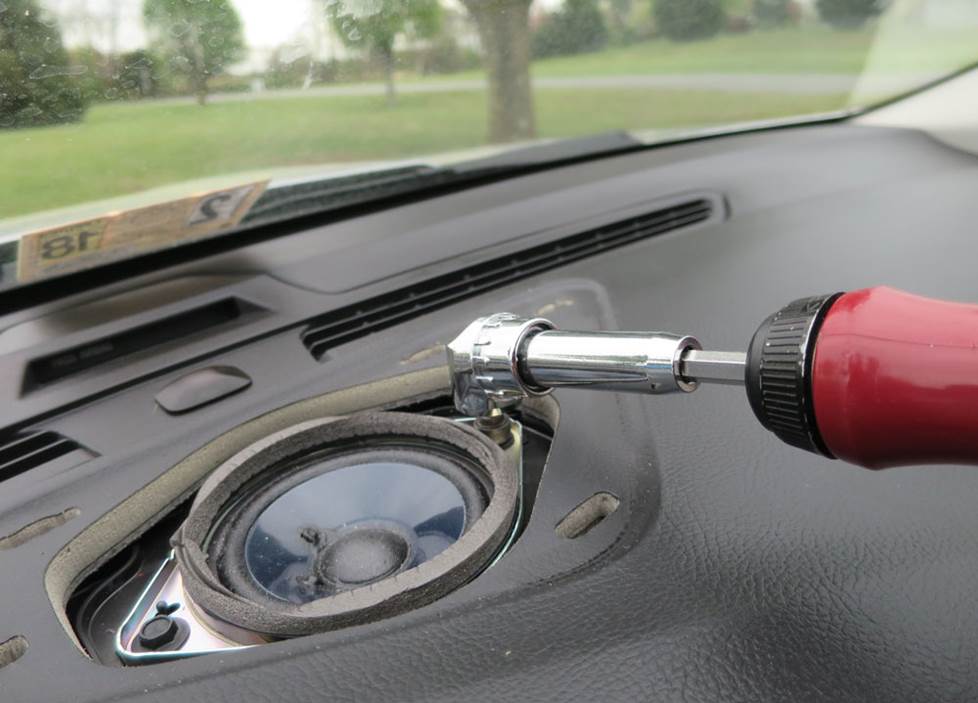
The Sony system's center dash speaker is quite easy to remove and replace (Crutchfield Research Photo)
Removing the center dash speaker (Sony system only)
The Sony system includes a 3-1/2" center dash speaker, and it’s pretty easy to get to. Pry up the center dash grille to release six clips and remove the grille. Remove the two 7mm screws securing the speaker to the dash, then disconnect the harness and remove the speaker.
Your replacement speaker will fit right in, but there’s no wiring harness available for this speaker. You'll have to splice or tap the new speaker’s wires to your vehicle's speaker wires. Alternately, you can use a set of Posi-Products speaker connectors.
And please remember what we said about impedance when you’re choosing your new speakers. If you have questions, give us a call!
Tools needed: Panel tool, 7mm socket, ratchet and extension
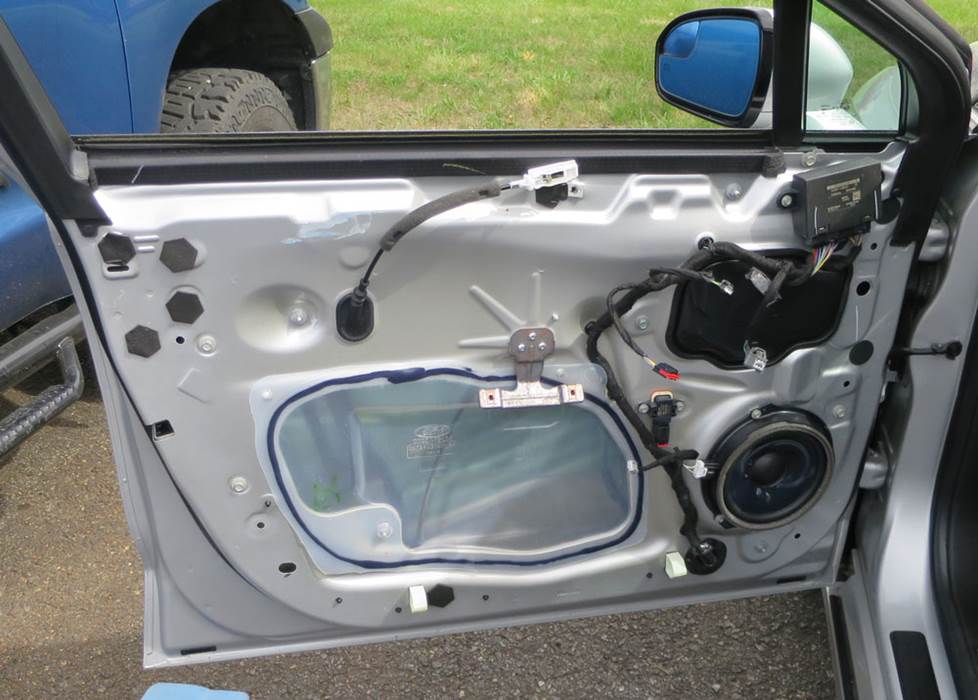
The Sony system includes component speakers in the front doors (Crutchfield Research Photo)
Removing the Fusion's front door speakers
Depending on the system you’re working with, your Fusion’s front doors can either house a set of 6-3/4" full-range speakers or a component system with 6-3/4" woofers and 1.608" tweeters. Either way, replacing the door speakers starts with removing the door panels.
Starting at the front edge, pry out the screw cover behind the door release. Remove the exposed 10mm screw, then move down the door and remove the two 7mm screws along the bottom edge of the door panel.
Moving back up, pry up on the rear edge of the power options switch panel to release the retaining clips. Disconnect the wiring harness and remove the panel, then remove the two 5.5mm screws exposed when you removed the panel.
Pry out the sides and bottom of the door panel to release six clips, then disconnect the wiring harnesses and door release cable before removing the door panel. Store the panel someplace safe while you continue working.
Tweeters: If your Fusion’s system includes tweeters, pry out the tweeter to release three clips, then remove it. There’s no mounting bracket that’ll work here, so you’ll need to either fabricate your own mounting bracket or use a set of our universal backstraps to secure the new tweeter. Hot glue or silicone can also work here. You’ll need Posi-Products speaker connectors to connect the new tweeters to the factory wiring, unless you’re comfortable with splicing or soldering.
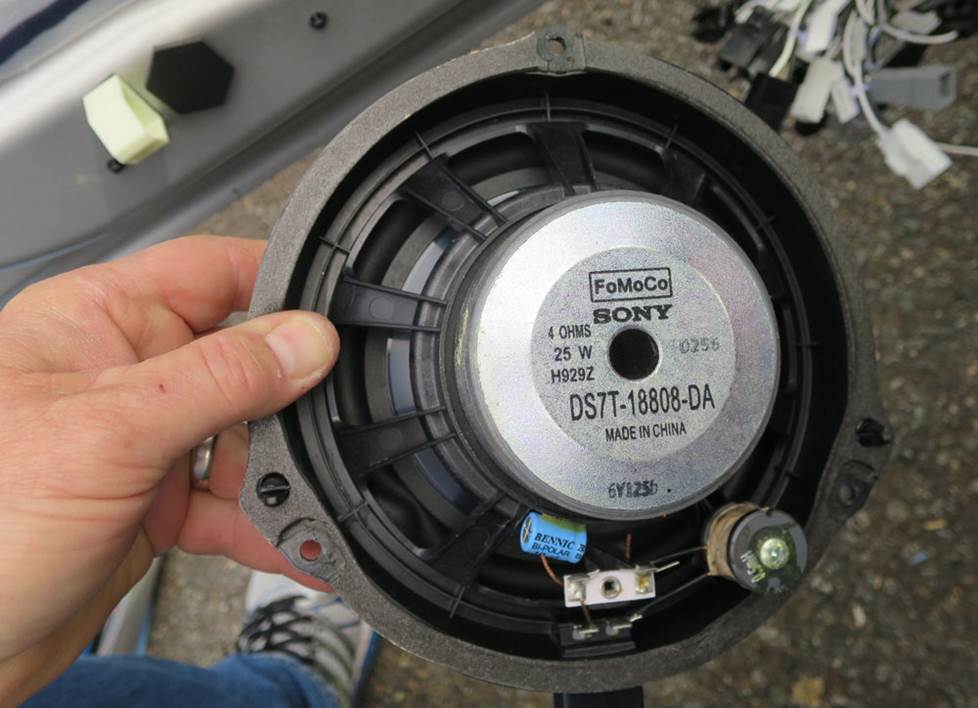
This 6-3/4" woofer can be replaced by a variety of aftermarket models (Crutchfield Research Photo)
Woofers: For the woofers (or full-range speakers), remove the three 7mm screws securing the speaker, then remove it. With that done, the process of installing the new speakers depends on the speakers you’re replacing.
You'll need speaker mounting brackets (in almost all cases) and a wiring harness adapter to install the new speakers. Crutchfield will include the harnesses and the brackets you need with your speaker purchase. When you’re installing some speakers, you’ll need to remove the inner tabs on the aftermarket speaker bracket. We’ll let you know if that’s going to be an issue, but it’s really no big deal.
All the details can be found in the custom installation instructions included with your Crutchfield purchase. If you run into trouble or just have questions, your purchase also includes free tech support for the life of your gear.
Once everything’s connected, test the speakers to make sure they’re working properly. If they are, you can start putting the doors back together by reversing the disassembly process.
Tools needed: Panel tool, small flat blade screwdriver, 5.5mm, 7mm and 10mm sockets, ratchet and extension

The speaker removal and replacement process is largely the same for the rear doors (Crutchfield Research Photo)
Removing the Fusion's rear door speakers
Whether you’re dealing with the base system or the Sony system, removing and replacing the rear door speakers is very much the same as what you did up front. All the details can be found in your custom instructions, and we’ll make sure you get the brackets and adapters you need. We’ll also remind you to order universal backstraps and/or Posi-Products connectors, if needed.
Tools needed: Panel tool, small flat blade screwdriver, 5.5mm, 7mm and 10mm sockets, ratchet and extension
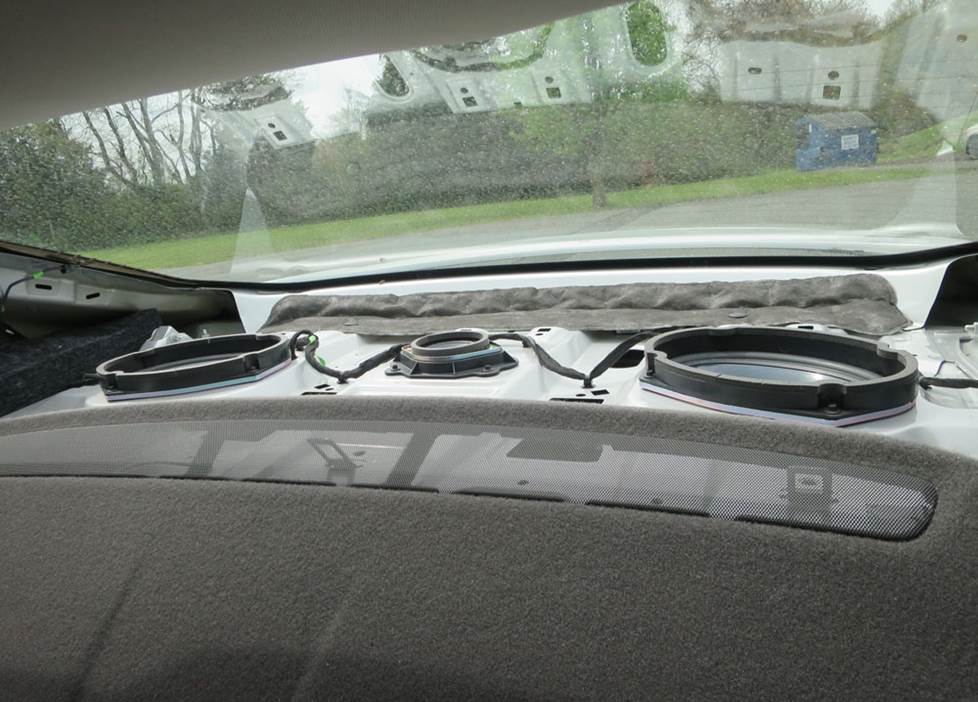
The Sony system includes two rear deck subwoofers, plus an extra 3-1/2" speaker (Crutchfield Research Photo)
Removing the rear deck speaker and subs (Sony system only)
If your Fusion is equipped with the Sony system, the rear deck is home to a 3-1/2" speaker and a pair of 6"x9" subwoofers. Getting to them takes a bit of work, but it’s not as bad as some rear deck set-ups we’ve seen. You can do this, but remember to work carefully, stay organized, and be patient.
To start, you’ll push the two latches under the front edge of the rear seat-bottom cushion toward the driver's side, then lift the seat up. Push the seat toward the rear of vehicle to clear the hooks, then remove the seat cushion.
Pry up the rear-door scuff panel to release five clips and remove the panel, then fold down the rear seat. Pry out the rear seat side trim panel to release four clips, then remove that panel. Next, you’ll pry out the rear pillar trim panel to release seven clips, then work the seat belt through the slot and remove the trim panel. You’ll need to perform all of these steps on both sides of the car.
Once that’s done, pry out the four clips along the front edge of the rear deck panel, then pull that panel toward the front of car and remove it.
That’ll expose the speakers. With the small speaker, remove the two Phillips screws securing the speaker to the factory bracket, then disconnect the harness and remove the speaker. With the subwoofers, remove the four 5.5mm screws securing each subwoofer to the rear deck steel, then disconnect the harness and remove the speaker.
The 3-1/2" is an 8-ohm speaker, while the subs are rated at roughly 2-ohms. To get the best performance out of your new speakers, we recommend replacing the stock amplifier.
Tools needed (speaker): Panel tool, Phillips screwdriver
Tools needed (subs): Panel tool, 5.5mm socket, ratchet and extension
Read our Car Speakers Buying Guide for more information.
Shop for speakers that fit your Ford Fusion
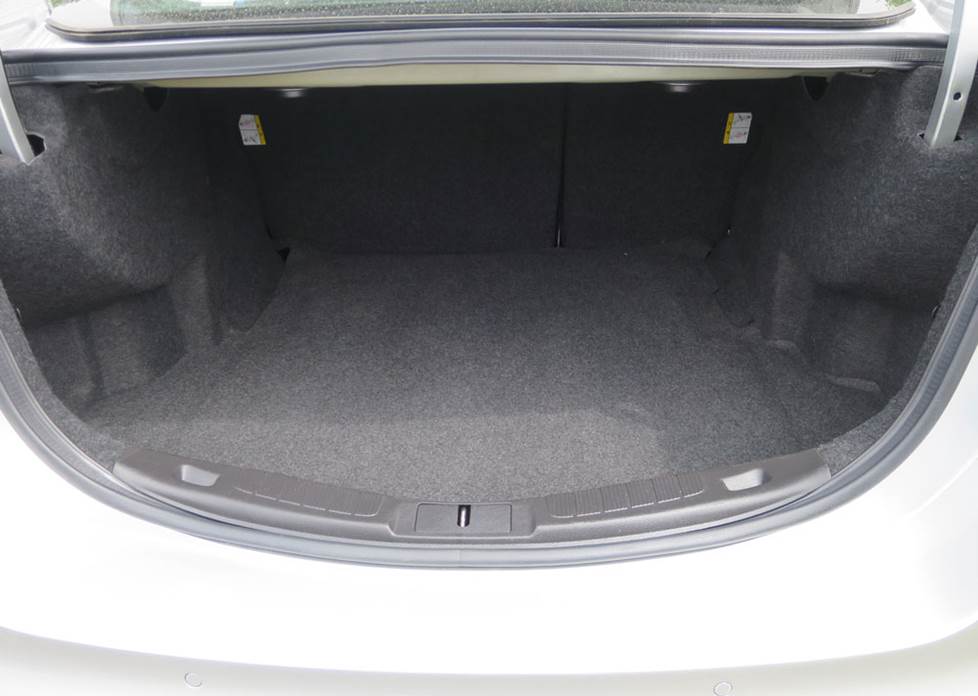
There's plenty of space in the Fusion's trunk (Crutchfield Research Photo)
Bass in your Fusion
There’s plenty of room in the Fusion’s trunk for cargo, which means there’s also plenty of space for a subwoofer box. The trunk measures 37" W x 19" H x 38"/32" D (top and bottom), which gives you ample room to work with. If you’d prefer to enhance your bass without sucking up all of your cargo space, a more compact powered subwoofer is a good choice.
Learn more about building a bass system in our Car Subwoofer Buying Guide.
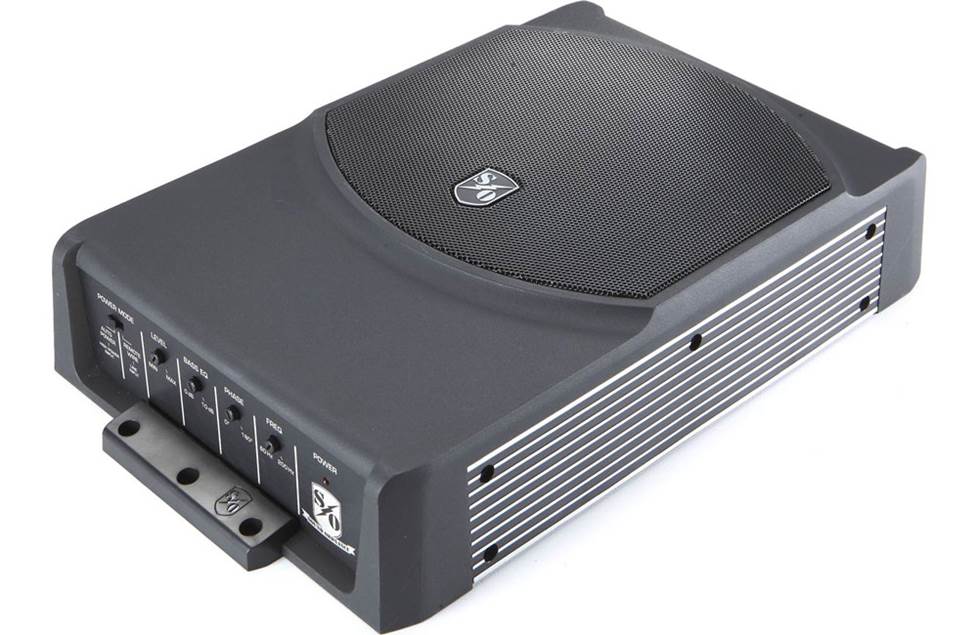
A powered sub like this Sound Ordnance B-8PTD can improve your bass performance without taking up valuable cargo room.
Other options for your Fusion
With a car like the Fusion, there are lots of ways to upgrade your in-car experience. Here are some of the ways Crutchfield can help.
Add an amp (or two)
A new 4-channel amplifier will help you get the most out of your new speakers. You'll get cleaner power (and a lot more of it), which will result in much, much better sound. A mono amp can provide the juice you need for your new rear deck subwoofers, too. And again, if you're working with a hybrid model, don't exceed a 30-amp current draw or 350-watt RMS power rating.
Learn more about adding amps to your system in our Car Amplifier Buying Guide.
Sound processor
If you choose to keep the stock radio, install a sound processor to send a clear, clean signal to your new amp. Sound processors remove any limitations on the signal imposed by the factory radio. The better the signal, the better the sound. Read our article explaining factory sound processors to learn more.
Dynamat
The Dynamat 10435 Xtreme Door Kit is the perfect way to seal in sound. This heavy-duty insulating material is easy to install, and it really makes a difference. One kit will take care of the front doors. If you install a big sub, you might want to line the trunk lid as well.
Remote start and security systems
Adding remote start capability to your vehicle lets you warm it up in the winter or cool it down in the summer. The iDatastart remote start system is incredibly convenient and makes it easier than ever to install a remote start system, so we highly recommend it. The module requires a vehicle-specific T-harness (sold separately) to connect with your vehicle's computer, security, and ignition systems, so we ask that you call to order so that we can make sure you get the right harness for your ride.
You can also talk to your Crutchfield Advisor about a security system. They’re not as easy to install (we usually suggest letting a professional do the job), but we can help you choose a system that’ll work in your vehicle.
Let's get started!
Ready to shop? Use our vehicle selector to find the gear that will fit your car or truck. If you have questions, give us a shout via phone or chat.


Jimmy Turner from Crossville
Posted on 3/25/2026
I have a 2017 Ford fusion SE I'm wanting to replace the front door speakers because they are blown but also I have seen that there is room for 2 6x9's in the back deck
Richard from Sacramento
Posted on 6/4/2023
So if I only want to switch out my factory sub to my 2013 fusion what subs in a box placed behind the back seat, woul you recommend can I just splice in another pair of subs that are 4 ohms
Jon Paul from Crutchfield
on 6/5/2023
Puff Futch from Supply
Posted on 3/24/2023
I have a 2016 ford fusion and want to put a aftermarket radio in it but dnt know what kind of wire harness I need in it. It has the little 3 or 4 on screen and I need to know what kind of harness I need plez help me
Jon Paul from Crutchfield
on 3/27/2023